You want your toes to feel festive and fun without turning your bathroom into a nail salon.
I’ve rounded up 17 winter toenail ideas that match cozy nights, holiday parties, and cold-weather style, so you can pick whatever fits your mood (or, honestly, your energy level).
Find a mix of simple, sparkly, and cozy toe designs you can try now, from classic reds and snowy whites to playful knit textures and tiny festive scenes.

Flip through these ideas for quick how-tos, color picks, and a sprinkle of inspiration that’ll make your toes look ready for every winter moment.
1. Frosty French Tips with a Twist of Silver Glitter
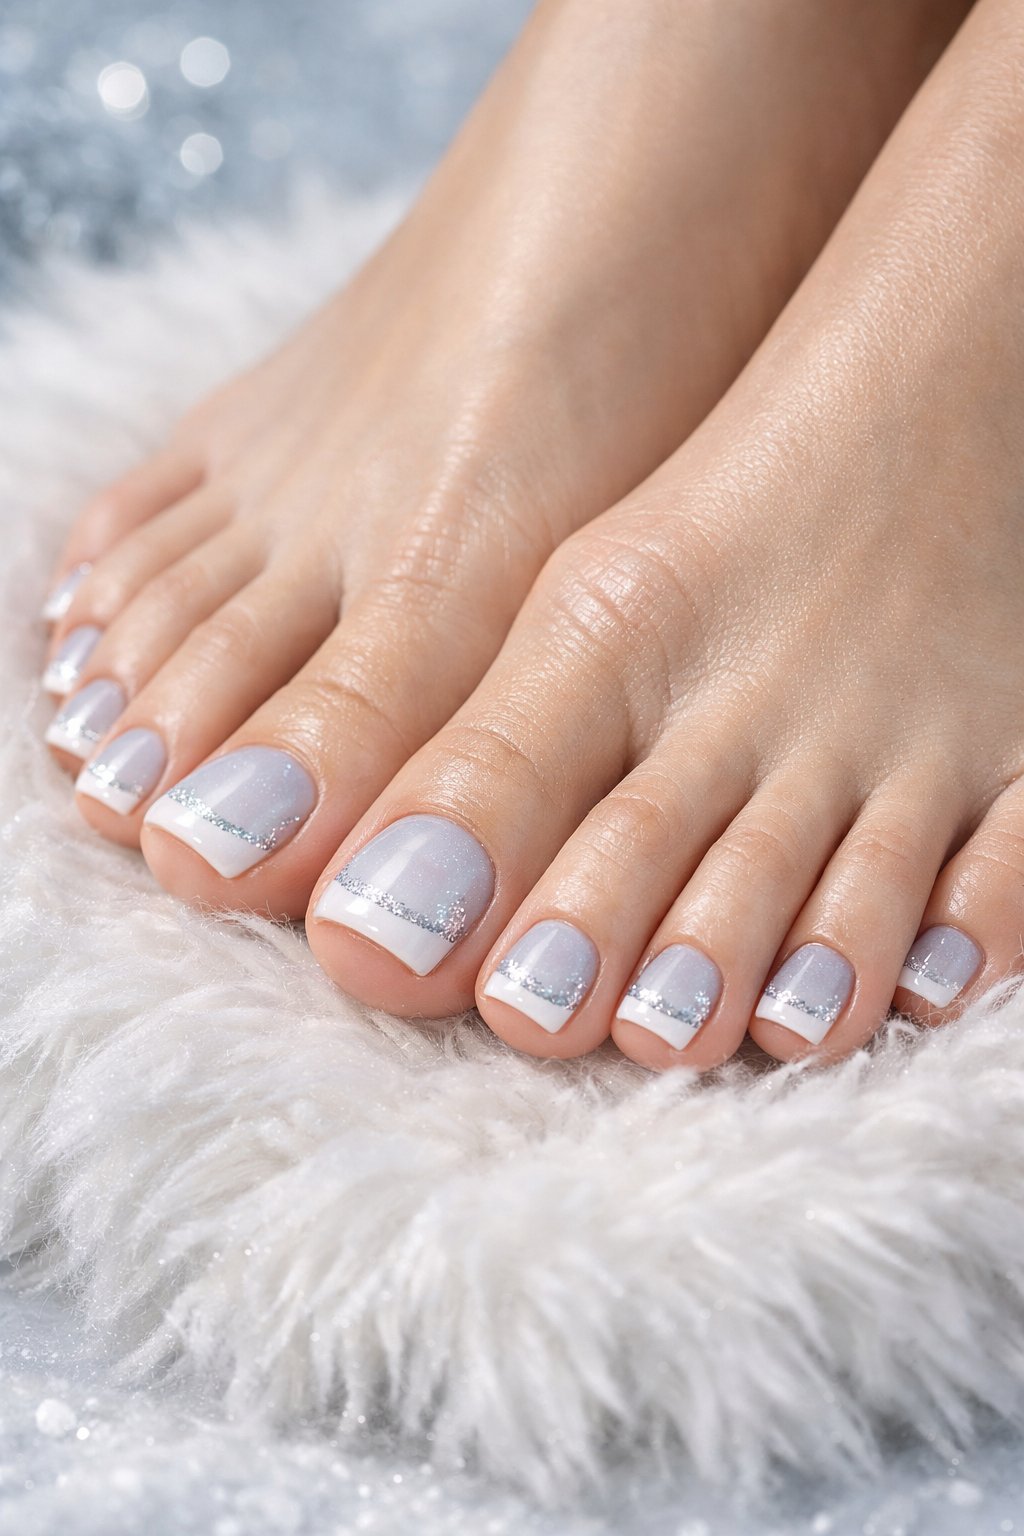
Start with a sheer icy blue or a pale white base for that fresh, wintery vibe. Paint on thin French tips using frosty white polish, curving the lines just a bit.
Add a fine line of silver glitter right along the tip. That sparkle really pops when the light hits.
Finish with a glossy top coat to seal in the glitter and keep everything shiny. This look works on short or medium nails and lasts longer if you use thin layers.
Expert Tip from KidsCareIdeas: “Use a striping brush for the glitter line to keep it even and tidy. Let each layer dry fully before the next to avoid chipping.”
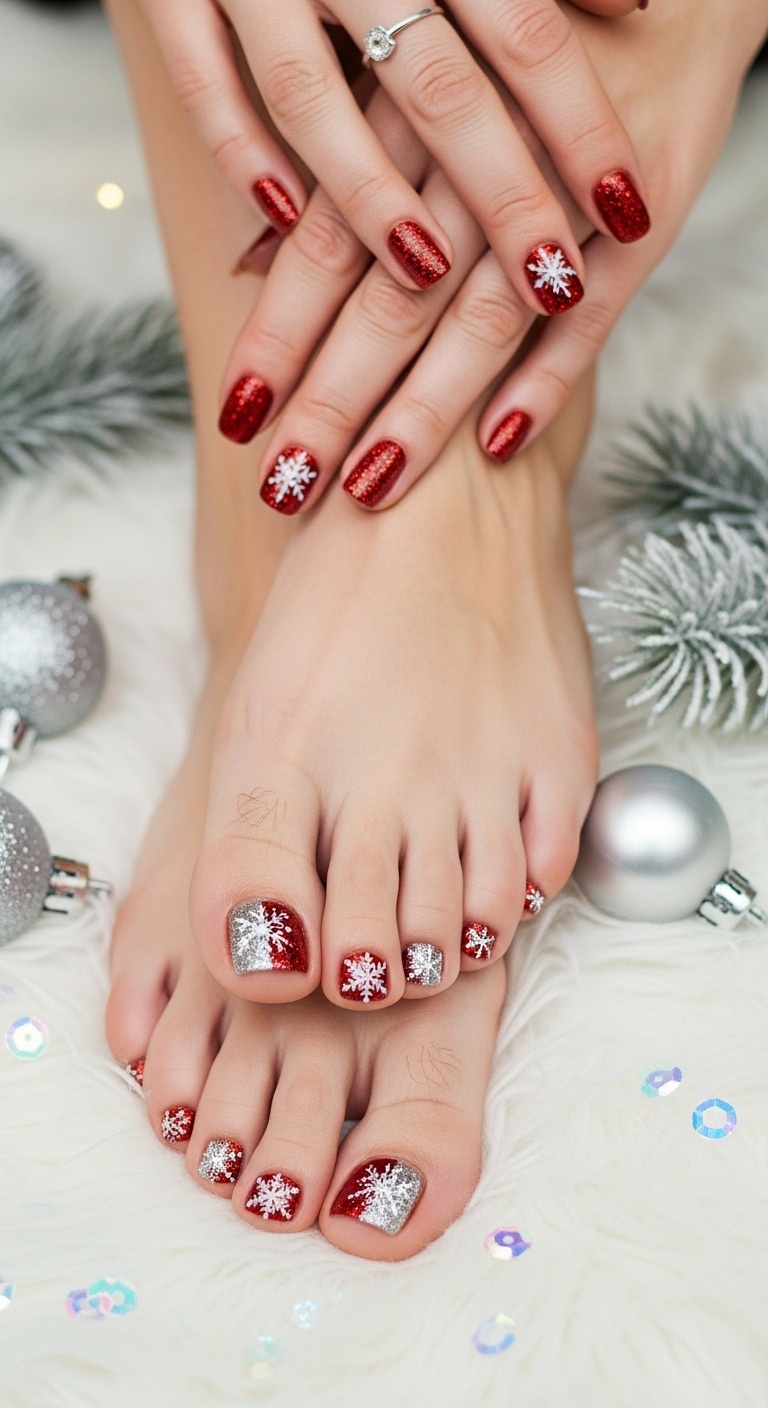
2. Santa Hat Red with Snowflake Accents
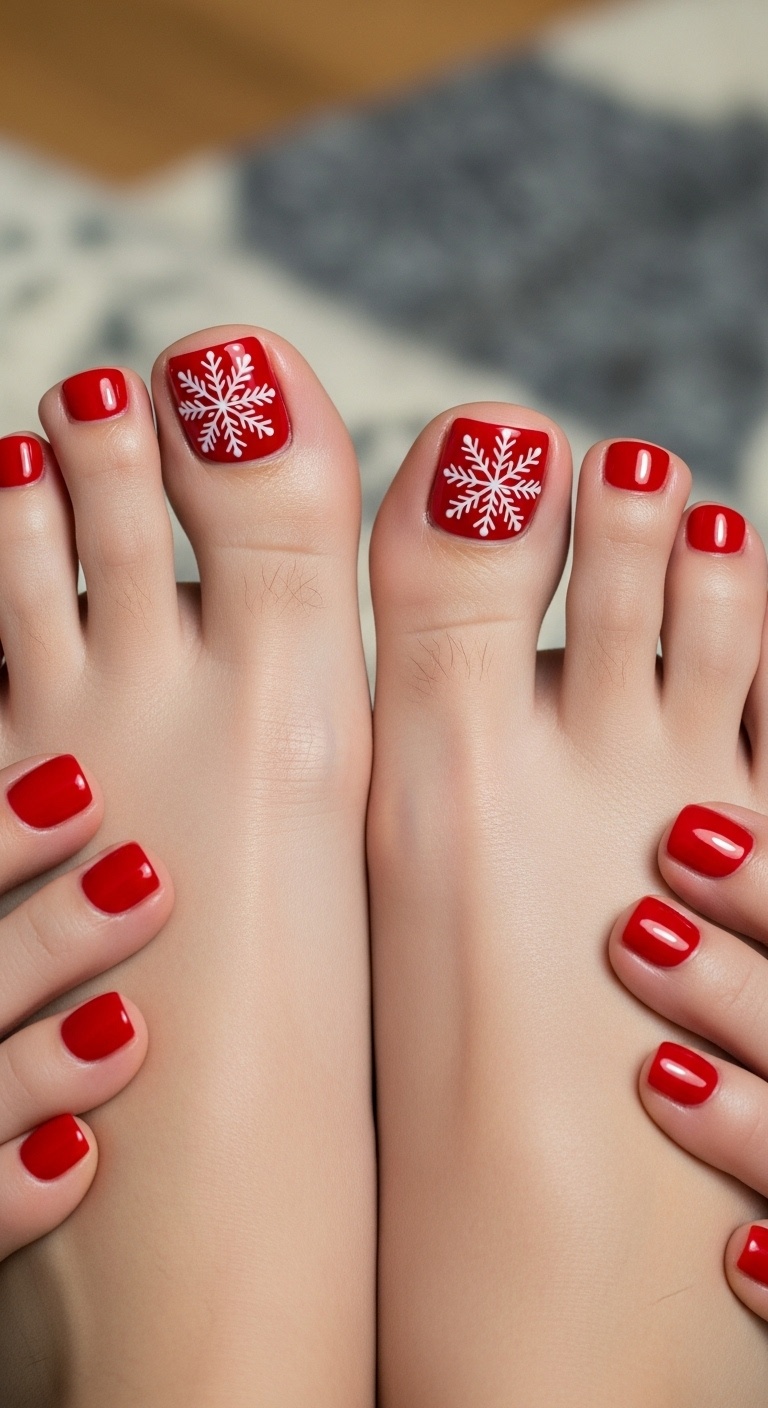
Go for a bright Santa-hat red on most toes. Pick one or two nails for snowflake accents in white or pale blue.
Use a tiny brush or even a toothpick to dot on simple snowflakes. Keeping it basic helps the design look neat, especially on small nails.
Choose a matte topcoat for a cozy finish, or glossy if you like a bold shine. If you want more sparkle, add a glitter stripe to one toe.
Expert Tip from KidsCareIdeas: “Use a peel-off base coat under glitter for easy removal.”
3. Cozy Plaid Patterns for Toe Warmth Vibes

Plaid nails totally give off that cabin-by-the-fire feeling. Mix deep greens, reds, and creams for a classic tartan look.
Paint thin plaid lines so your toes don’t look too busy. Toss in a tiny gold or white dot at the cuticle for a little sparkle, but don’t go overboard.
Matte topcoat makes the plaid look extra soft and cozy. Try painting one accent toe with a fuzzy nail sticker for a sweater-like texture.
Expert Tip from KidsCareIdeas: “Start with a neutral base and use a striping brush for crisp plaid lines.”
4. Glistening Icy Blue Ombre

Grab two blues: a pale icy blue and a deeper glacier shade. Paint the lighter blue near the cuticle and the darker one at the tip, blending where they meet.
Dab and blend with a sponge for a smooth gradient. A thin coat of silver shimmer adds just enough sparkle.
Glossy top coat locks in the shine and helps prevent chips. Keep some cotton swabs handy for quick cleanup.
Expert Tip from KidsCareIdeas: “Apply thin layers and let each dry fully to avoid smudges and bubbling.”
Expert Tip from KidsCareIdeas: “Use a small makeup sponge for smoother ombre transitions and less polish waste.”
5. Peppermint Swirl Mint Green and White
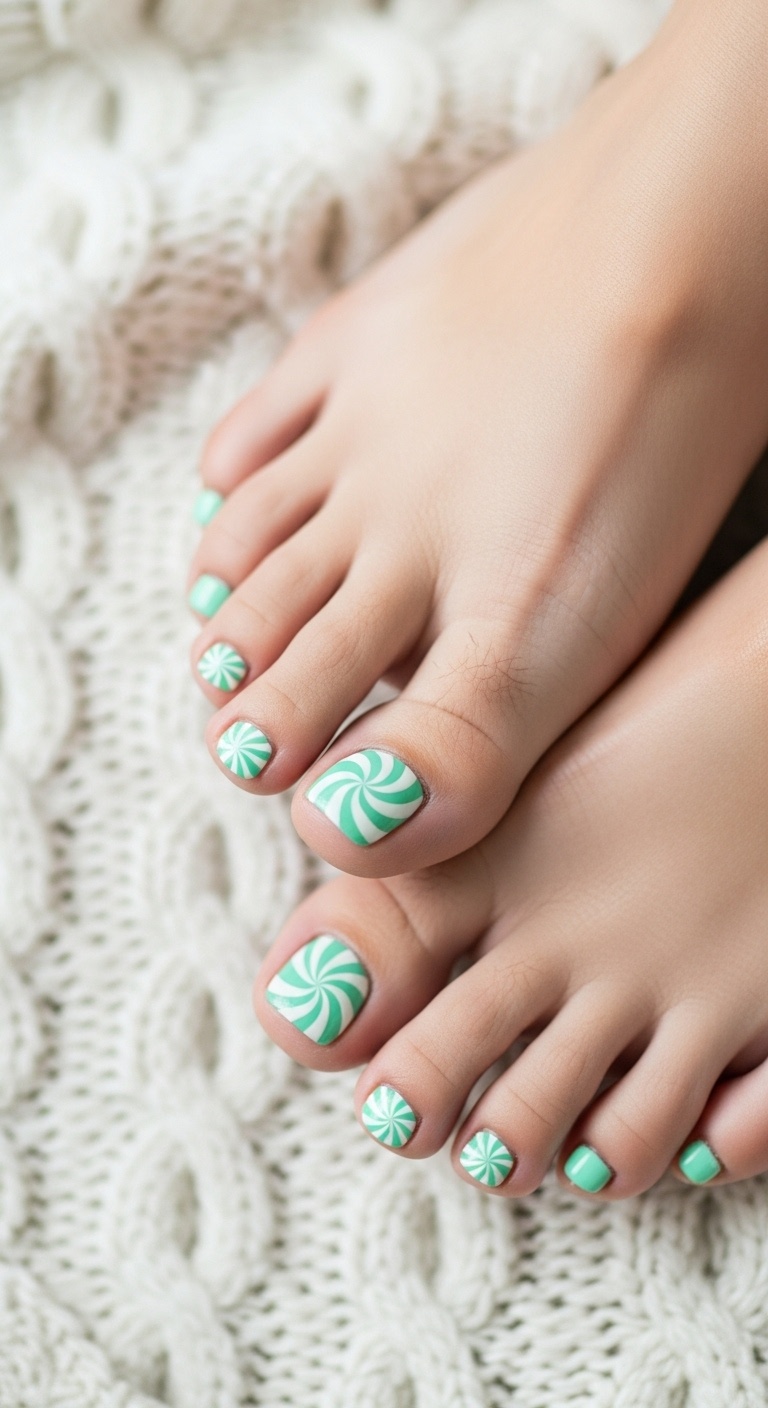
Go with a soft mint green base for a cool wintery feel. Add thin white swirls on a few nails to look like peppermint candies.
Keep the swirls small so they don’t take over. Mix solid mint nails with swirl-accented ones for a balanced look.
Use a fine brush or toothpick for the swirls. Glossy top coat keeps the design fresh and shiny.
Expert Tip from KidsCareIdeas: “Practice the swirl on paper first to get steady lines. Work one nail at a time and dry each layer before adding the next.”
6. Chunky Knit Sweater Texture Nail Art
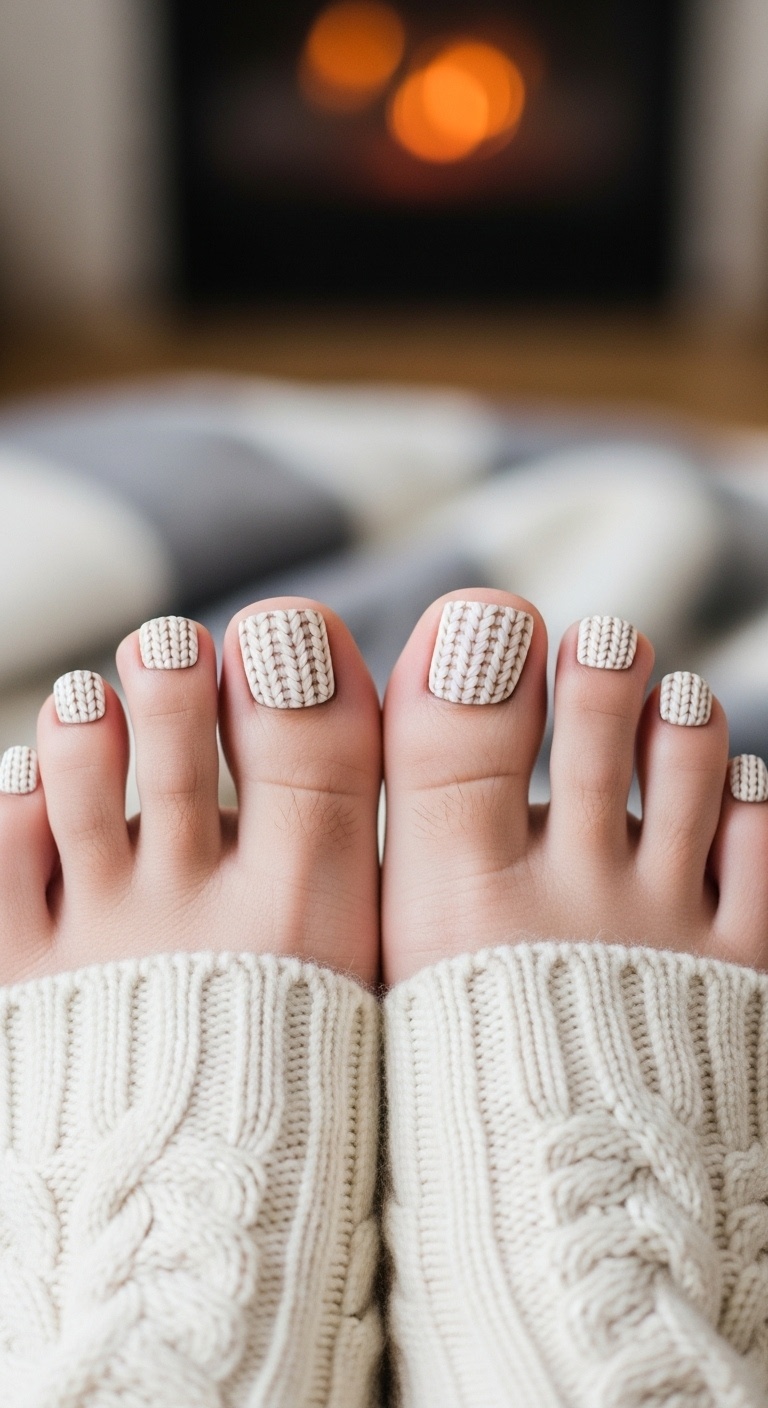
You can make your nails look like your favorite winter sweater by using raised polish or gel for a 3D effect. Pick warm shades like cream, burgundy, or forest green for that classic vibe.
Work in small sections and cure each pattern if you’re using gel, so the texture stays crisp. Simple cable or rib patterns look best and feel super cozy.
This style hides chips, so you won’t have to touch up as often. Matte topcoat gives the look a soft, fabric-like finish.
Expert Tip from KidsCareIdeas: “Use a dotting tool or small brush to drag raised polish into knit patterns. Seal edges with a thin topcoat to protect the texture without flattening it.”
7. Rudolph Red Nose Sparkle
Paint your nails a deep red for a classic winter base. Add one small round glitter dot to the tip of a nail for Rudolph’s nose.
Use a thin brush or dotting tool for a crisp circle. Glossy top coat keeps the sparkle in place and helps prevent chips.
Keep the glitter accent on just one toe if you want a playful touch. This design looks great on both short and long nails.
Expert Tip from KidsCareIdeas: “Use press-on gems for a perfect round nose if freehand dots feel tricky. Seal with two thin topcoats so the sparkle lasts through winter activities.”
8. Chunky Gold Snowflakes on Matte Navy
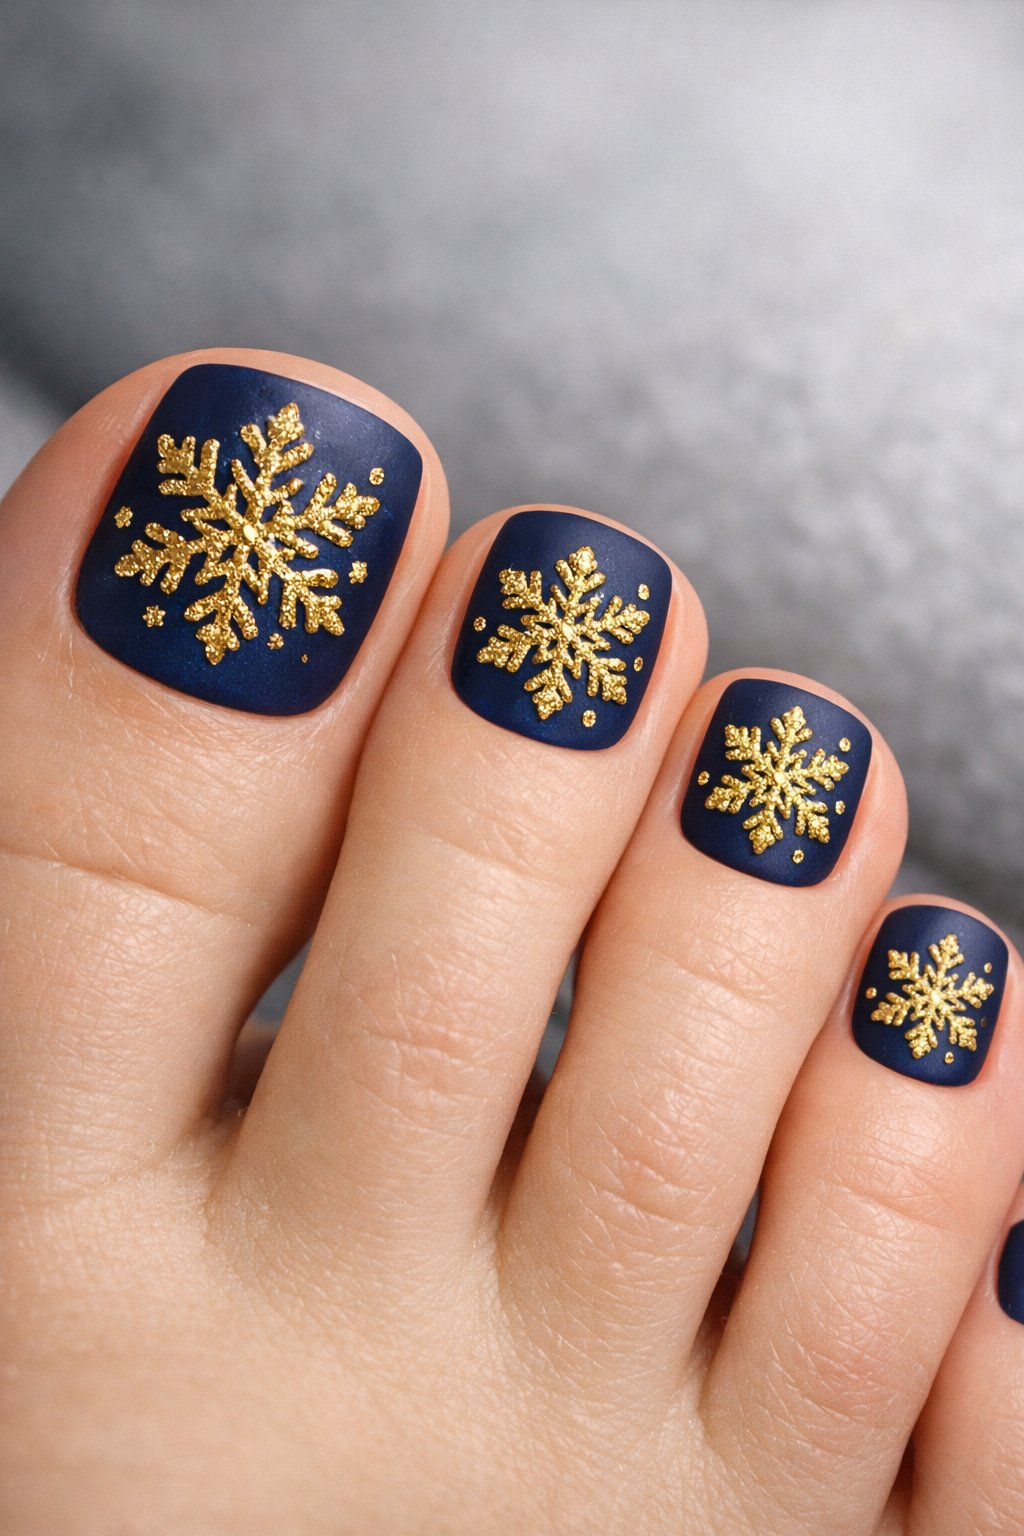
Start with a deep navy matte polish for your base. The dark color makes gold details pop and keeps things feeling wintery.
Stick on chunky gold foil or metallic flakes to form snowflake shapes. Place one big snowflake on an accent toe or scatter smaller ones around.
Let the designs stay a little irregular for a homemade look. Matte top coat seals everything in and keeps the flakes from lifting.
Expert Tip from KidsCareIdeas: “Press gold flakes gently into tacky polish to set them without smudging. Finish with a thin matte top coat to lock pieces in place.”
9. Hot Chocolate Marshmallow Dots
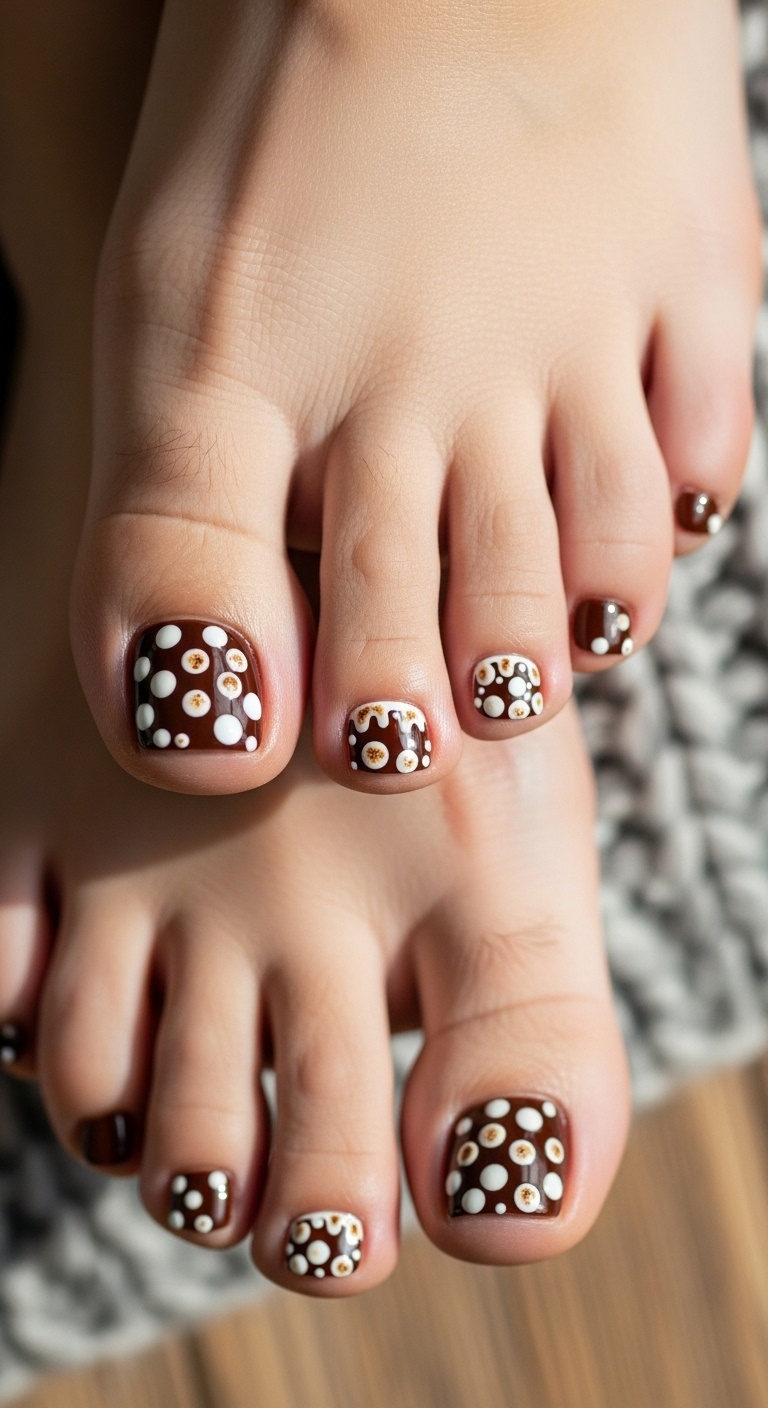
Paint your nails a warm brown, kind of like hot cocoa. Add small white dots with a toothpick or dotting tool for marshmallows.
Mix up the dot sizes to keep things playful. Glossy top coat makes the dots really pop, just like melty marshmallows.
Add a bit of silver glitter to one nail for a “steam” effect. This design works for any nail length and is super quick to do.
Expert Tip from KidsCareIdeas: “Use a toothpick for tiny marshmallows and a bobby pin for bigger dots to control size.”
10. Gingerbread Man Smiles
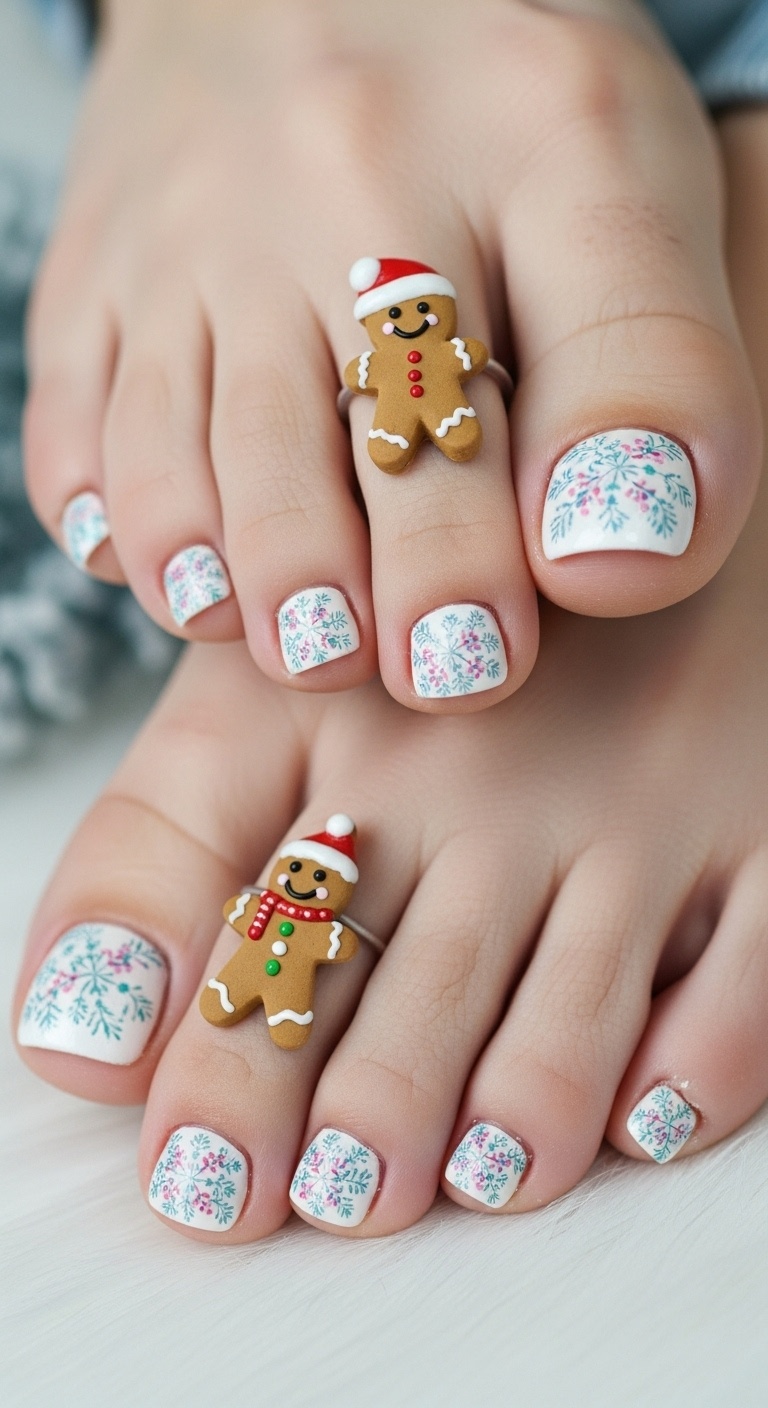
Paint tiny gingerbread faces on each nail for some winter cheer. Use brown polish for the base, then add white dots for icing and small dark dots for eyes.
Add a little red or green bow tie to a couple nails for extra pop. Glossy topcoat helps the details stay put and last longer.
Expert Tip from KidsCareIdeas: “Use a toothpick for tiny eyes and a dotting tool for icing lines to keep the faces neat. Practice on a spare nail first to get proportions right.”
11. Festive Fair Isle Knitted Socks Look

Paint your nails to look like Fair Isle socks by adding small patterns and using a few colors. Start with a neutral base, then add rows of tiny diamonds, dots, and stripes with a thin brush or dotting tool.
Pick reds, greens, creams, or icy blues for a wintry feel. Clear topcoat keeps those little details safe from all the sock action.
Expert Tip from KidsCareIdeas: “Practice the pattern on paper first to get steady lines. Use a toothpick for tiny dots if you don’t have a dotting tool.”
12. Snow Globe Scene with Tiny Trees

Start with a clear base coat and paint a soft blue or silver background for a chilly sky. Add tiny green triangle trees on one or two nails, changing up the size for a little depth.
Dot on white for falling snow. Glossy top coat makes the scene look like it’s under glass.
Use a dotting tool or toothpick for the tiny details. Paint one nail with glitter to act as a sparkly “snow globe” accent.
Expert Tip from KidsCareIdeas: “Use quick-dry top coat layers to protect tiny details and reduce smudges.”
13. Holi-Dazzle Metallic Golds and Reds
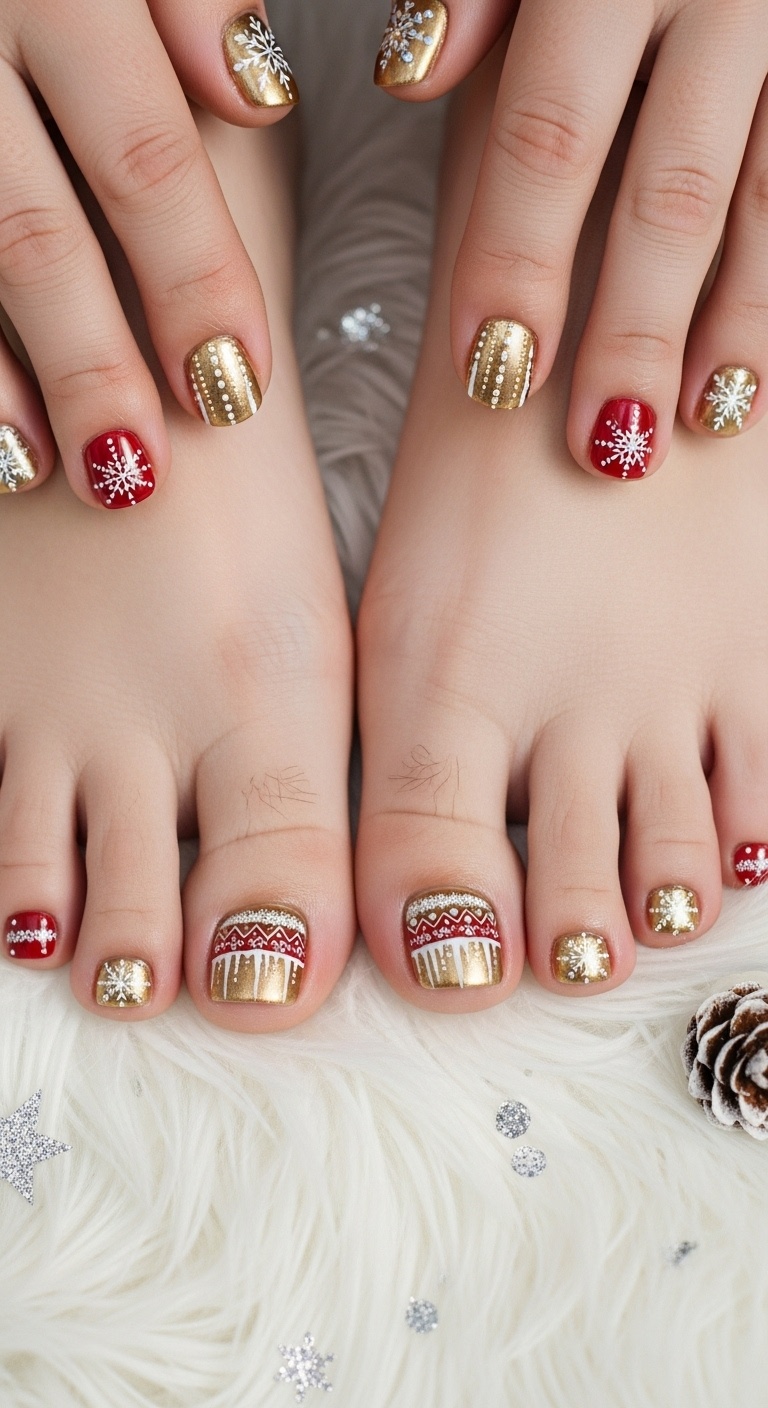
Pick gold and red for a festive, warm look that goes with every winter outfit. Metallic finishes catch the light and hide little chips, so your toes stay ready for photos.
Mix solid red with gold accents—tips, dots, or a thin stripe—to keep things classy. Paint one toe full-on metallic gold for some extra pop.
Quick-dry topcoat locks in shine and keeps scuffs away, even if you’re wearing boots. If you’re a sandal-in-winter person, metallics make pedicures look fancy with almost no effort.
Expert Tip from KidsCareIdeas: “Apply a peel-off base on the big toe if you like changing looks often; it makes removal fast and clean. Buff lightly before polish so the color sticks and looks smooth.”
14. Twinkling Christmas Lights Wrap
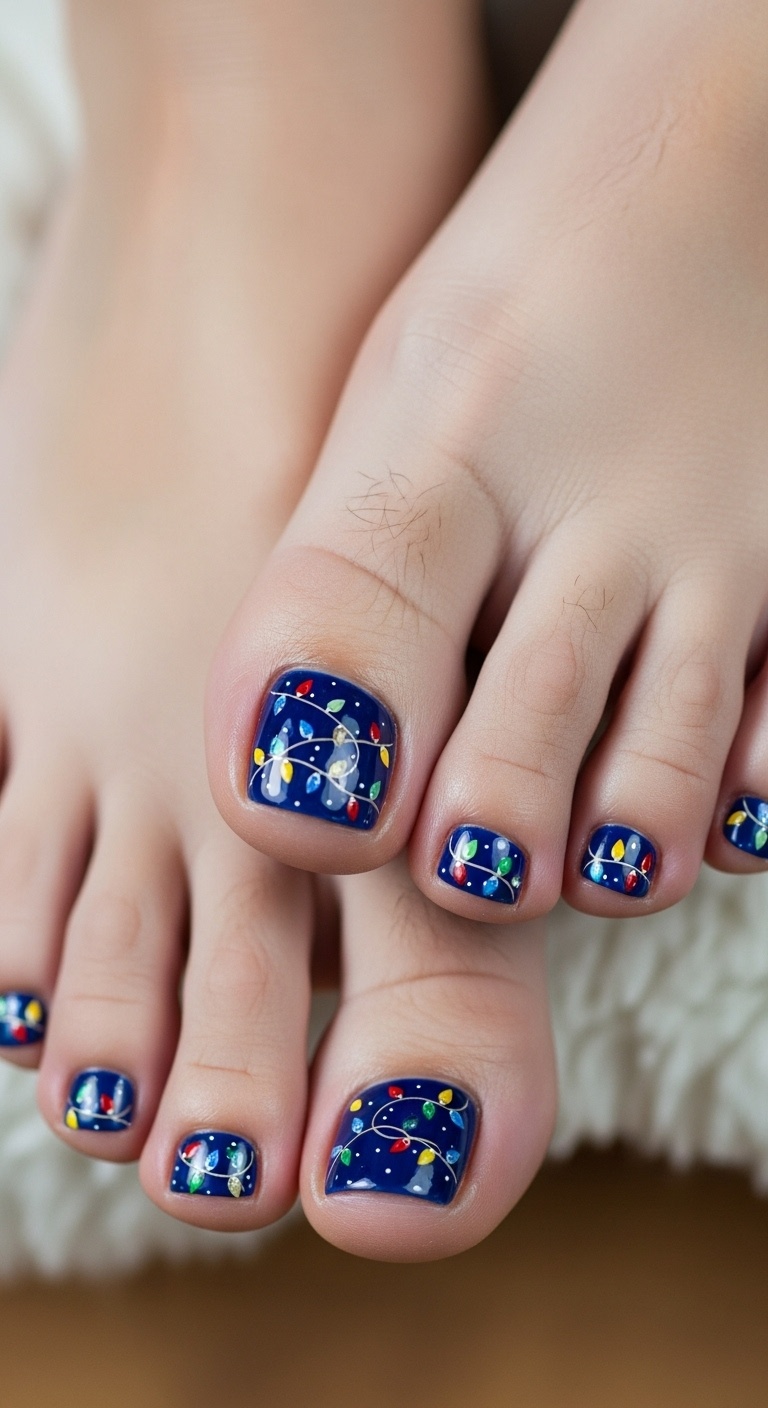
Paint tiny white or multicolor dots around a base color like navy or deep red to look like holiday lights. Use a thin brush or dotting tool for the circles, then add a couple of thin lines for the string.
Change up the size and colors of the lights to keep things fun. Top with a clear coat to make those dots shine like real bulbs.
Expert Tip from KidsCareIdeas: “Use striping tape to keep wires straight while you paint, then remove it before the polish dries.”
15. Fuzzy White Pom Pom 3D Accents
Stick a couple of tiny white pom poms on your toenails, and suddenly your toes look like they’re ready for a snowball fight. I usually reach for nail glue or a thick gel top coat to keep those fuzzy accents in place—even when it’s freezing outside.
If you keep the rest of your nails matte or a soft pink, the pom poms really pop. Snip any wild pom pom fuzz so you don’t end up snagging socks or your favorite blanket.
Shorter toes actually pull off this look really well, and chunkier pom poms add extra cuteness. I always buy acrylic or nail-safe craft pom poms—nobody wants fluff everywhere.
Expert Tip from KidsCareIdeas: “Press pom poms into tacky gel and cure for a stronger hold. Replace pom poms after a week to keep your toes looking fresh.”
16. Candy Cane Stripes with a Matte Finish
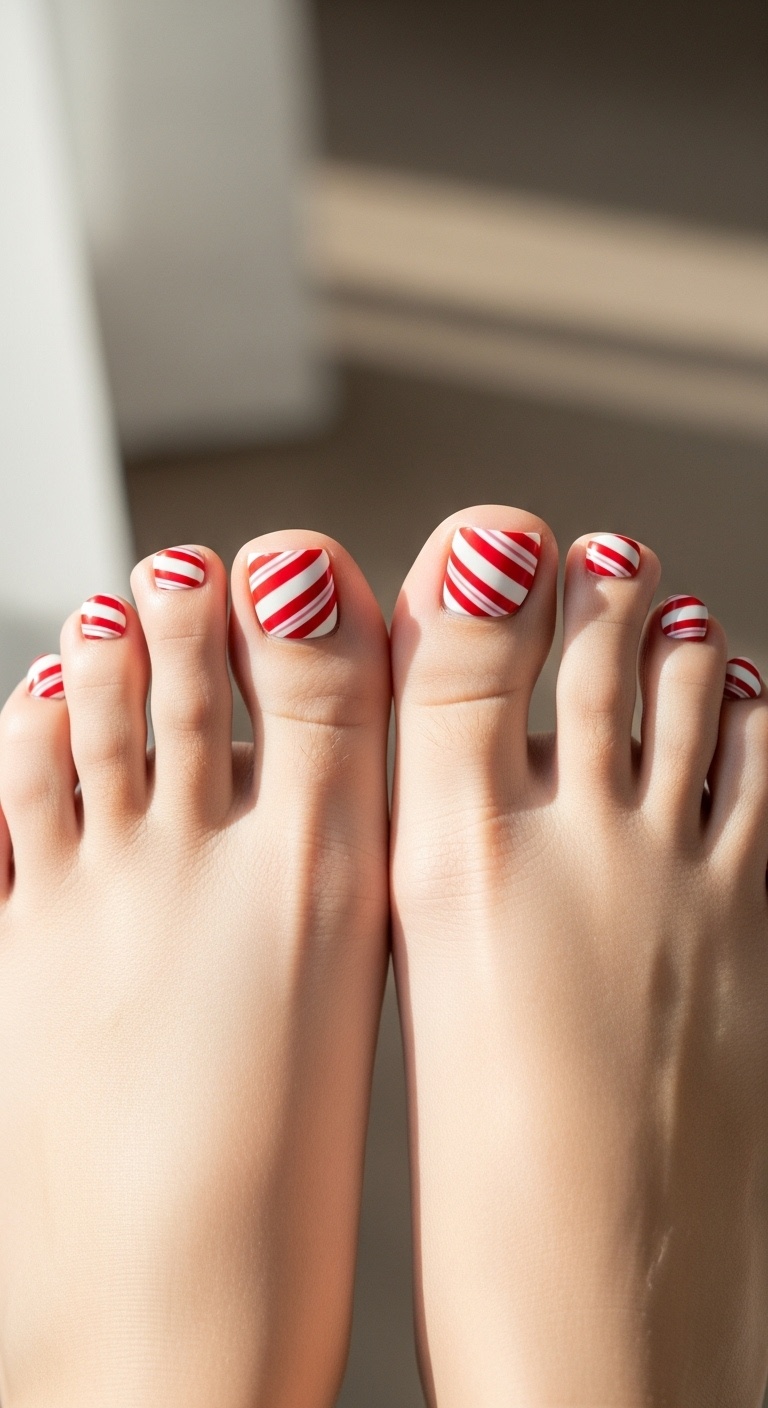
Candy cane stripes just scream winter, right? I love classic red and white, but the matte top coat gives it a softer, cozier vibe—no blinding shine here.
You can paint thin red stripes over white, or flip it if you’re feeling bold. A striping brush works, but honestly, nail tape is a lifesaver if you’re not a surgeon.
Matte polish hides little mistakes, and it lasts if you start with a solid base and top coat. I always swipe on some cuticle oil at the end—makes everything look fresh.
Expert Tip from KidsCareIdeas: “Apply two thin coats of color and let each dry fully before adding stripes to avoid smudging.”
Expert Tip from KidsCareIdeas: “Seal with a matte top coat and press a cotton pad around the cuticle to keep edges clean.”
17. Mini Mitten Nail Art

Try painting tiny mittens on each toe if you want a playful winter vibe. I usually reach for pale blue or a cozy cream as the base, then grab a brighter polish to sketch out the mitten shapes.
Go wild with the details—maybe a little cuff, a few dots, or even a tiny heart if you’re feeling extra creative. Mixing up the mitten designs on each toe keeps things fun and never boring.
Short nails? No problem. This style actually looks great on them. I find it’s pretty quick to pull off at home, especially if you use a thin brush.
Slap on a clear topcoat, and those mittens will stay cute for days.
Expert Tip from KidsCareIdeas: “Use a toothpick for tiny mitten details and seal with two coats of topcoat to prevent chipping.”
