October is the perfect excuse to let your nails get a little dramatic. Deep reds, smoky plums, burnt orange, and tiny ghosts bring the season to your fingertips without requiring a full costume or a bucket of fake cobwebs.
The best 18 October nail ideas balance Halloween details with wearable fall color, so you can choose a manicure that feels festive at work, a party, or a pumpkin patch.
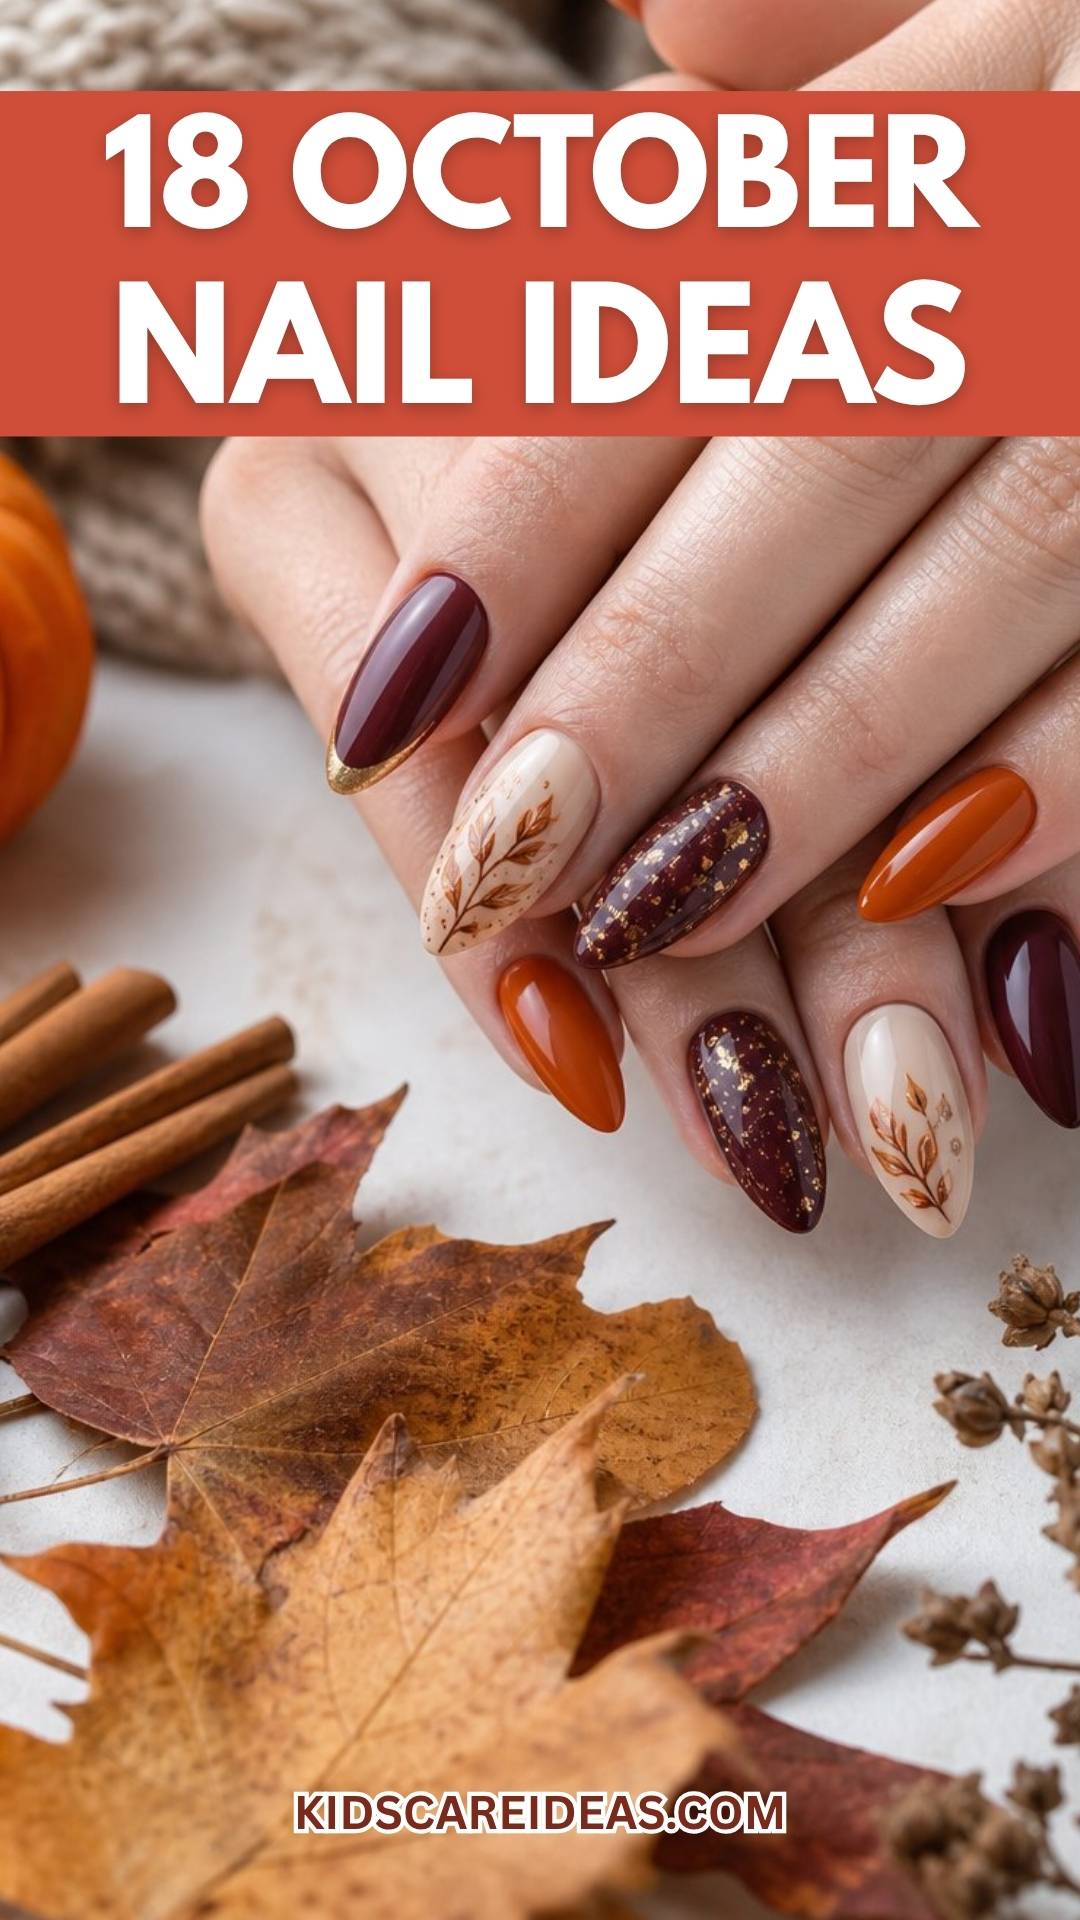
Short nails suit small icons and French tips, while longer shapes give chrome, plaid, and layered art more room to shine.
1. Glossy Black Cat Eyes With Chrome Starbursts
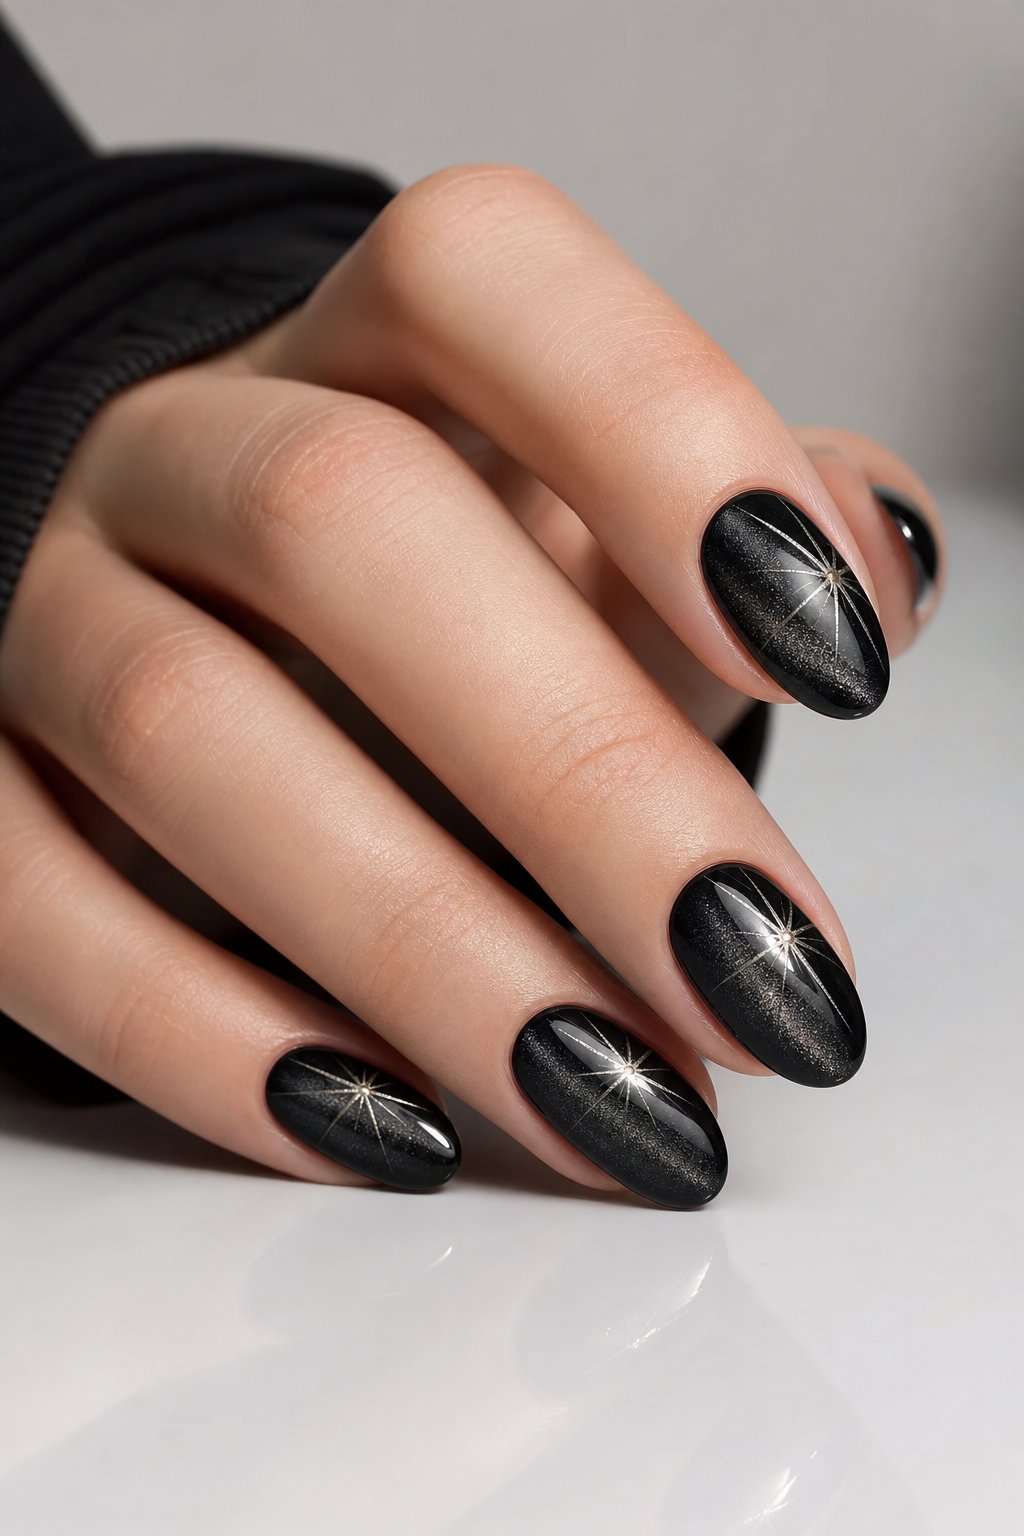
Glossy black cat-eye nails create a moody base with a shifting flash of green, blue, or silver.
The velvet effect looks richest on almond or coffin shapes. Add chrome starbursts near the cuticle for a sharp flash of light. Keep the stars varied in size so the design feels hand-drawn.
A black gel base helps the magnetic polish look deeper. Finish each nail with a high-shine top coat. Short nails can wear the same idea with one starburst on each ring finger.
Expert Tip from KidsCareIdeas: “Hold the magnet over each nail for 10 to 15 seconds before curing. Keep the tool close without touching the polish.”
2. Burnt Orange French Tips With Tiny Black Bats
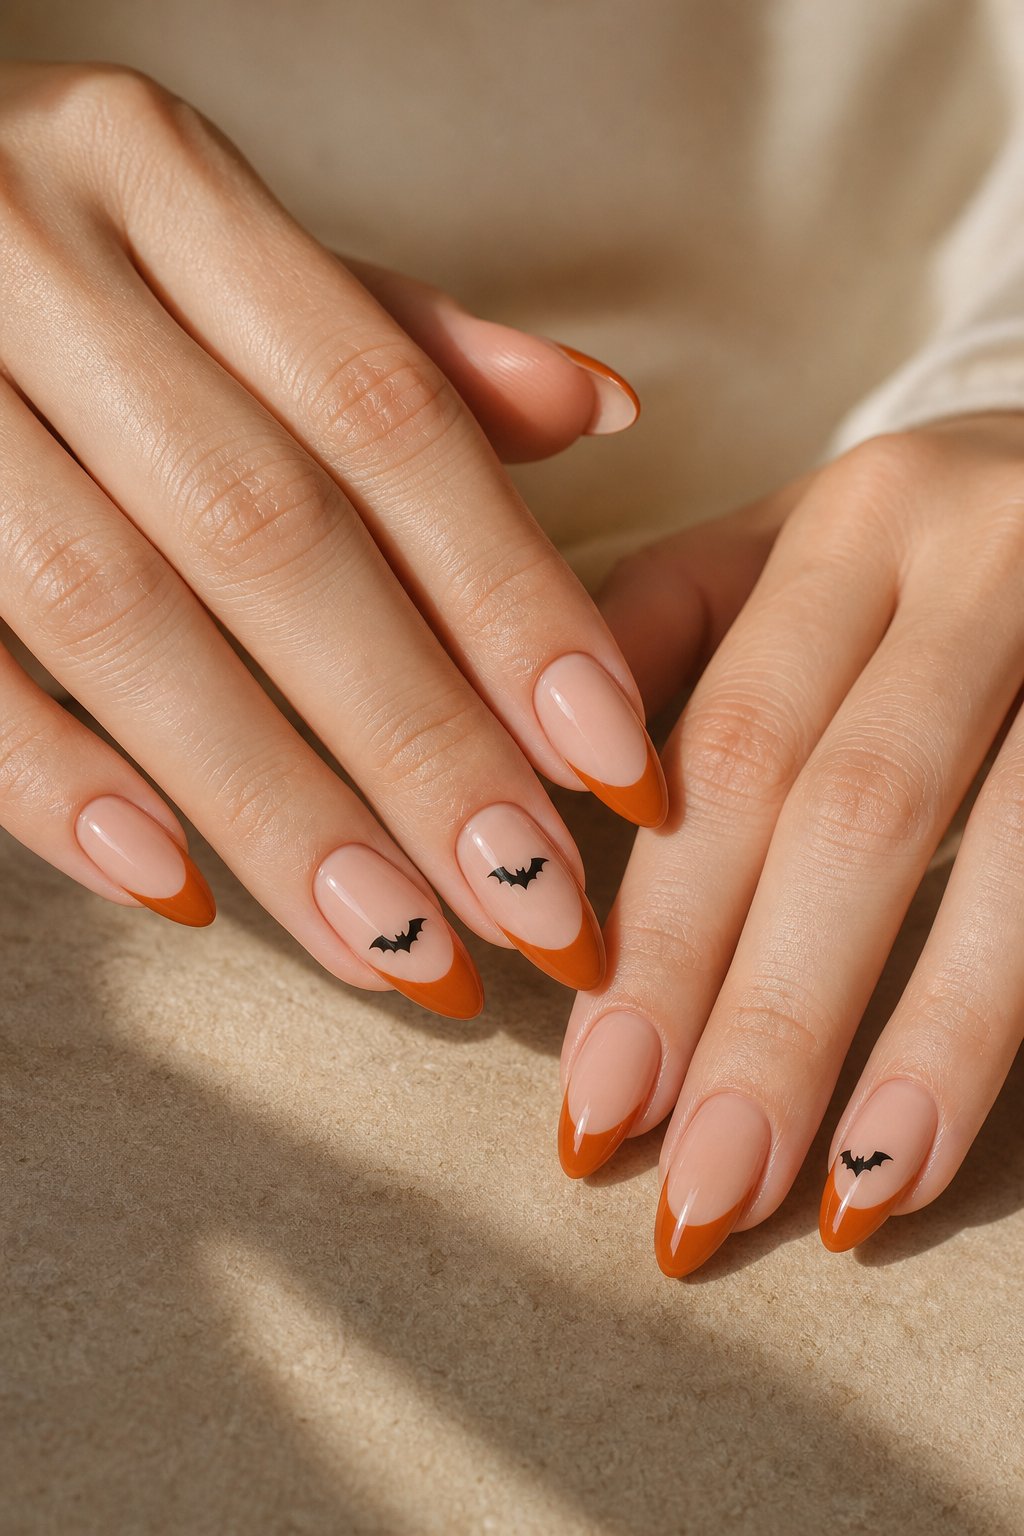
Burnt orange French tips give you a warm fall manicure with a playful Halloween wink. Use a sheer beige or milky nude base to keep the tips crisp.
Paint tiny black bats on two accent nails, placing them near the sidewall or above the smile line. A fine liner brush makes the wings easier to shape.
This look works well on short square nails because the color follows the free edge. Choose a muted orange for a softer effect, or use pumpkin orange for extra cheer. Seal the bats under a smooth top coat.
Expert Tip from KidsCareIdeas: “Paint the bat body first, then add two pointed wings. Cure the design before applying top coat to prevent smearing.”
3. Blood-Red Drip Nails With Milky Nude Bases
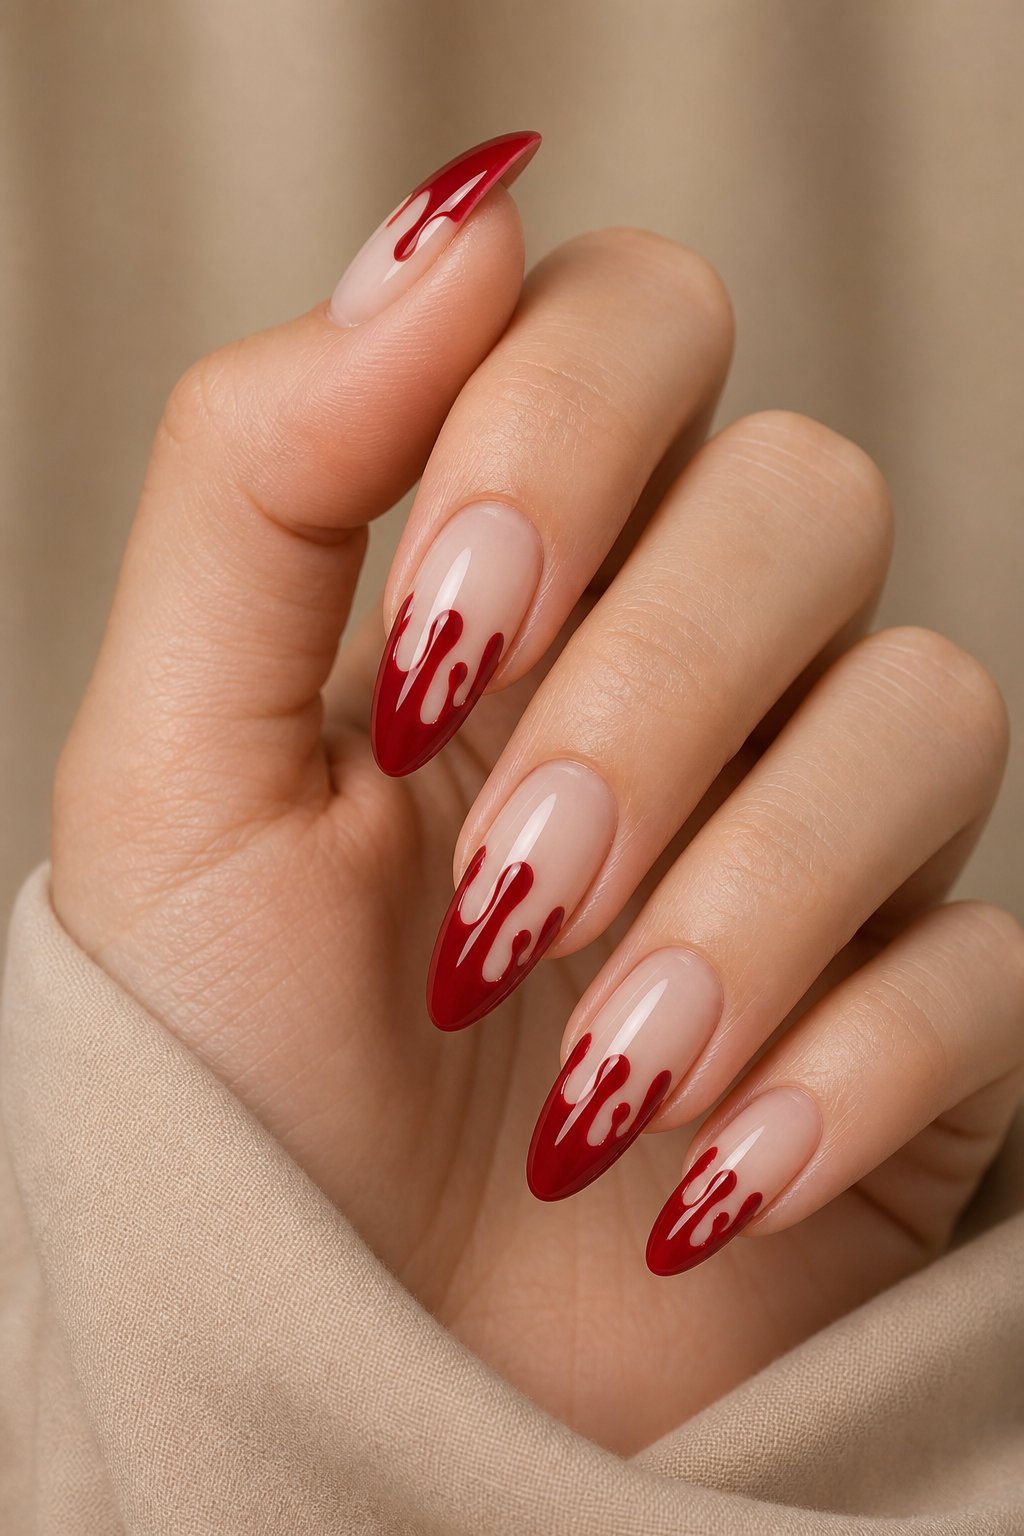
Blood-red drip art turns a soft milky base into a polished Halloween statement. Start with two thin nude coats so the red looks clean and bold.
Draw a red line across the tip, then pull rounded drips toward the center of the nail.
Vary the drip lengths to avoid a stamped, identical look. Almond and coffin shapes give the design a smooth runway for the color. A glossy red finish makes the drops look wet without becoming messy. Keep the cuticle area bare for a cleaner balance.
Expert Tip from KidsCareIdeas: “Use a dotting tool to form rounded drip ends. Let the red layer settle before adding your top coat.”
4. Deep Plum Velvet Nails With Gold Moon Charms
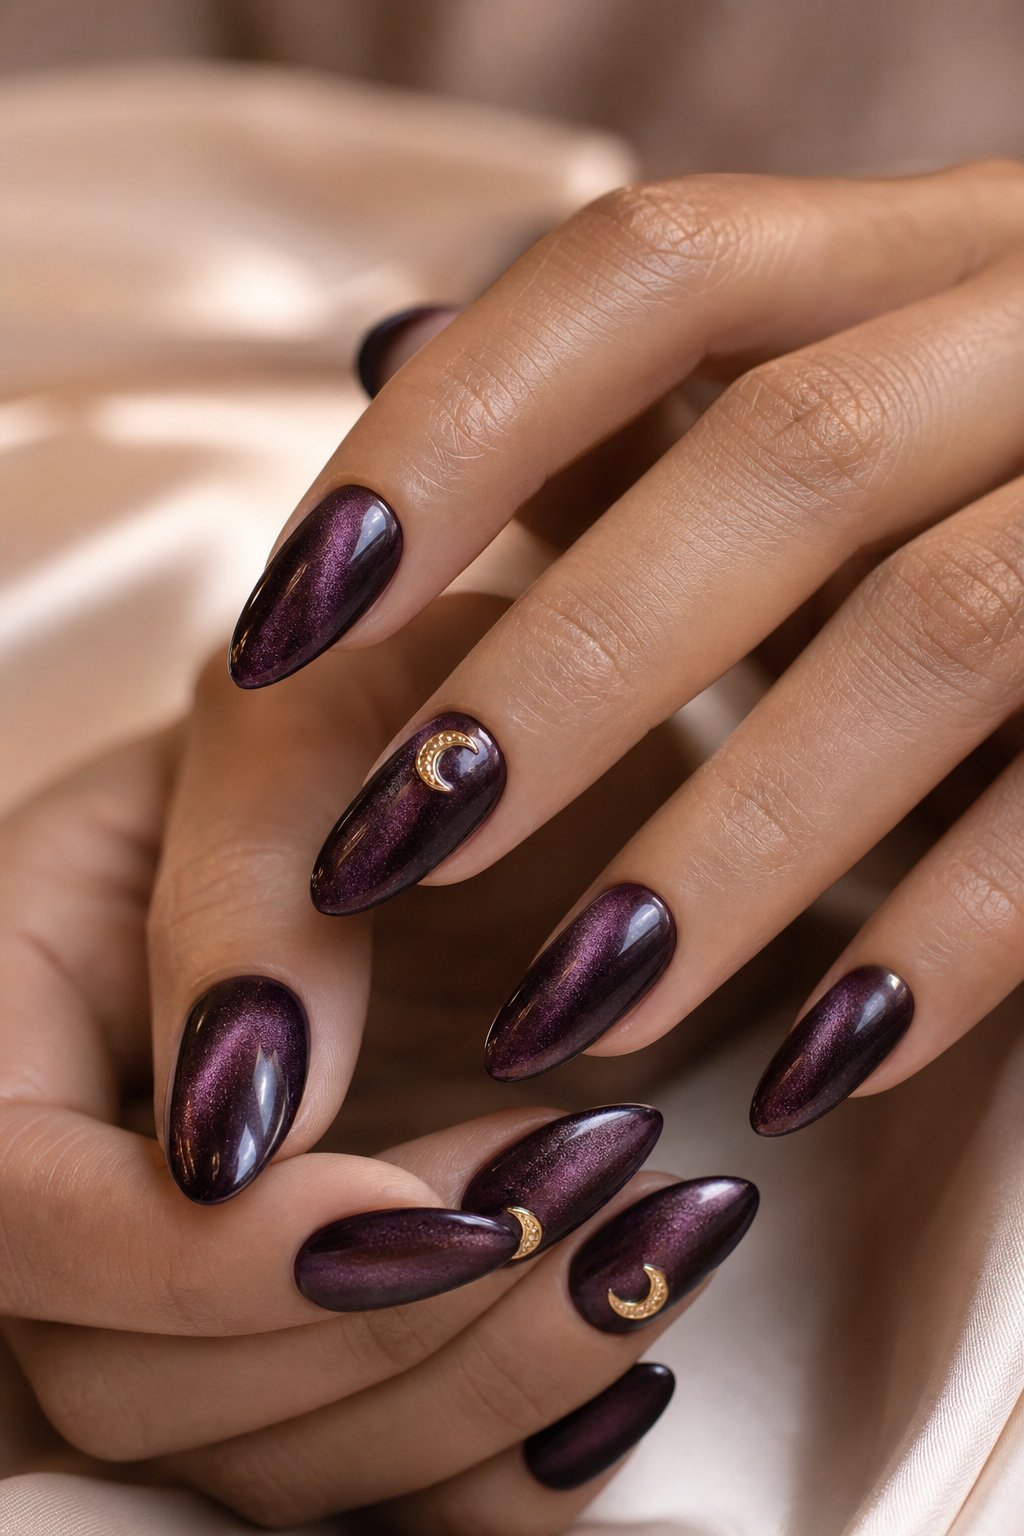
Deep plum velvet nails bring a rich, candlelit mood to your October manicure. Magnetic plum polish creates a soft shimmer that shifts as your hands move.
Place a small gold crescent charm near the cuticle on one or two nails. The gold adds contrast without covering the plush finish.
This design looks elegant on medium almond nails and feels easy to wear after Halloween. Apply charm gel beneath each moon for a secure hold. Cap the edges with top coat while leaving the velvet surface visible.
Expert Tip from KidsCareIdeas: “Magnetize the polish before curing every layer. Reposition the charm with tweezers while the gel is still flexible.”
5. Pumpkin Patch Nails With Hand-Painted Jack-o’-Lanterns
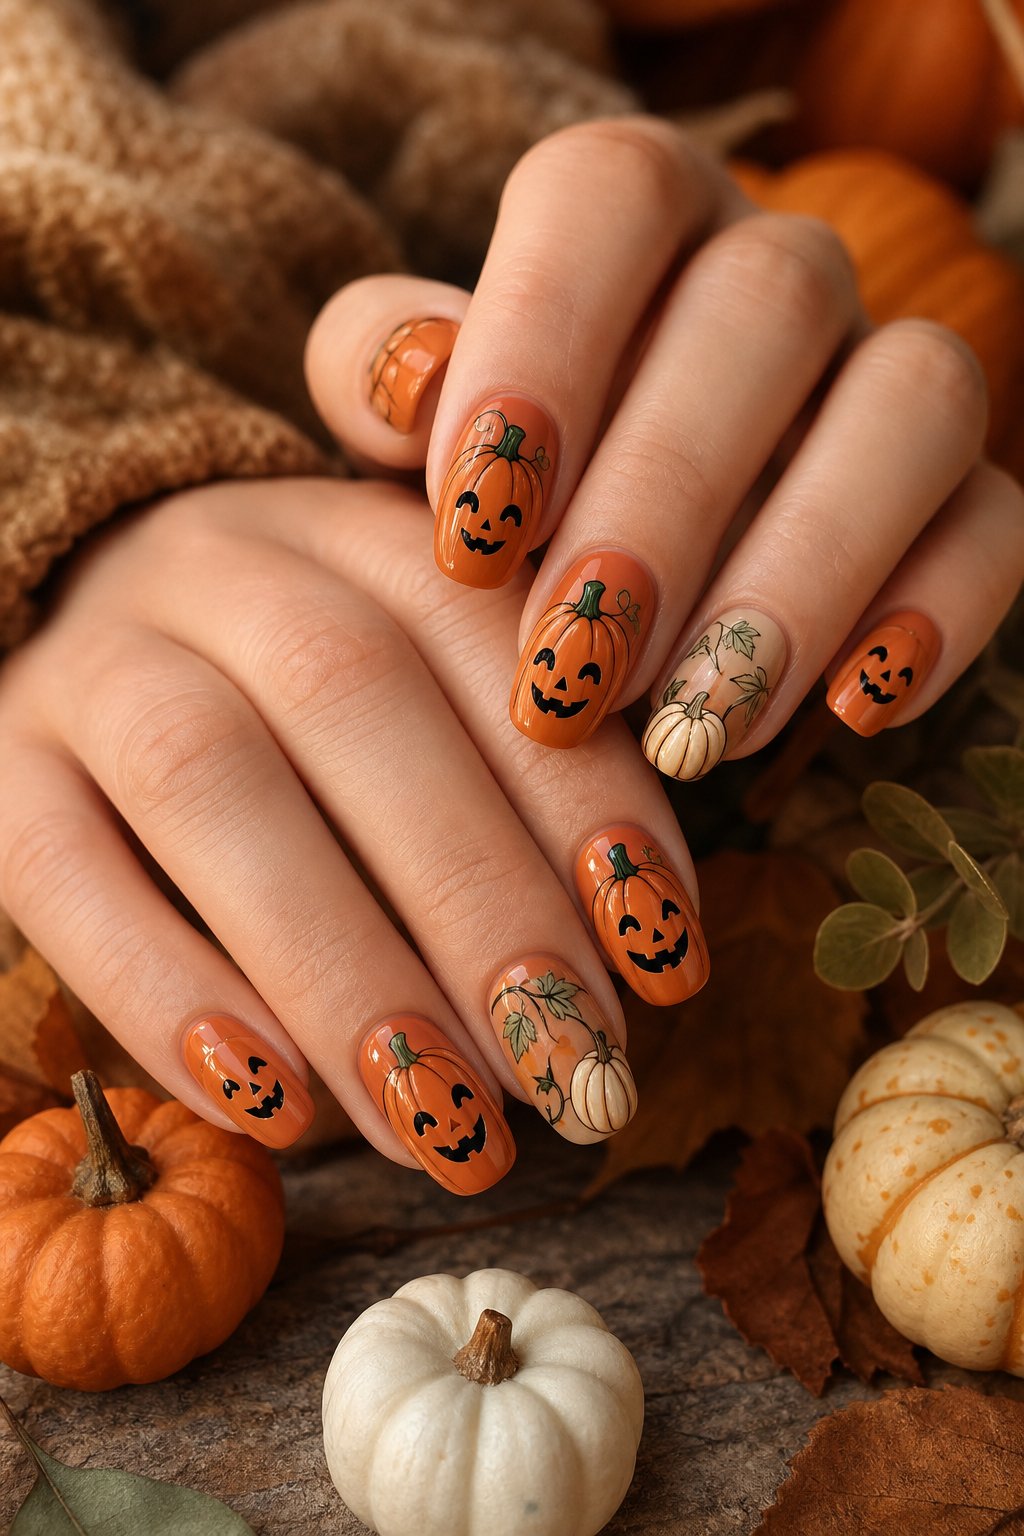
Pumpkin patch nails bring classic Halloween charm through tiny orange gourds and glowing faces. Use a creamy beige base to make the pumpkins stand out. Paint curved orange shapes, add green stems, then draw simple black eyes and smiles.
One detailed pumpkin per hand keeps the manicure readable. Short rounded nails suit this design because the shapes stay compact. Add a matte top coat for a soft harvest look, or choose gloss for a candy-like finish. A thin brown outline gives each pumpkin more depth.
Expert Tip from KidsCareIdeas: “Build each pumpkin with two orange coats instead of one thick coat. Small dotting tools help create even eyes and smiles.”
6. Tortoiseshell Nails With Espresso Brown French Tips
Tortoiseshell nails paired with espresso tips create a grown-up autumn manicure with plenty of texture. Layer caramel, amber, and dark brown patches over a sheer tan base. Keep the patches uneven so the pattern looks like natural shell. Add espresso French tips on alternating nails for a calmer visual rhythm.
Almond shapes make the brown tip look sleek and lengthening. Use a glossy finish to bring out the warm layers. This design pairs well with denim, camel sweaters, and gold jewelry.
Expert Tip from KidsCareIdeas: “Float the darker spots over the amber layer while it is slightly tacky. That softens the edges without muddying the pattern.”
7. Forest Green Aura Nails With Gold Leaf Flecks
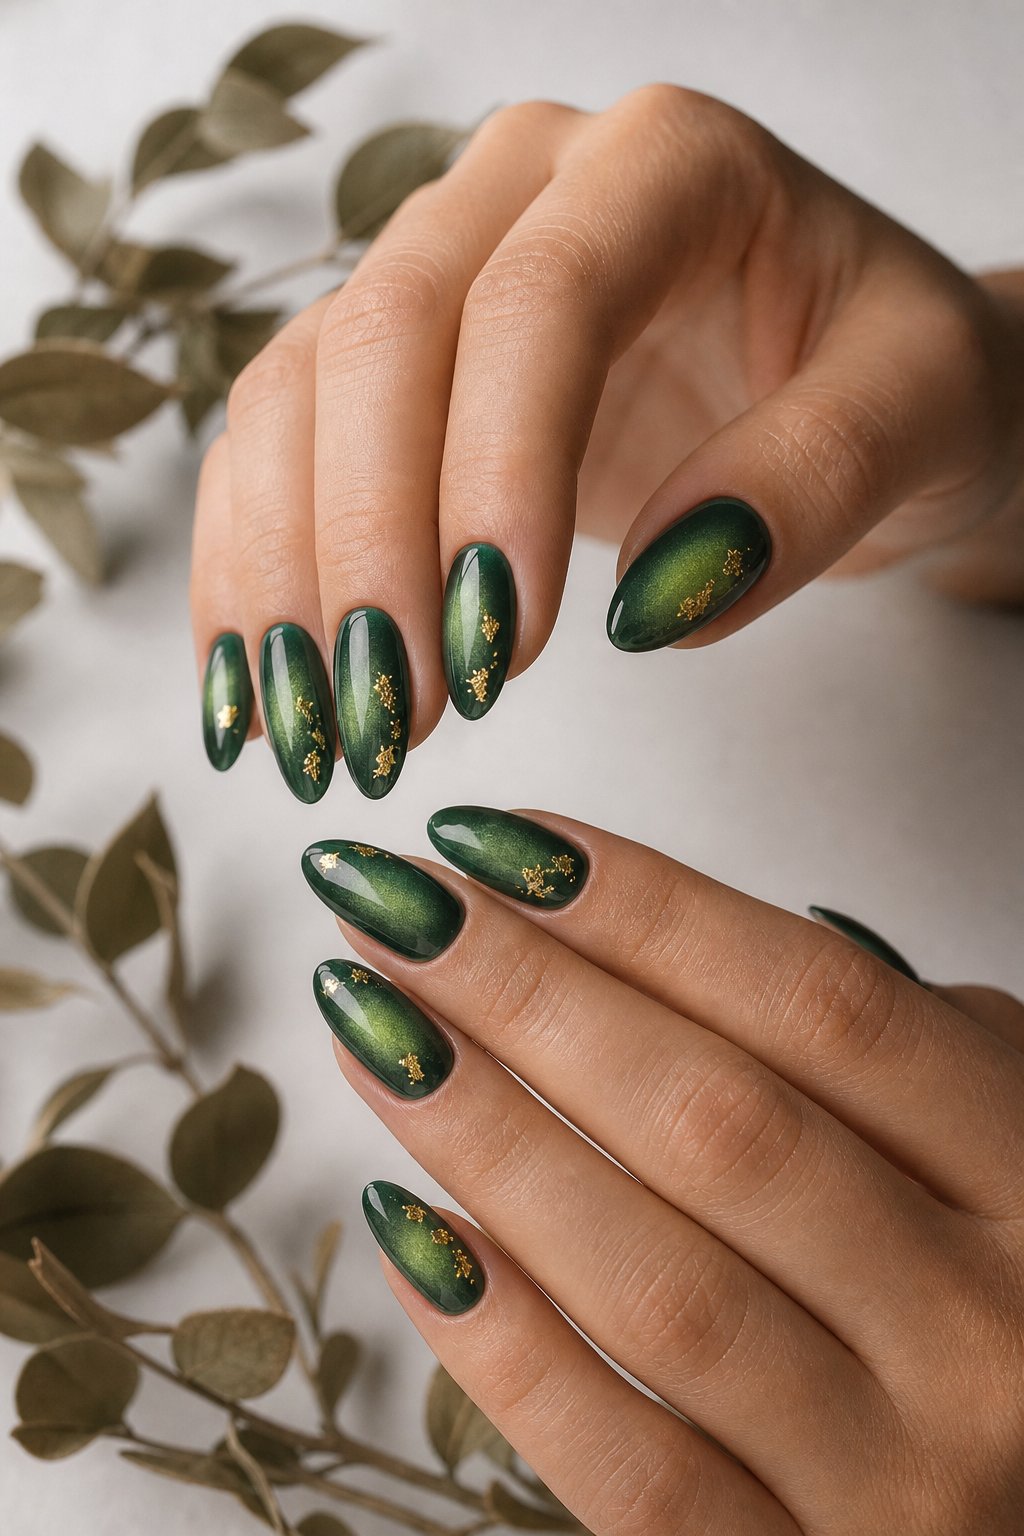
Forest green aura nails give your manicure a smoky, enchanted-forest feel. Blend a darker green around the edges and a lighter green glow near the center. Add tiny gold leaf flecks to two accent nails for warm contrast.
The aura effect looks smoothest over a sheer neutral base. Medium oval nails keep the color wearable while leaving enough room for the glow. Use scattered foil pieces instead of dense coverage. A glossy top coat makes the green appear deeper.
Expert Tip from KidsCareIdeas: “Use a soft sponge to build the aura in thin layers. Press gold foil onto a tacky surface, then seal its edges completely.”
8. Matte Black Nails With Glossy Spiderweb Art
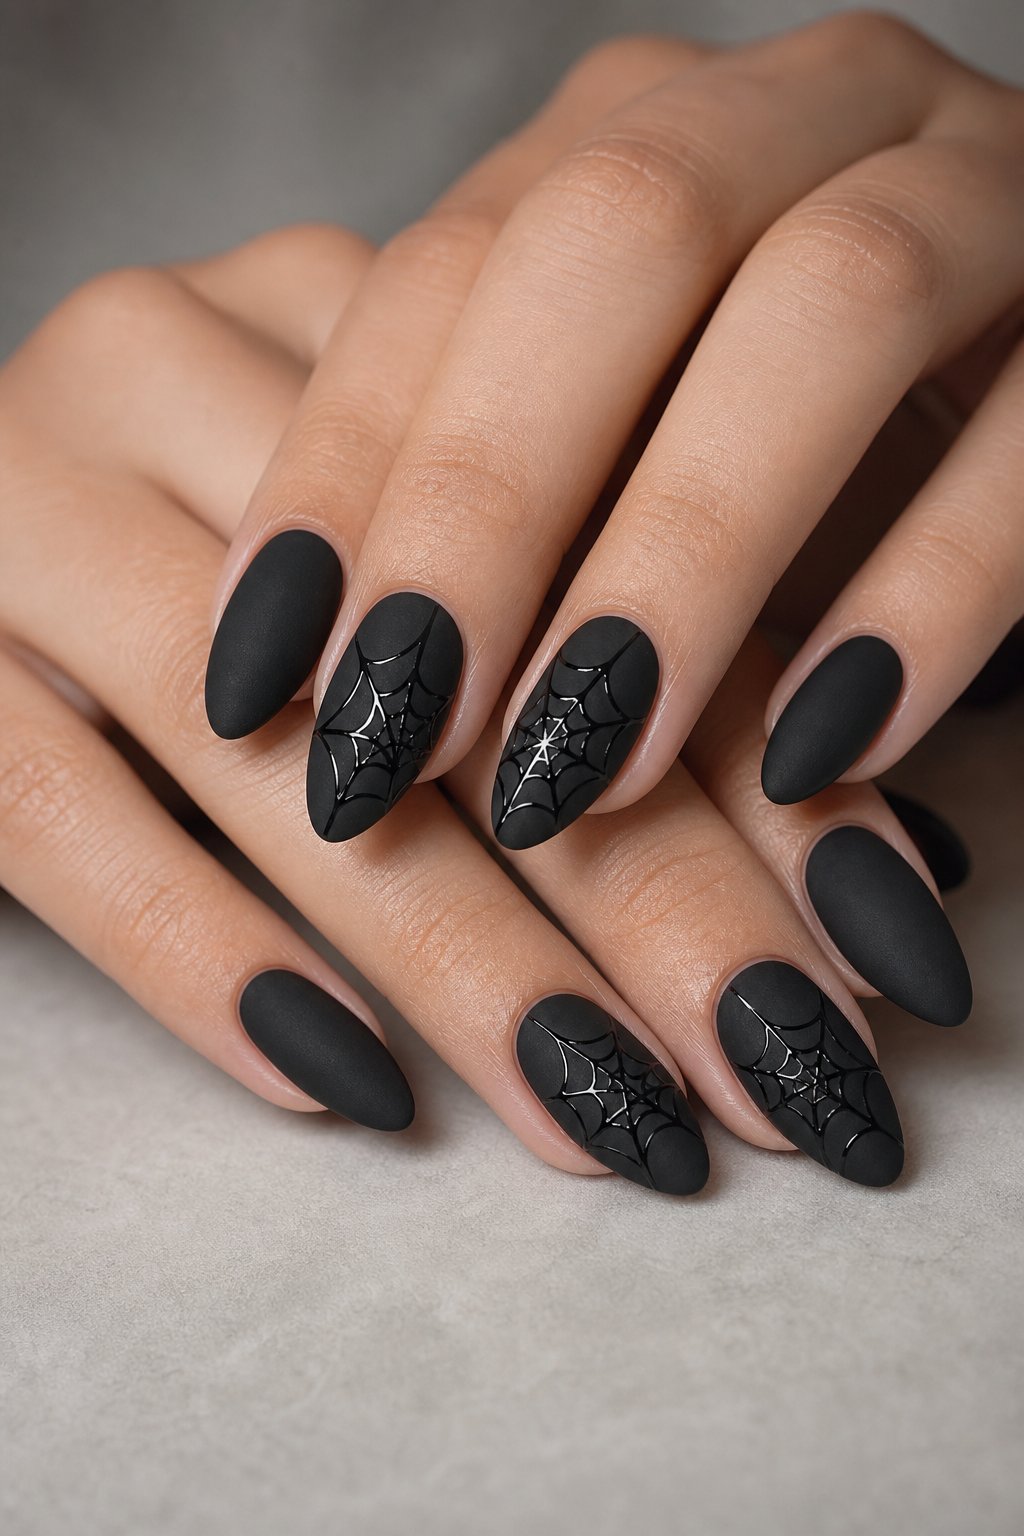
Matte black nails with glossy spiderwebs create a subtle design you notice when the light hits. Paint the entire nail black, then add matte top coat and cure it fully. Draw thin glossy lines from one corner before connecting them with curved web sections.
Place webs on two or three nails to preserve the graphic effect. Square and coffin shapes give the lines a clean frame. A fine liner brush keeps the web strands delicate. The raised shine shows best under warm indoor lighting.
Expert Tip from KidsCareIdeas: “Use less gel on your liner brush for cleaner web lines. Cure the matte layer before adding glossy details.”
9. Candy Corn French Tips in White, Orange, and Yellow
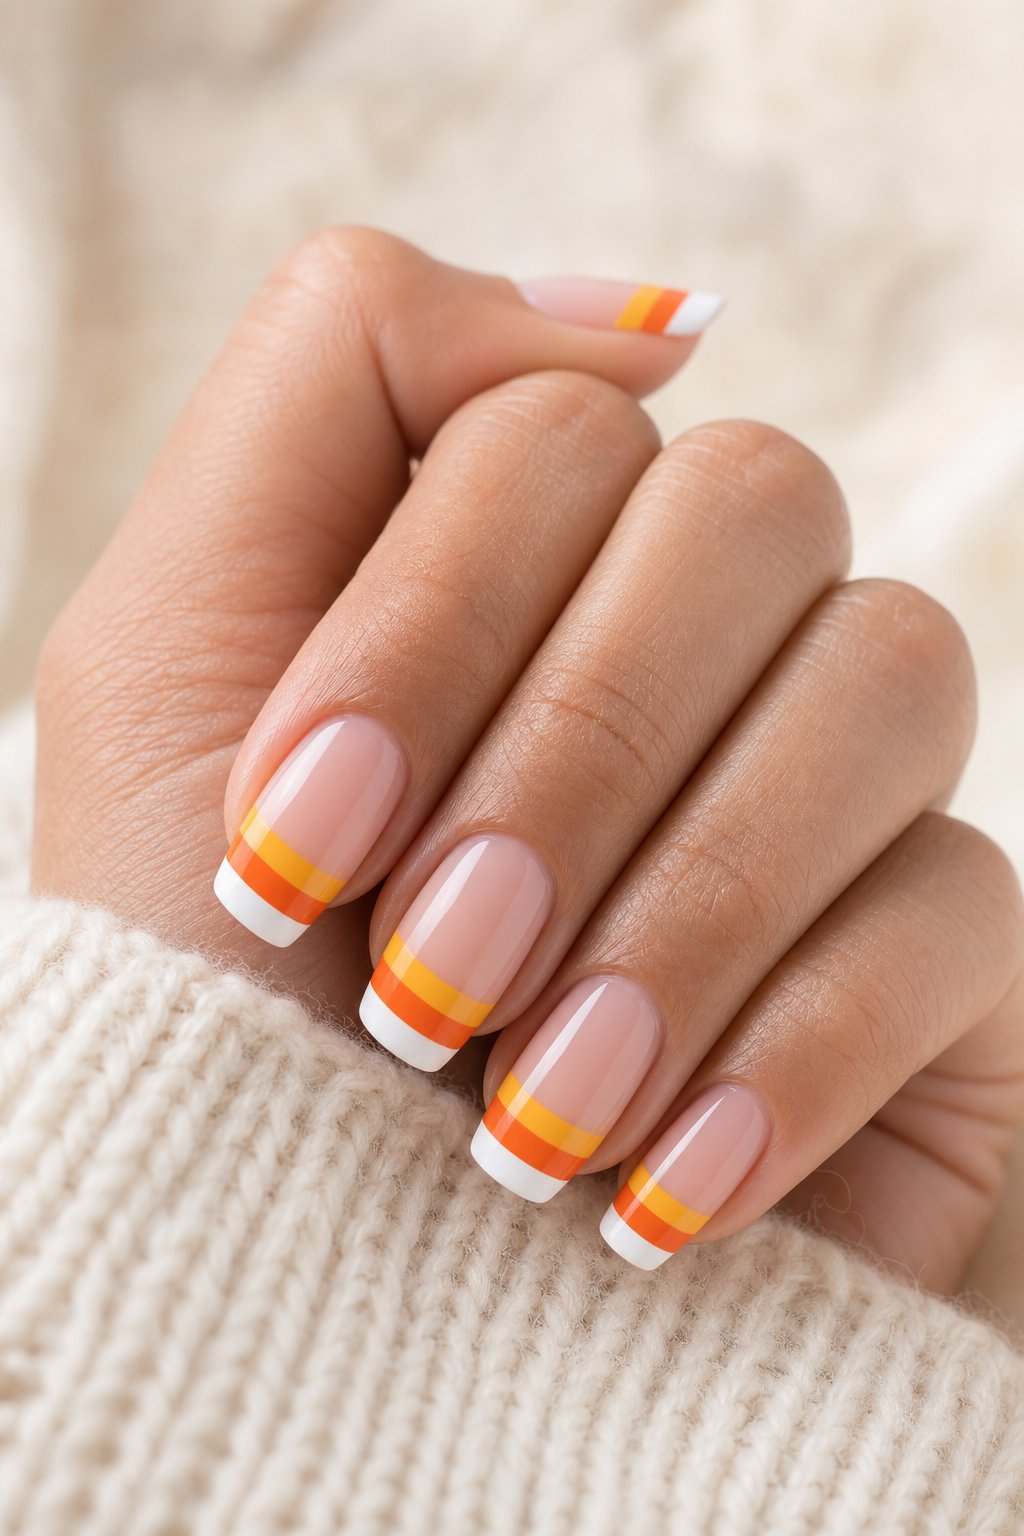
Candy corn French tips turn the familiar Halloween treat into a bright manicure. Paint yellow closest to the free edge, orange through the middle, and white near the base of the tip. A nude base keeps the three colors from feeling heavy.
Use thin horizontal bands so the design stays neat on shorter nails. Long almond nails give each color more space and definition. Choose a glossy finish for a sugary look. A fine brush helps sharpen the borders between shades.
Expert Tip from KidsCareIdeas: “Cure each color before painting the next band. Keep the layers thin so the tip does not become bulky.”
10. Cranberry Red Nails With Gold Foil Cuticles
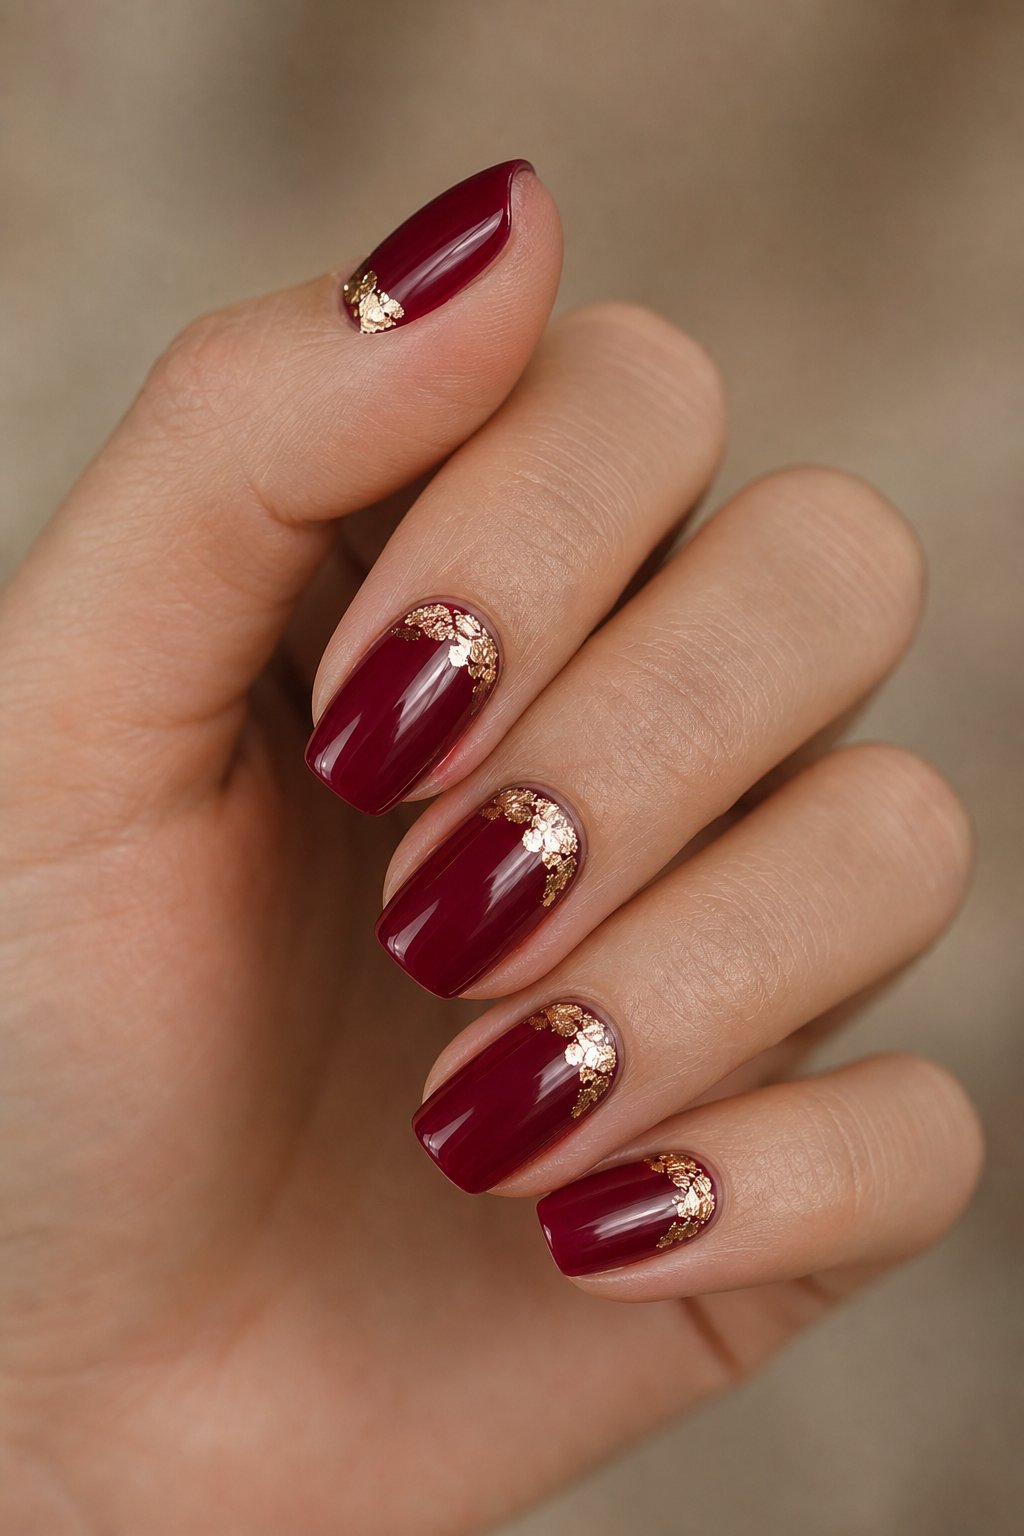
Cranberry red nails with gold foil cuticles bring October color into a polished evening look. Choose a deep berry shade with a blue or wine undertone. Add small foil pieces along the base of each nail, leaving gaps so the cuticle line stays refined. Rounded almond shapes complement the rich color.
Keep the foil on every nail for a jewelry-like finish, or limit it to two fingers. A smooth gel top coat prevents the foil from catching on fabric. The design transitions easily into November.
Expert Tip from KidsCareIdeas: “Break foil into tiny pieces before application. Press each piece flat and seal the cuticle edge with an extra swipe of top coat.”
11. Mismatched Halloween Nails With Ghosts, Bats, and Stars
Mismatched Halloween nails let you combine several seasonal details without forcing one repeated pattern.
Use black, cream, pumpkin orange, and dusty mauve as your color set. Give each nail a different role, such as a ghost, bat, star, or tiny moon.
Repeat one shade across the hand so the variety still feels connected. Short nails suit simple icons with bold outlines. Add glossy and matte finishes for extra contrast. Keep the busiest art on your ring and middle fingers.
Expert Tip from KidsCareIdeas: “Choose your color palette before painting any icons. Repeating one background shade keeps mismatched nails from looking crowded.”
12. Mocha Swirl Nails With Cream and Caramel Waves
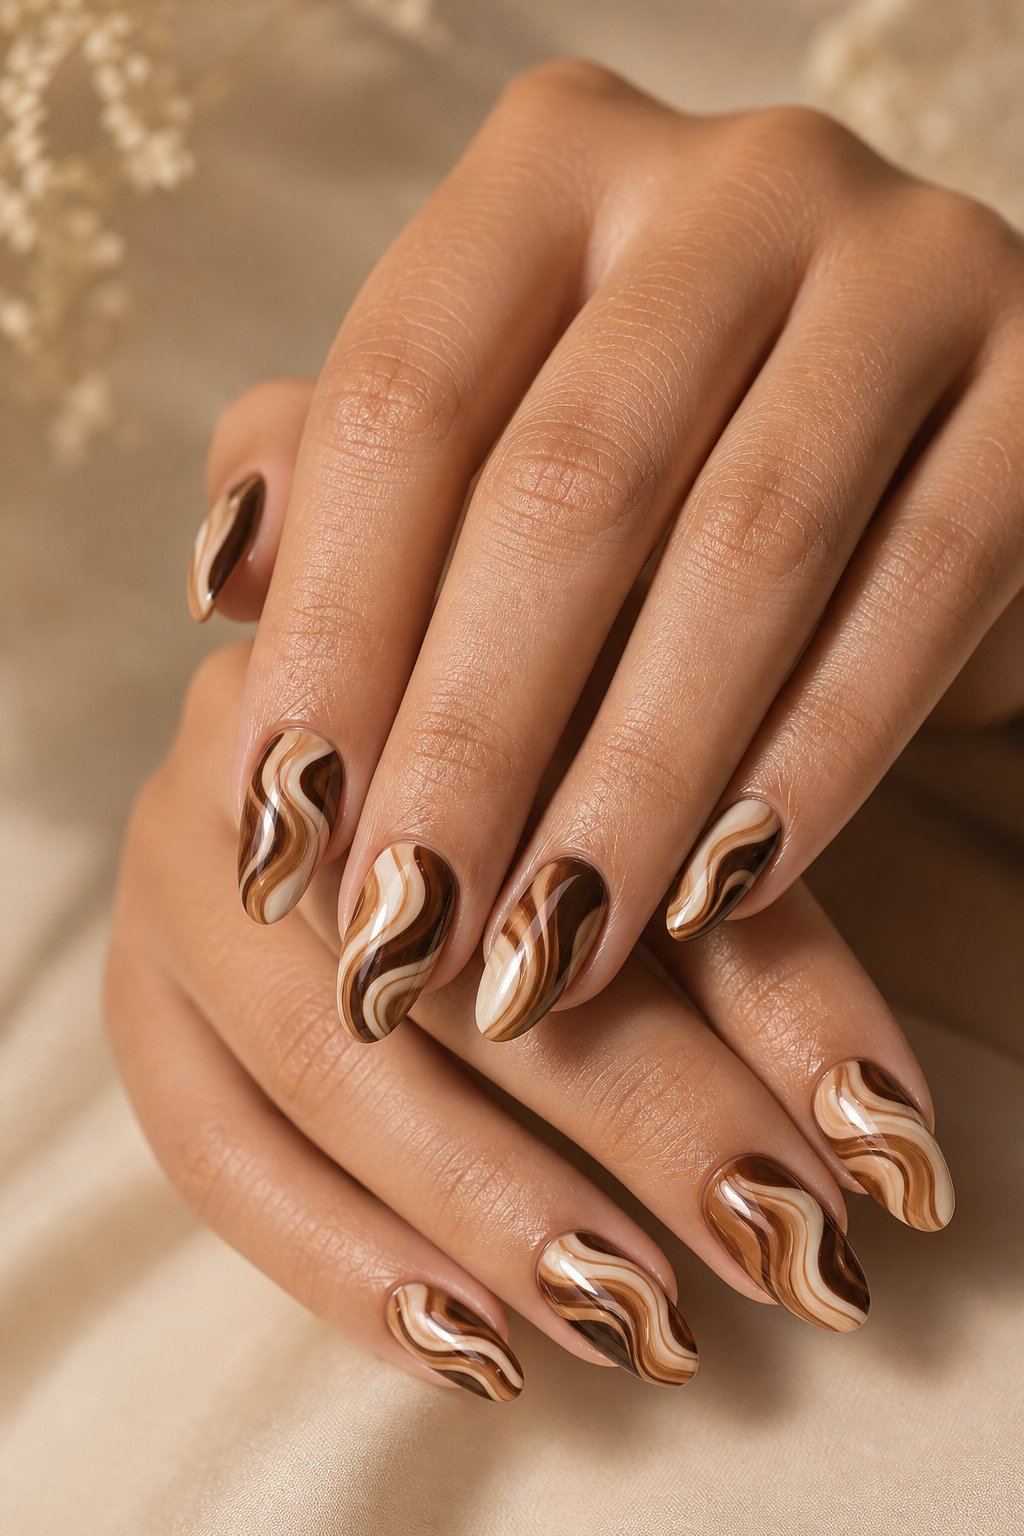
Mocha swirl nails offer a cozy October look with no spooky symbols required. Start with a cream base, then sweep mocha and caramel curves from the cuticle toward the tip. Keep each line fluid and slightly different.
Almond nails give the swirls a long, elegant path. Use a detail brush with a rounded tip for smooth turns. A high-gloss finish makes the colors resemble melted coffee foam. This design works well for an office manicure or a fall dinner.
Expert Tip from KidsCareIdeas: “Map the curves with a thin layer first. Add color slowly so the bands stay separate and the base remains visible.”
13. Navy Midnight Sky Nails With Silver Constellations
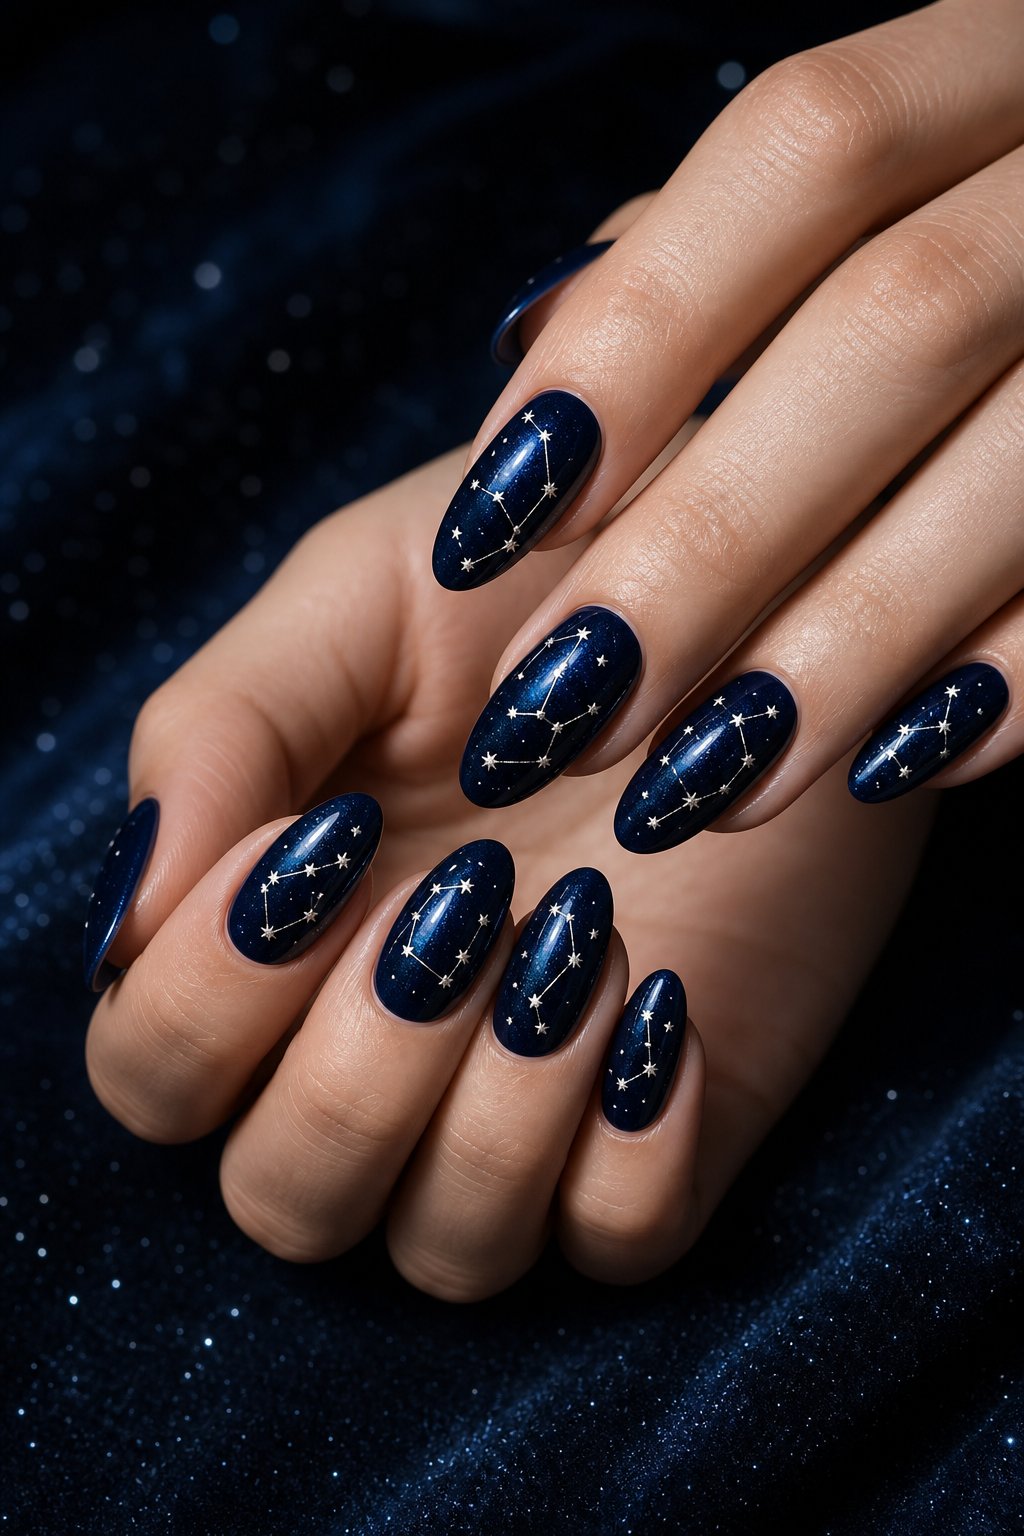
Navy midnight sky nails bring a cool, mysterious mood to your October color palette. Apply two coats of deep navy for a smooth night-sky base. Draw tiny silver lines between small dots to form simple constellations.
Place the stars at different angles so each nail feels like its own slice of sky. Long oval nails give the constellation art room to breathe. Add a few silver dots without connecting them for a scattered sparkle. Seal the design with a glossy top coat.
Expert Tip from KidsCareIdeas: “Use a striping brush for constellation lines and a dotting tool for stars. Keep the silver layer thin for crisp points.”
14. Olive Green Checkerboard Nails With Cream Accents
Olive green checkerboard nails give you a retro pattern in a grounded fall palette. Paint a cream base, then add olive squares in a small grid.
Alternate the pattern across two or three nails and use solid olive on the rest. Short square nails make the checkerboard look graphic and tidy.
A striping brush helps create straight edges, while nail tape speeds up the grid. Keep the color contrast soft for a vintage feel. Glossy top coat brings the pattern together.
Expert Tip from KidsCareIdeas: “Let each row dry before filling the next set of squares. Remove striping tape while the polish remains slightly soft.”
15. Black French Tips With Tiny White Skeleton Hands
Black French tips with tiny skeleton hands deliver Halloween detail in a clean, wearable format.
Use a sheer pink or nude base so the black tips stay sharp. Paint white skeleton hands on one or two accent nails, with the fingers reaching toward the tip. A short square shape supports the bold French line, while almond nails make it more delicate.
Keep the hand icons small enough to leave breathing room. Glossy black polish gives the manicure a sleek finish. Add a matte accent nail for a soft contrast.
Expert Tip from KidsCareIdeas: “Draw the palm first, then add four narrow fingers. Use a tiny brush or white nail-art pen for controlled lines.”
16. Copper Chrome Nails With Embossed Leaf Details
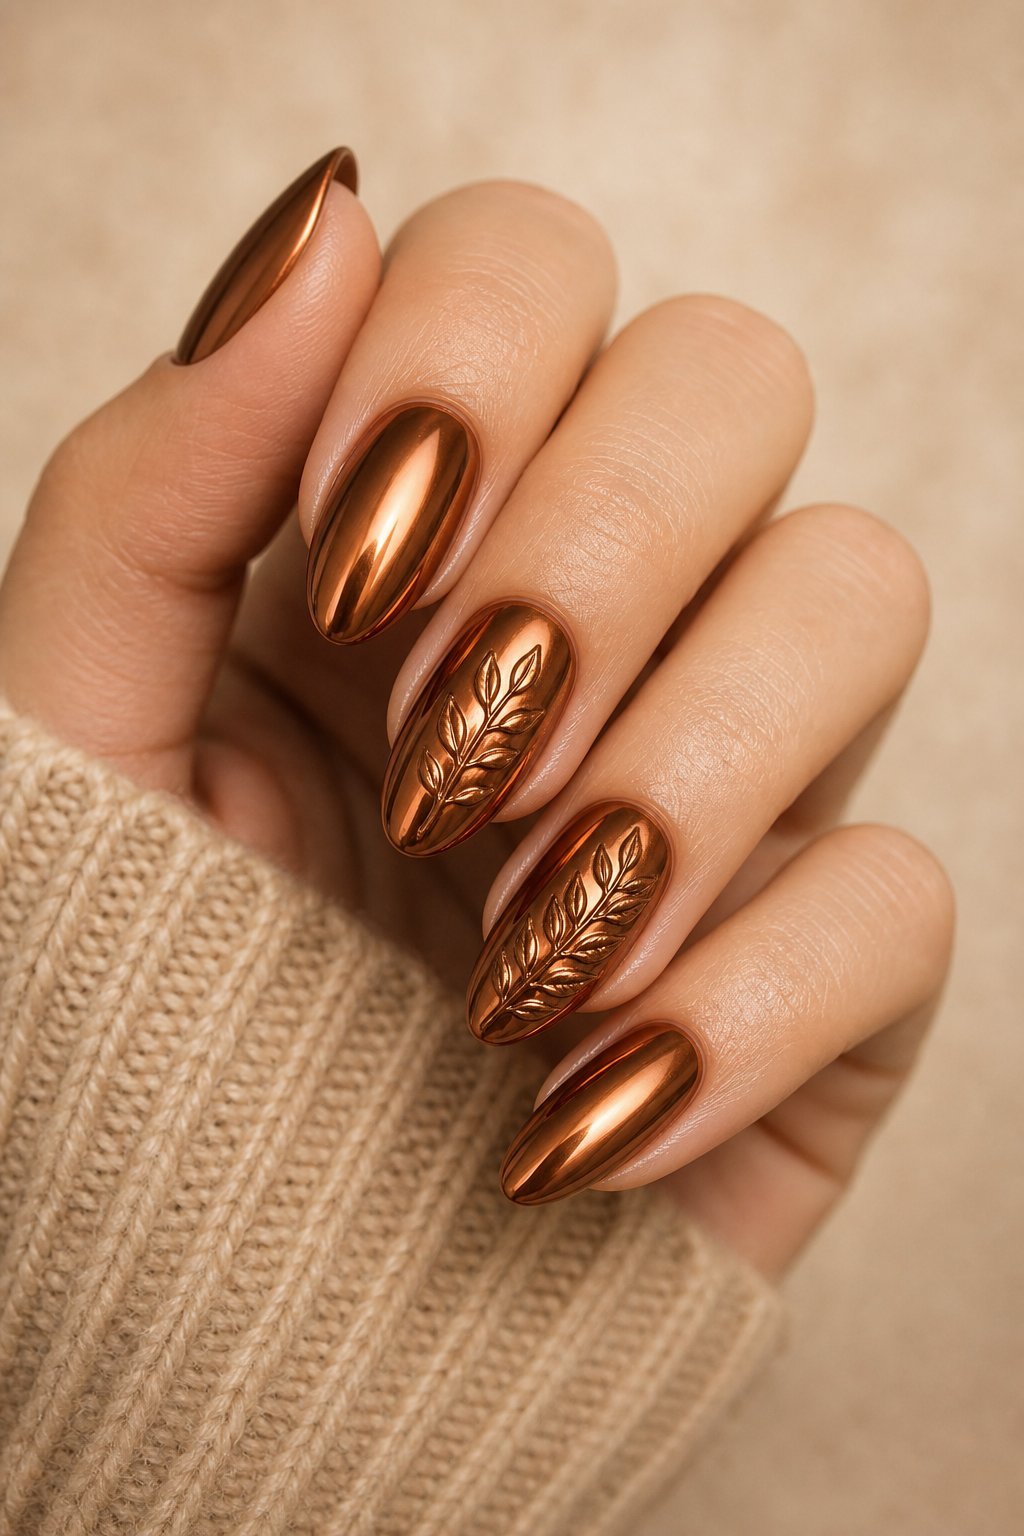
Copper chrome nails turn autumn foliage into a bold metallic manicure. Rub copper chrome powder over a cured no-wipe top coat for a mirror-like base. Add raised leaf details with builder gel or thick art gel. Keep the leaves on two accent nails so the chrome remains visible. Coffin and almond shapes both suit the reflective finish. Choose a warm bronze leaf shade for tone-on-tone texture. Seal raised designs with care around their edges.
Expert Tip from KidsCareIdeas: “Buff chrome powder onto a smooth, fully cured surface. Outline raised leaves twice if the first layer looks too flat.”
17. Mauve and Black Plaid Nails With Gold Studs
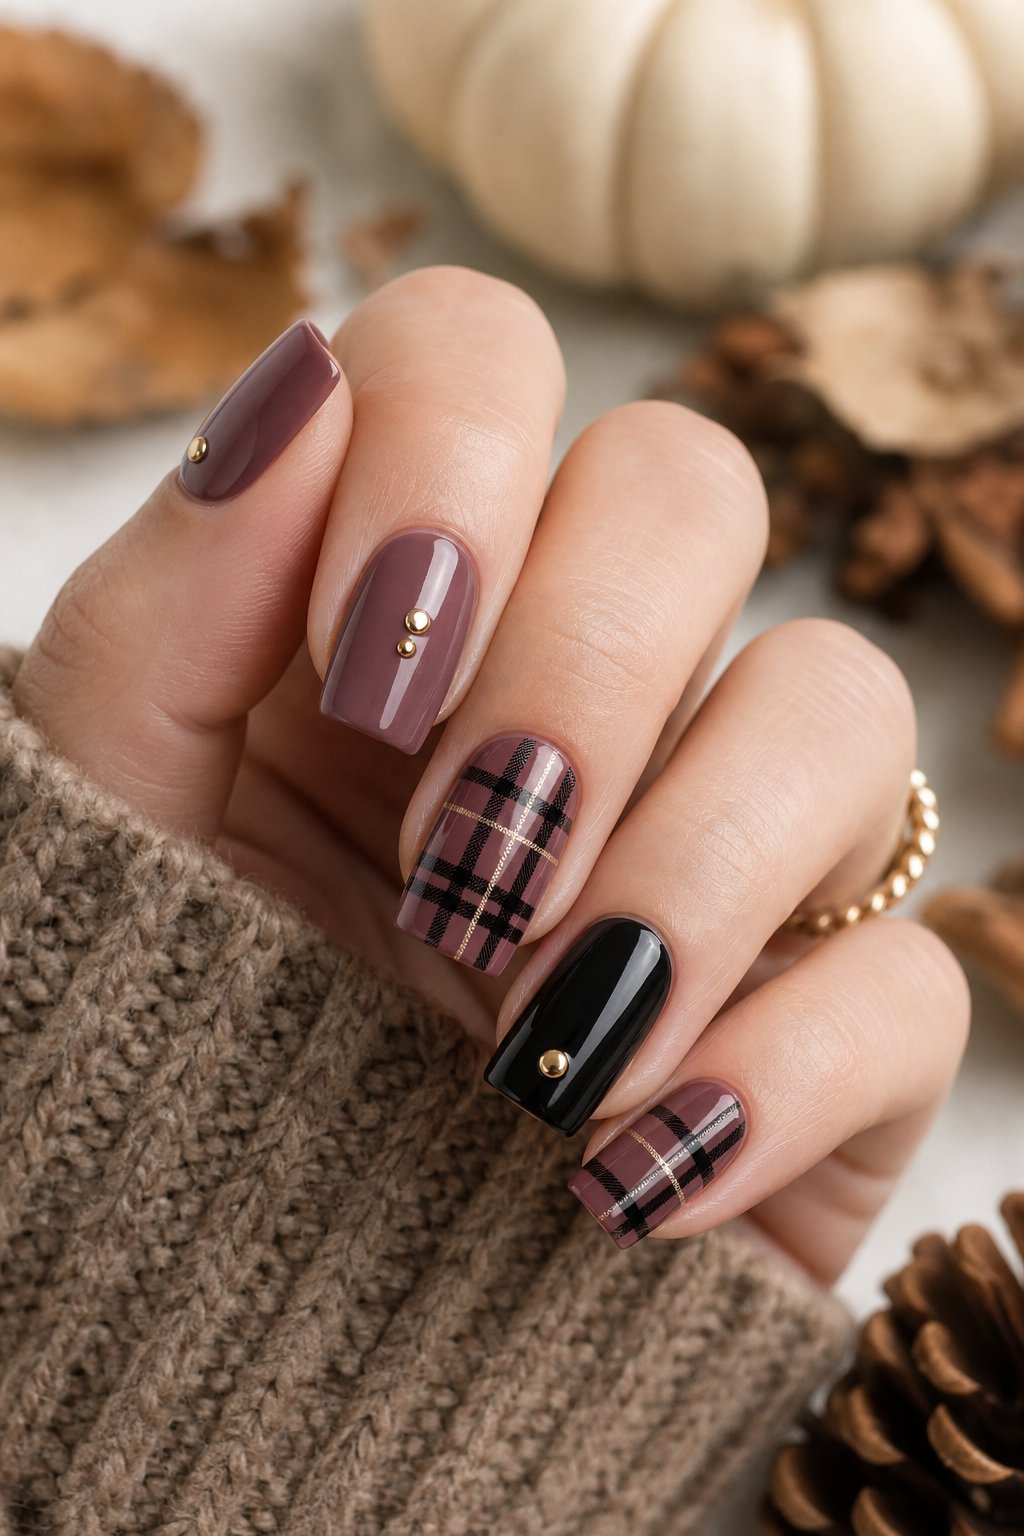
Mauve and black plaid nails bring sweater-season texture to your fingertips. Paint a muted mauve base, then add thin black lines in crossing horizontal and vertical bands. Leave some nails solid mauve so the plaid does not dominate the hand. Place one small gold stud at the center of an accent nail. Medium coffin nails give the lines a tidy, tailored look. A satin top coat softens the contrast and suits the fabric-inspired pattern. Use a glossy finish when you want sharper lines.
Expert Tip from KidsCareIdeas: “Paint the widest plaid lines first and the narrow lines second. Secure each gold stud with builder gel before top coating.”
18. Glazed Cinnamon Nails With Subtle Brown Chrome
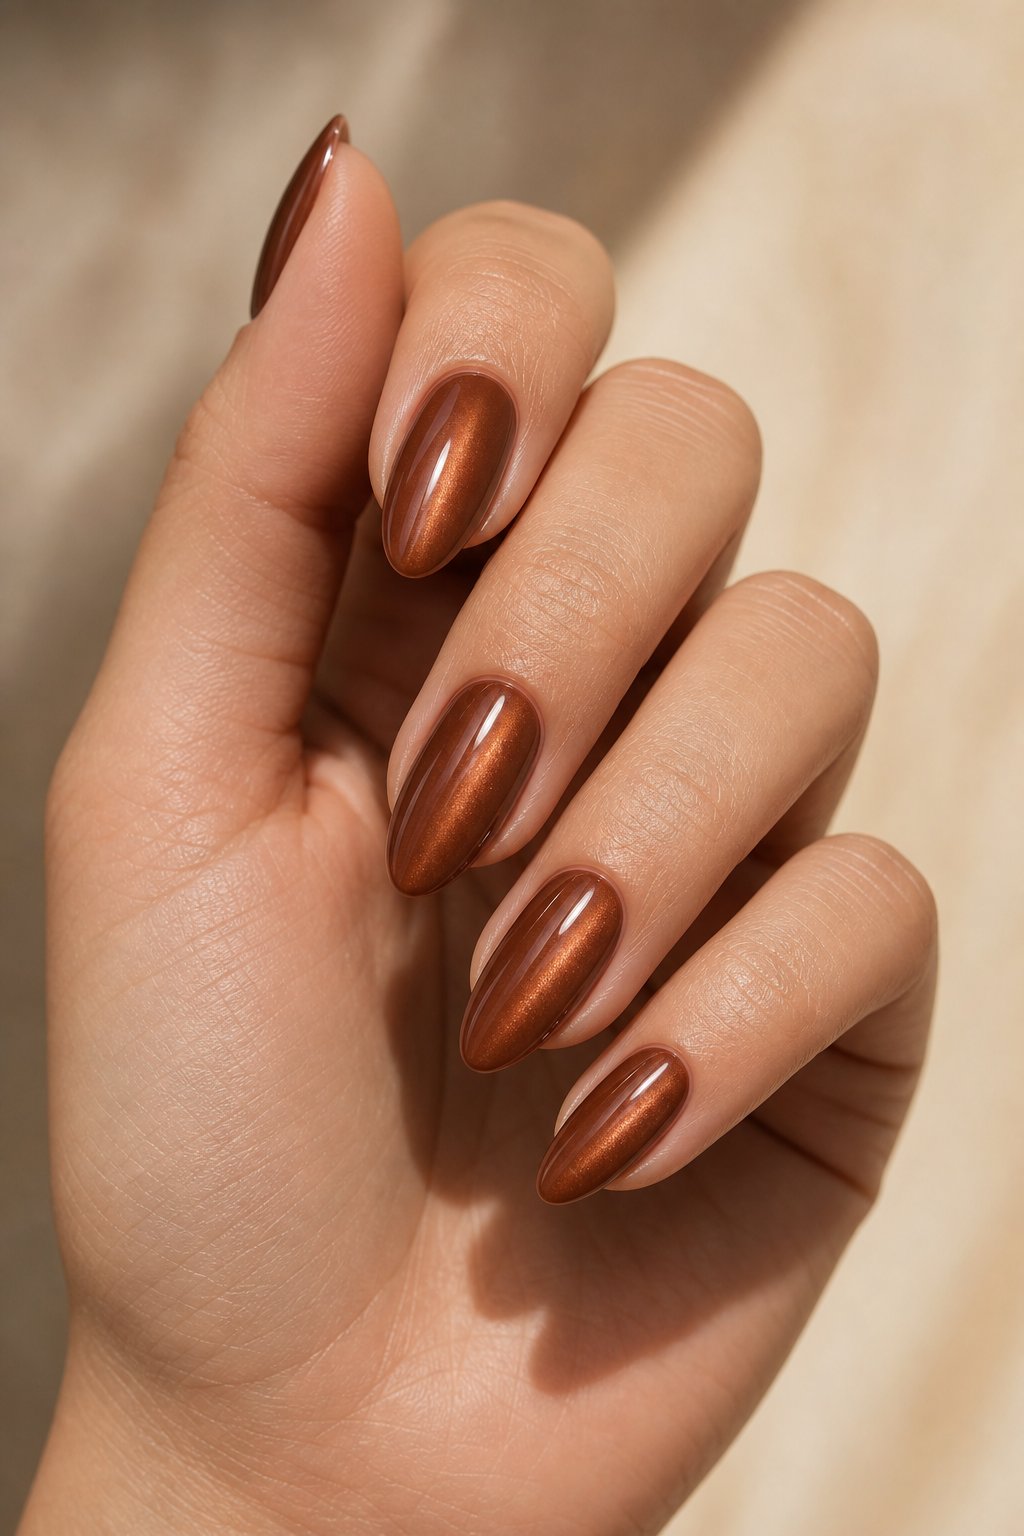
Glazed cinnamon nails give you an easy fall manicure with a soft reflective finish. Choose a cinnamon polish with warm orange-brown undertones. Add a sheer brown chrome layer for a gentle glow that catches light without looking mirror-bright. Almond nails make the shade feel refined and lengthen the visual line of each finger. Keep the surface smooth and free of added art. This color works with cream knits, denim, and dark leather. A glossy top coat protects the glaze and deepens the warmth.
Expert Tip from KidsCareIdeas: “Use a light hand with brown chrome powder. Too much pigment can cover the cinnamon shade and make the finish look flat.”
How to Choose Your October Nail Design
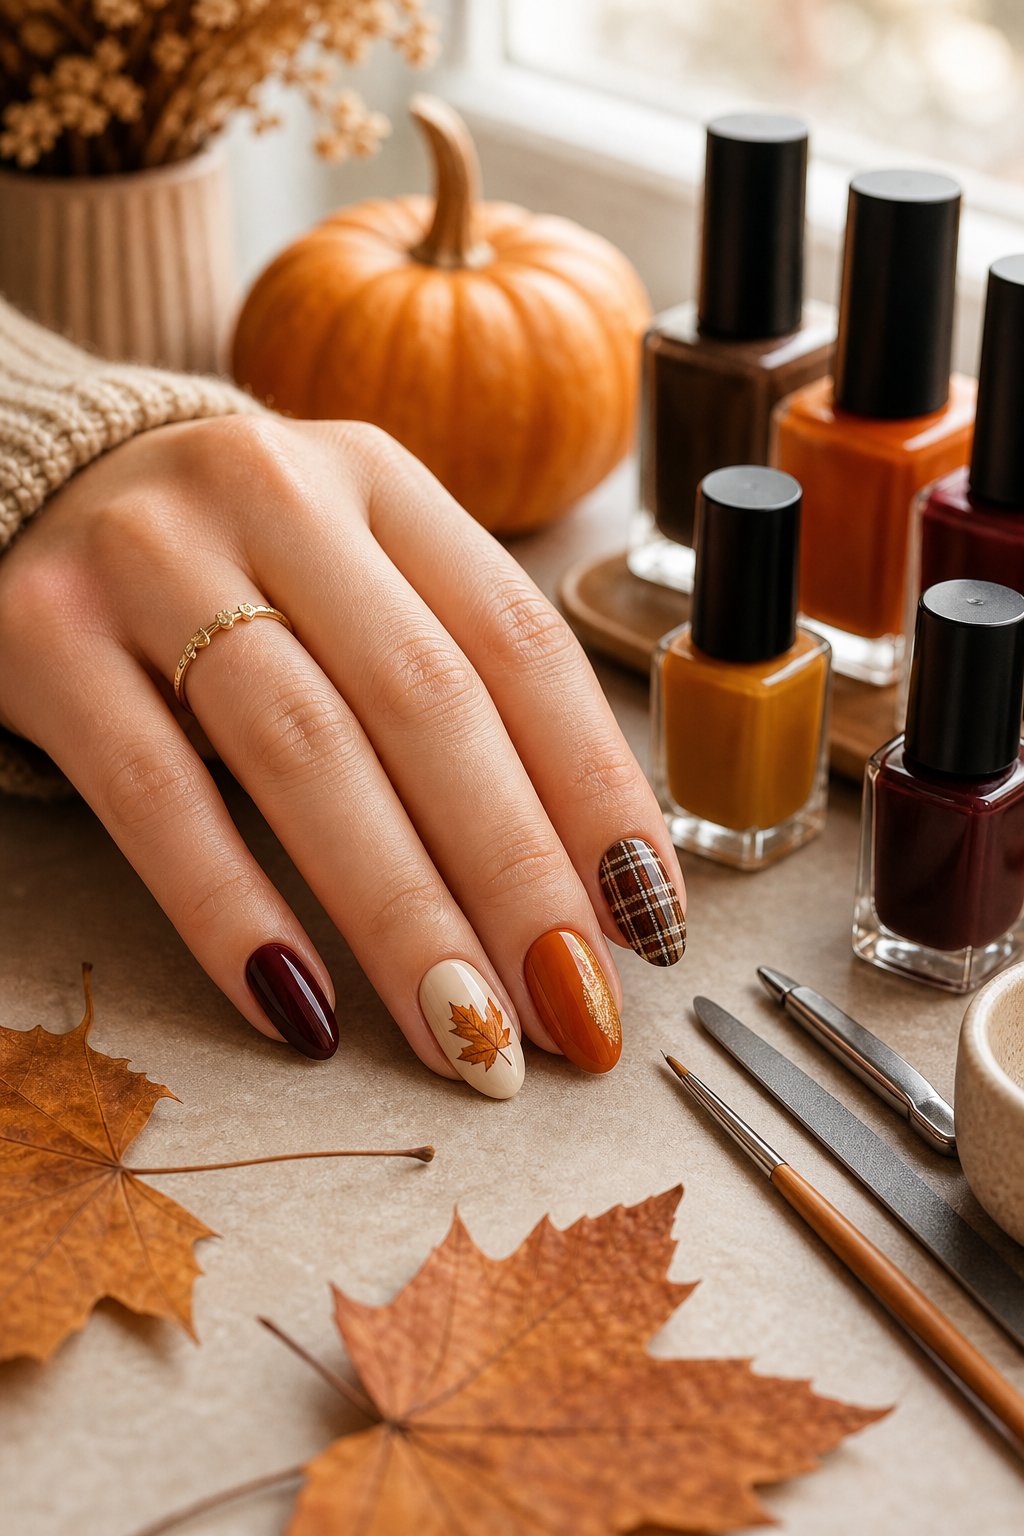
Your best October manicure matches your color comfort, nail length, and time for upkeep. Use the guide below to narrow the choices before your appointment or at-home session.
Which October Nail Colors Suit Your Style?
Warm colors such as burnt orange, cranberry, copper, and cinnamon suit a classic fall wardrobe. Black, navy, forest green, and deep plum give your look a cooler, moodier edge. Cream, mauve, and mocha soften Halloween art when you want a manicure that works past October 31.
How Much Nail Art Can Your Nail Length Handle?
Short nails work well with French tips, checkerboards, tiny bats, and single-color chrome. Medium and long nails leave more room for spiderwebs, swirls, plaid, and detailed skeleton hands. Place the most detailed design on one or two accent nails if your nail beds are small.
Should You Choose Gel, Press-Ons, or Regular Polish?
Gel suits layered art, chrome, charms, and raised details because each layer cures in place. Press-ons offer quick length and consistent shapes for event-ready designs. Regular polish fits simple color, French tips, and small art when you have extra drying time.
| Design | Main Mood | Best Shape | Finish |
|---|---|---|---|
| Cat Eyes | Moody | Almond | Glossy |
| Burnt Orange Tips | Playful | Short square | Glossy |
| Red Drips | Spooky | Almond | Glossy |
| Plum Moons | Luxe | Almond | Velvet |
| Pumpkin Patch | Cute | Round | Matte or gloss |
| Tortoiseshell Tips | Classic | Almond | Glossy |
| Green Aura | Enchanted | Oval | Glossy |
| Spiderwebs | Graphic | Coffin | Matte and gloss |
| Candy Corn | Bright | Almond | Glossy |
| Cranberry Foil | Dressy | Almond | Glossy |
| Mismatched Halloween | Playful | Any | Mixed |
| Mocha Swirls | Cozy | Almond | Glossy |
| Navy Constellations | Celestial | Oval | Glossy |
| Olive Checkerboard | Retro | Short square | Glossy |
| Skeleton Hands | Spooky | Square | Glossy |
| Copper Leaves | Metallic | Coffin | Chrome |
| Mauve Plaid | Soft grunge | Coffin | Satin |
| Cinnamon Glaze | Minimal | Almond | Glossy |
Tips for Making October Nail Art Last
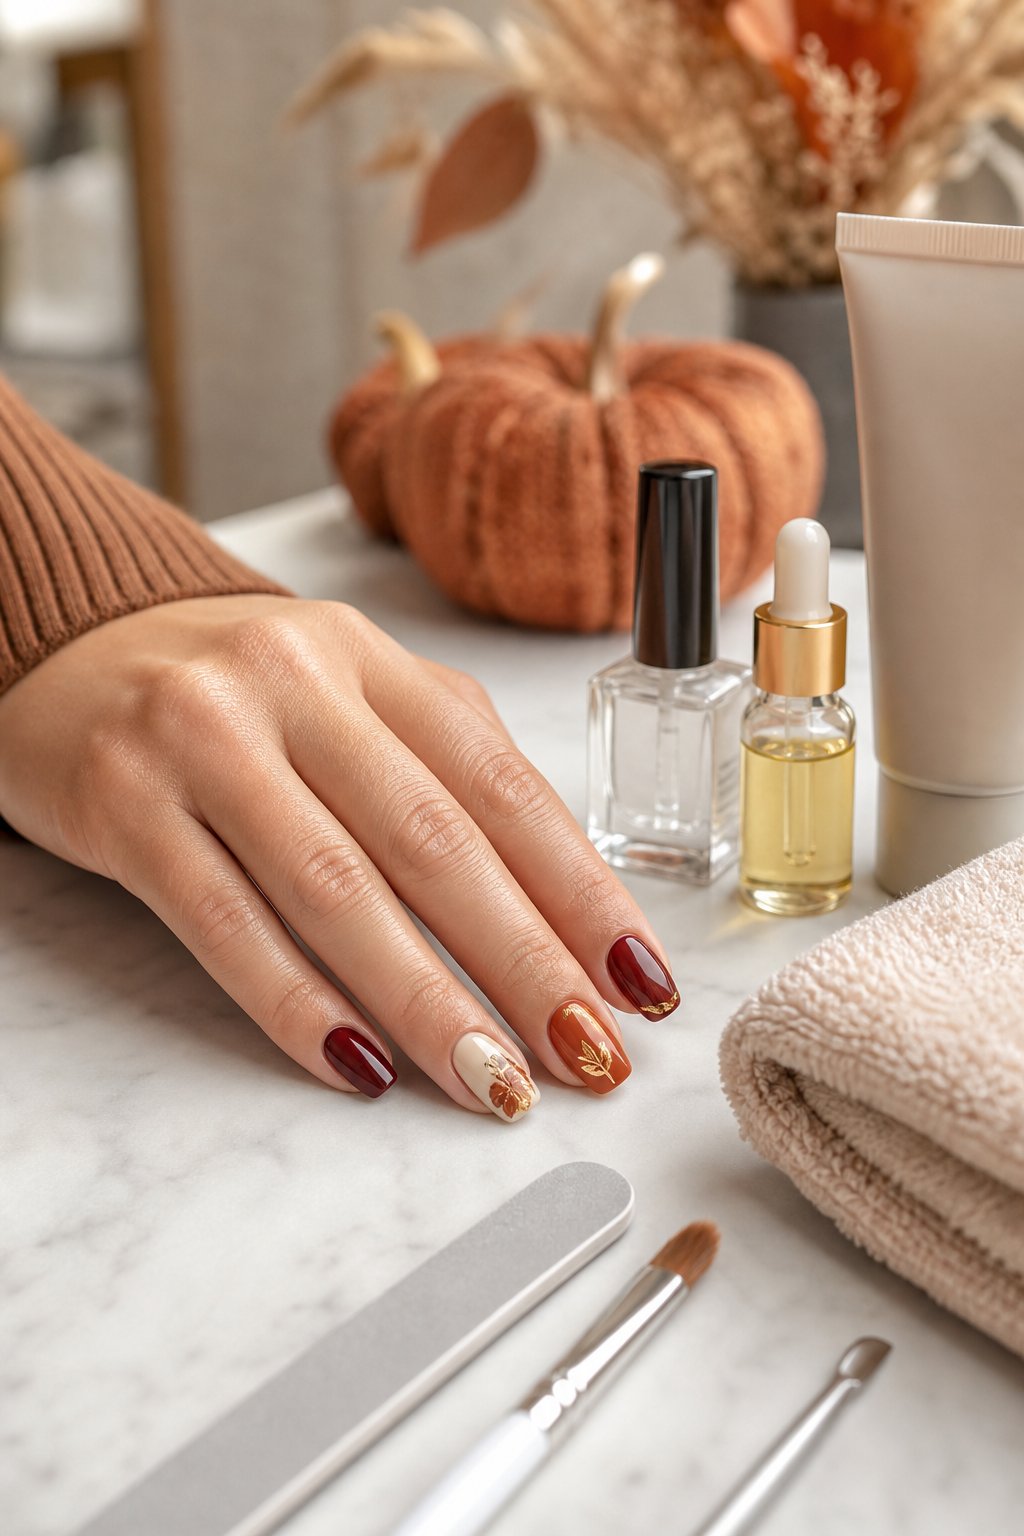
Good prep and careful sealing help your October manicure stay neat through hand washing, sweaters, and busy weekends. Protect the free edge and give raised decorations extra support.
How Do You Prep Nails for Long-Lasting Polish?
Remove old polish, wash away oils, and dry your hands fully. Push back loose cuticle tissue, shape the edges, and lightly buff shine from the nail plate. Wipe each nail with alcohol or a nail cleanser before base coat. Keep polish off the skin because flooding the cuticle line creates early lifting.
What Top Coat Works Best for Raised Nail Art?
Use a thicker gel top coat or builder gel around charms, studs, and embossed leaves. Brush around the decoration first, then cover the surrounding nail without burying the design. Cure for the full time listed by the product brand. Regular polish top coat works for flat art and small decals.
How Can You Keep Chrome and Foil Details From Chipping?
Seal chrome with a compatible no-wipe top coat and cap the free edge. Press foil flat before sealing so loose corners do not catch on clothing. Apply a second thin layer around raised pieces when needed. Wear gloves for cleaning and use cuticle oil daily to keep the surrounding skin comfortable.