November pedicures look best when they borrow from the month’s cozy color story: espresso, cranberry, burnt orange, olive, and soft latte shades. You can keep the design polished with a glossy solid color, or add a small detail on the big toe for a little seasonal personality.
The easiest way to make your fall pedicure last is to pair careful nail prep with thin polish layers and roomy shoes while the color sets.
1. Espresso Brown Gloss Pedicure
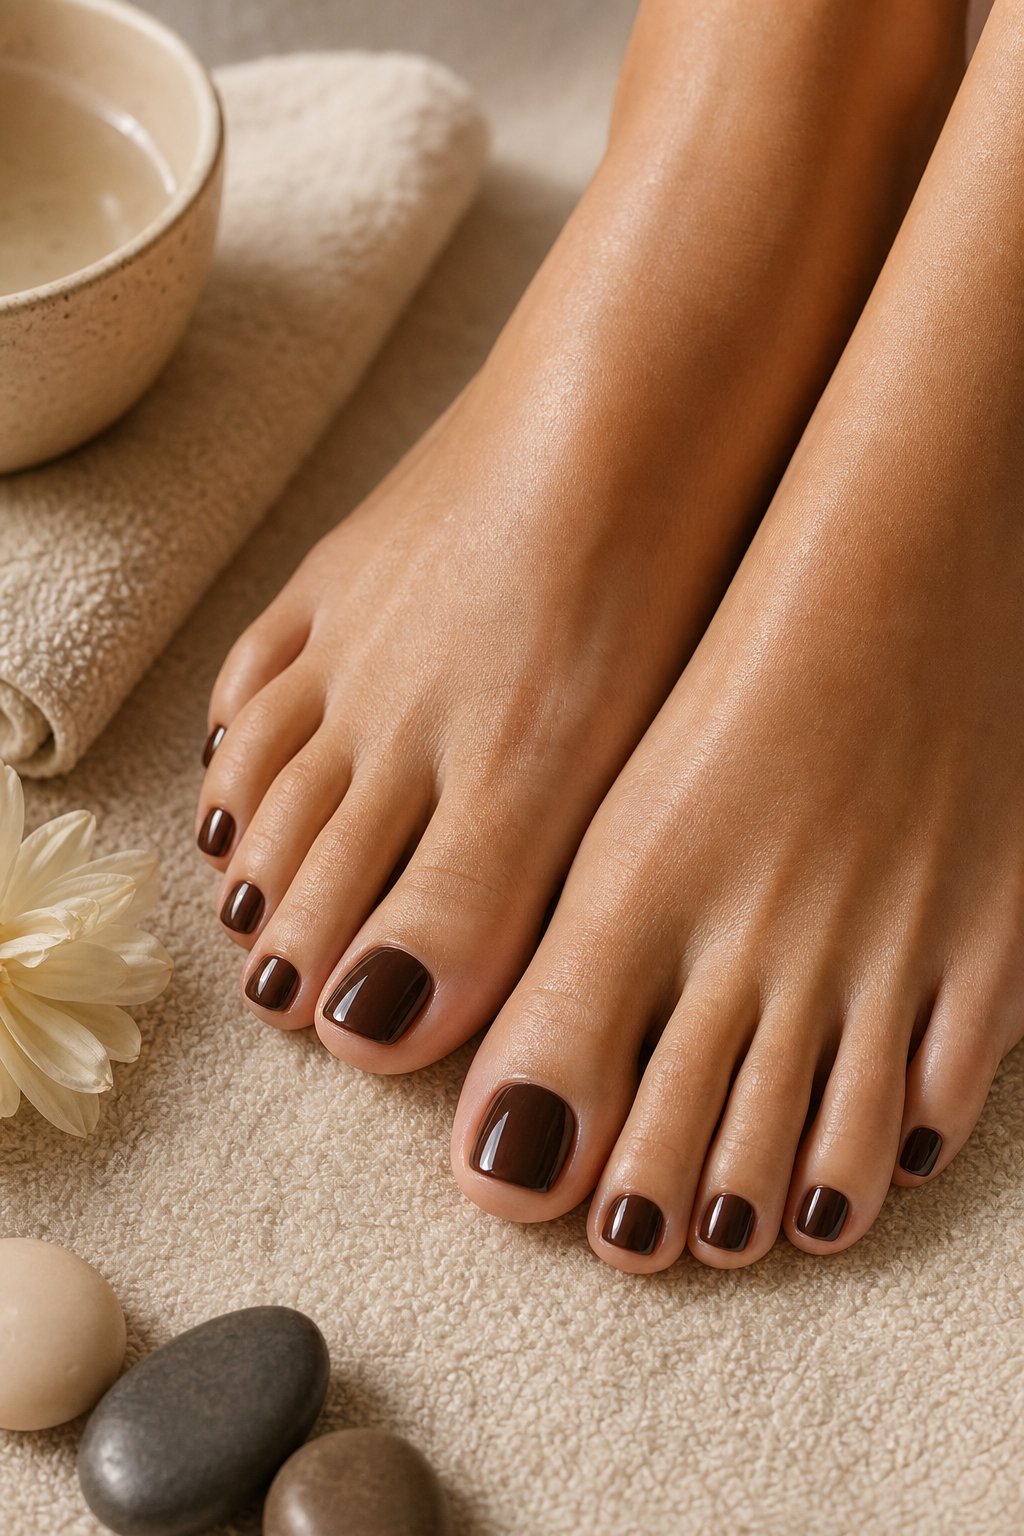
Espresso brown gives your toes a rich November look with almost no nail art required. Choose a warm chocolate shade if your skin has golden undertones, or pick a cooler coffee brown for pink or neutral undertones.
Two thin coats create a smoother finish than one heavy coat. A glossy topcoat makes the color look fresh and helps disguise small surface ridges.
Keep the nail shape short and softly squared for a clean finish inside boots. This design pairs neatly with cream sweaters, denim, and tan leather. The shade also grows out gracefully because its depth softens the line near your cuticles.
Expert Tip from KidsCareIdeas: “Apply polish to the center of each toenail first, then fill the sides with lighter strokes. Seal the free edge with topcoat to slow tip wear.”
2. Tortoiseshell Big Toe Accent Pedicure
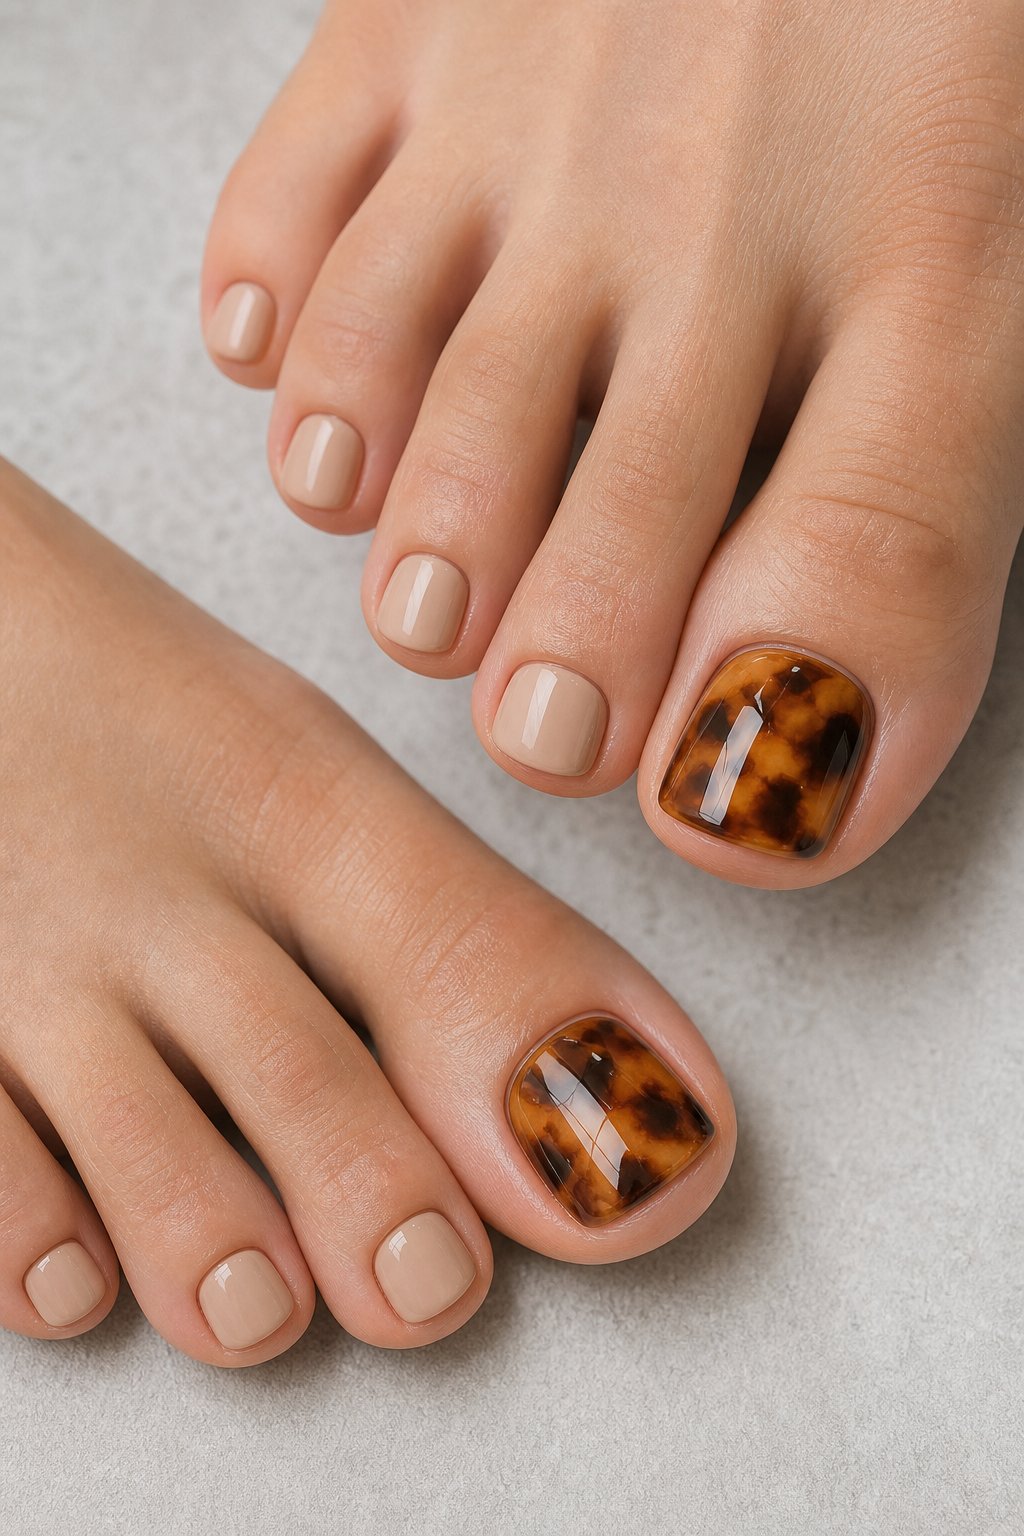
A tortoiseshell accent on each big toe brings warm pattern without making your pedicure feel busy. Start with a sheer beige or caramel base across every nail.
Layer irregular patches of amber, honey, and dark brown on the big toes, letting small areas of the base show through. A fine brush creates organic shapes that look better slightly uneven. Keep the smaller toes glossy nude so the accent remains the focus.
This design works well with gold jewelry and autumn accessories. Add two layers of clear topcoat for the glassy finish that makes tortoiseshell look like polished resin.
Expert Tip from KidsCareIdeas: “Place darker spots after the amber layer has dried for a cleaner pattern. Use a dotting tool to soften hard edges before adding topcoat.”
3. Burnt Orange French Tip Pedicure
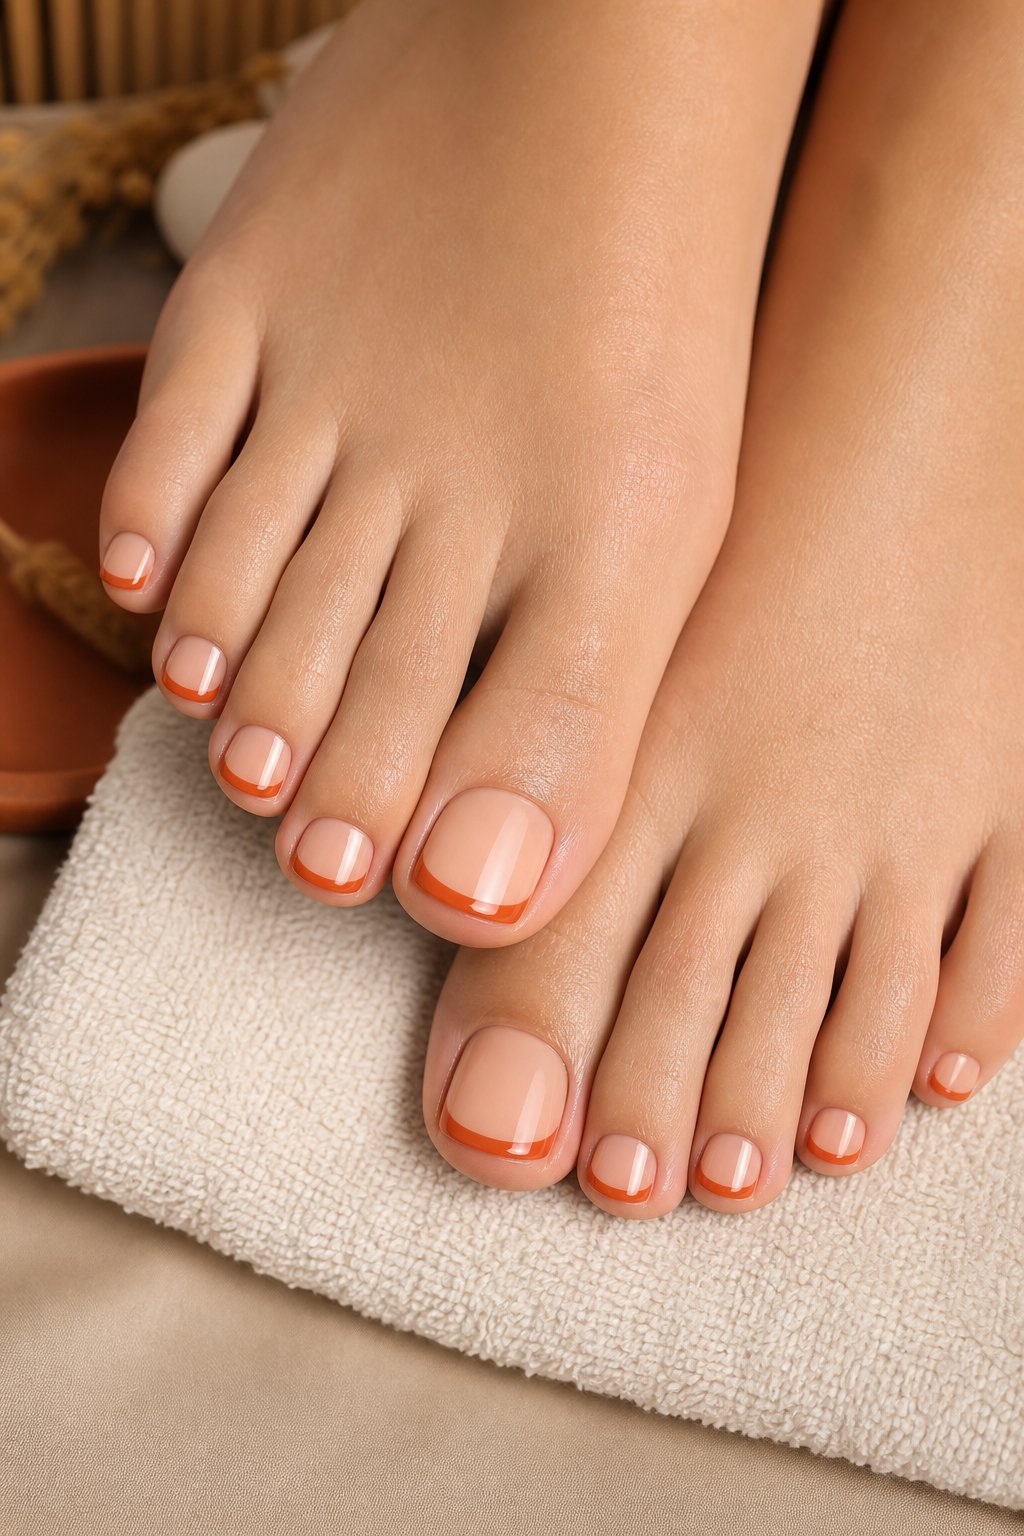
Burnt orange French tips give you a bright fall accent while keeping the base light and wearable. Use a milky nude polish on every toenail and let it dry before painting the tips. A thin curved line works best on short nails because it leaves plenty of negative space.
Choose a cinnamon orange with a brown undertone for a softer November feel. Repeat the color on the big toes with a slightly wider tip for balance. A glossy topcoat smooths the edge and adds shine. This look suits open-toe shoes now and makes a tidy transition into boot season.
Expert Tip from KidsCareIdeas: “Use French tip guide stickers only after the base feels fully dry. Remove them while the orange polish is still slightly wet for sharper lines.”
4. Deep Burgundy Chrome Pedicure
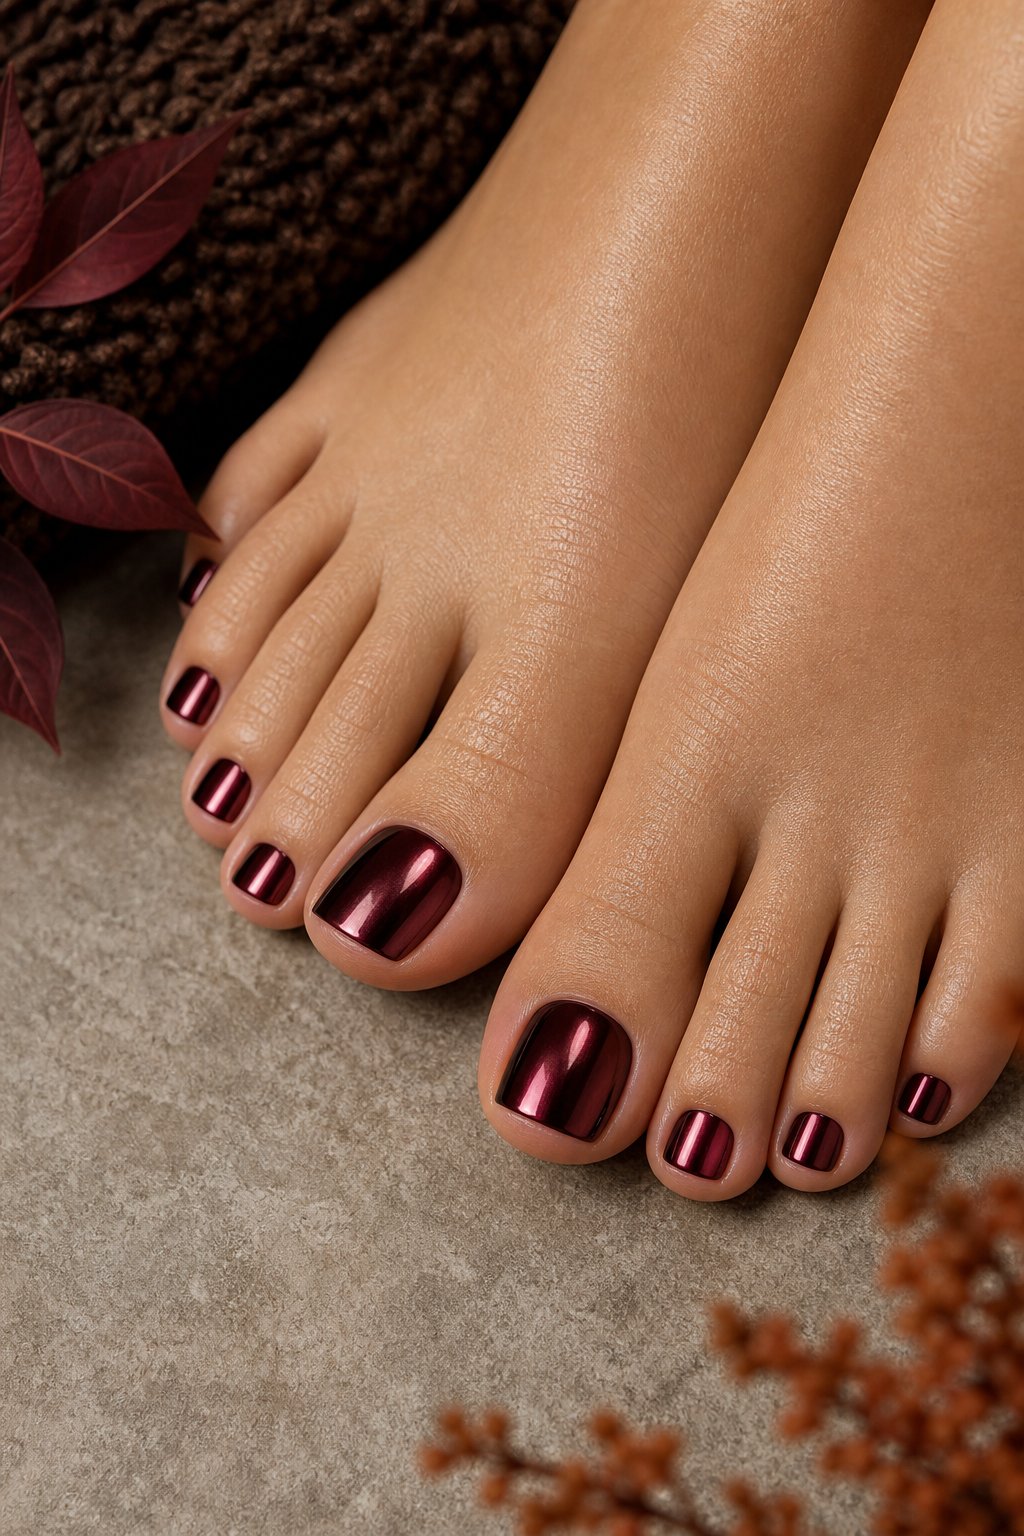
Deep burgundy chrome turns a classic wine shade into a reflective evening pedicure. Apply a black or burgundy gel base, then press chrome powder over the cured color for the strongest mirror effect.
Regular polish with metallic burgundy layers gives a similar glow with an easier home routine. Keep the nails evenly filed because reflective finishes draw attention to rough edges.
The color looks especially polished against neutral clothing and dark denim. Use a no-wipe gel topcoat for gel services, or a high-shine regular topcoat for air-dry polish. Give the toes extra drying time before putting on socks.
Expert Tip from KidsCareIdeas: “Buff the nail plate lightly and wipe away every trace of dust before chrome application. Any oil left behind will create dull patches.”
5. Olive Green and Gold Leaf Pedicure
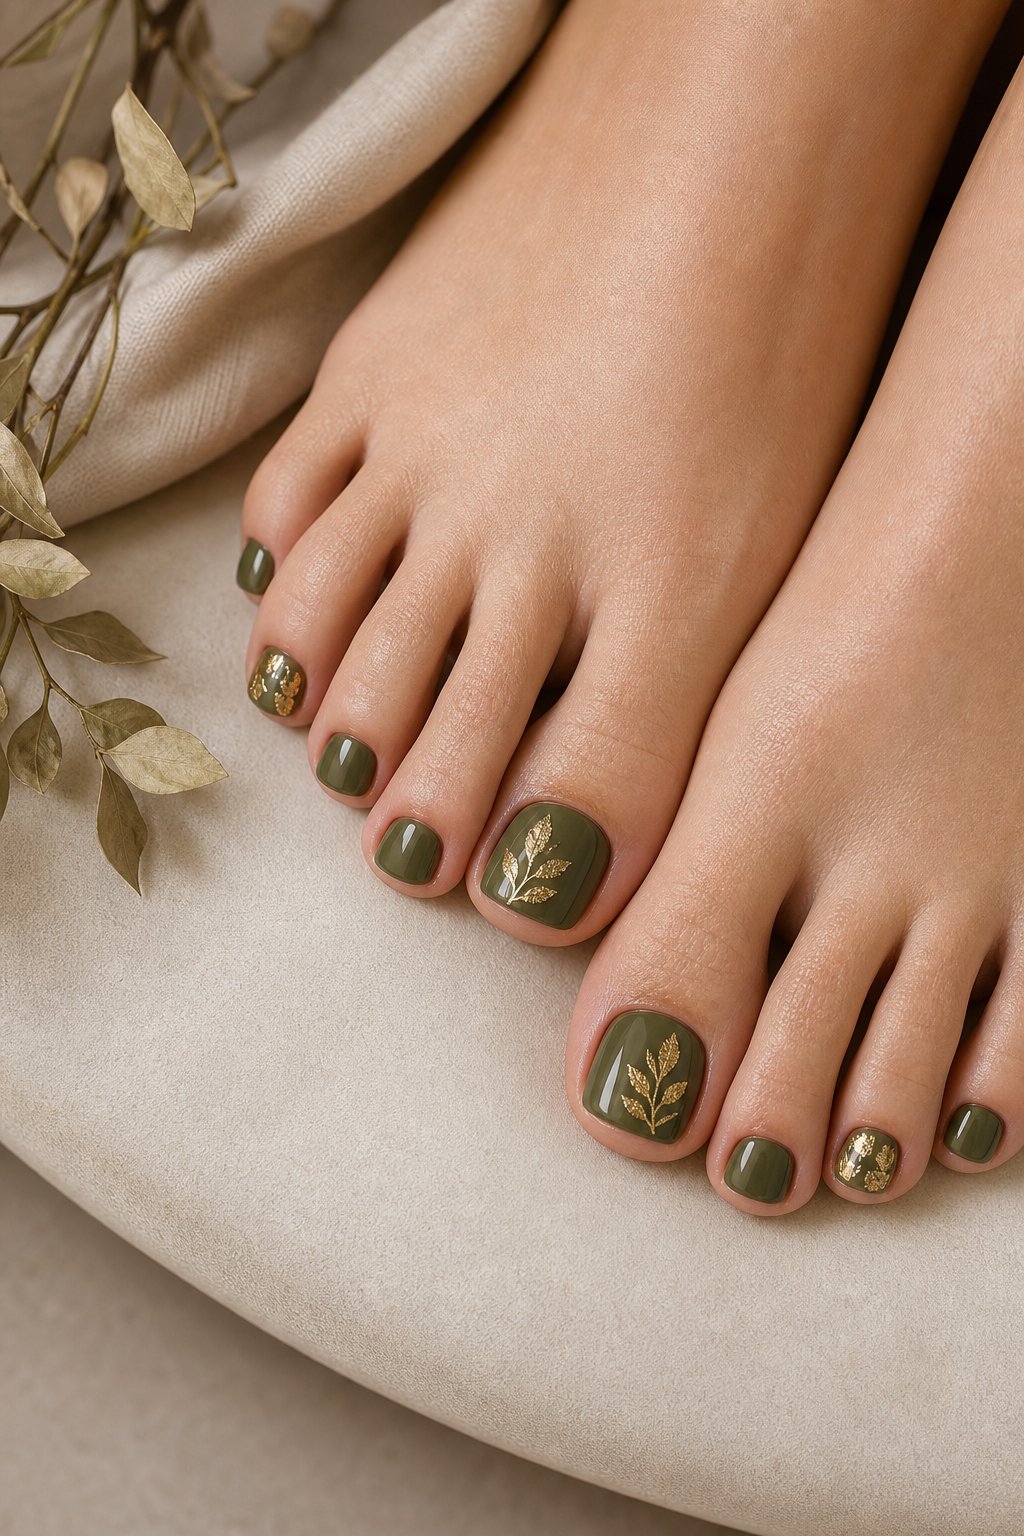
Olive green with small gold leaf details creates a grounded fall pedicure with a dressy finish. Paint the smaller toes olive and reserve the gold accents for the big toes. Press tiny foil fragments into a tacky clear layer, keeping the pieces sparse near one corner.
A satin or glossy topcoat changes the mood, with shine feeling more festive and satin looking softer. This color complements brown boots, rust clothing, and cream knitwear. Keep the foil pieces flat so they do not catch on socks. A short rounded shape helps the design look neat as it grows.
Expert Tip from KidsCareIdeas: “Tear foil with tweezers for natural edges instead of cutting matching shapes. Press each piece down firmly before sealing the entire nail.”
6. Latte Swirl Big Toe Nail Art
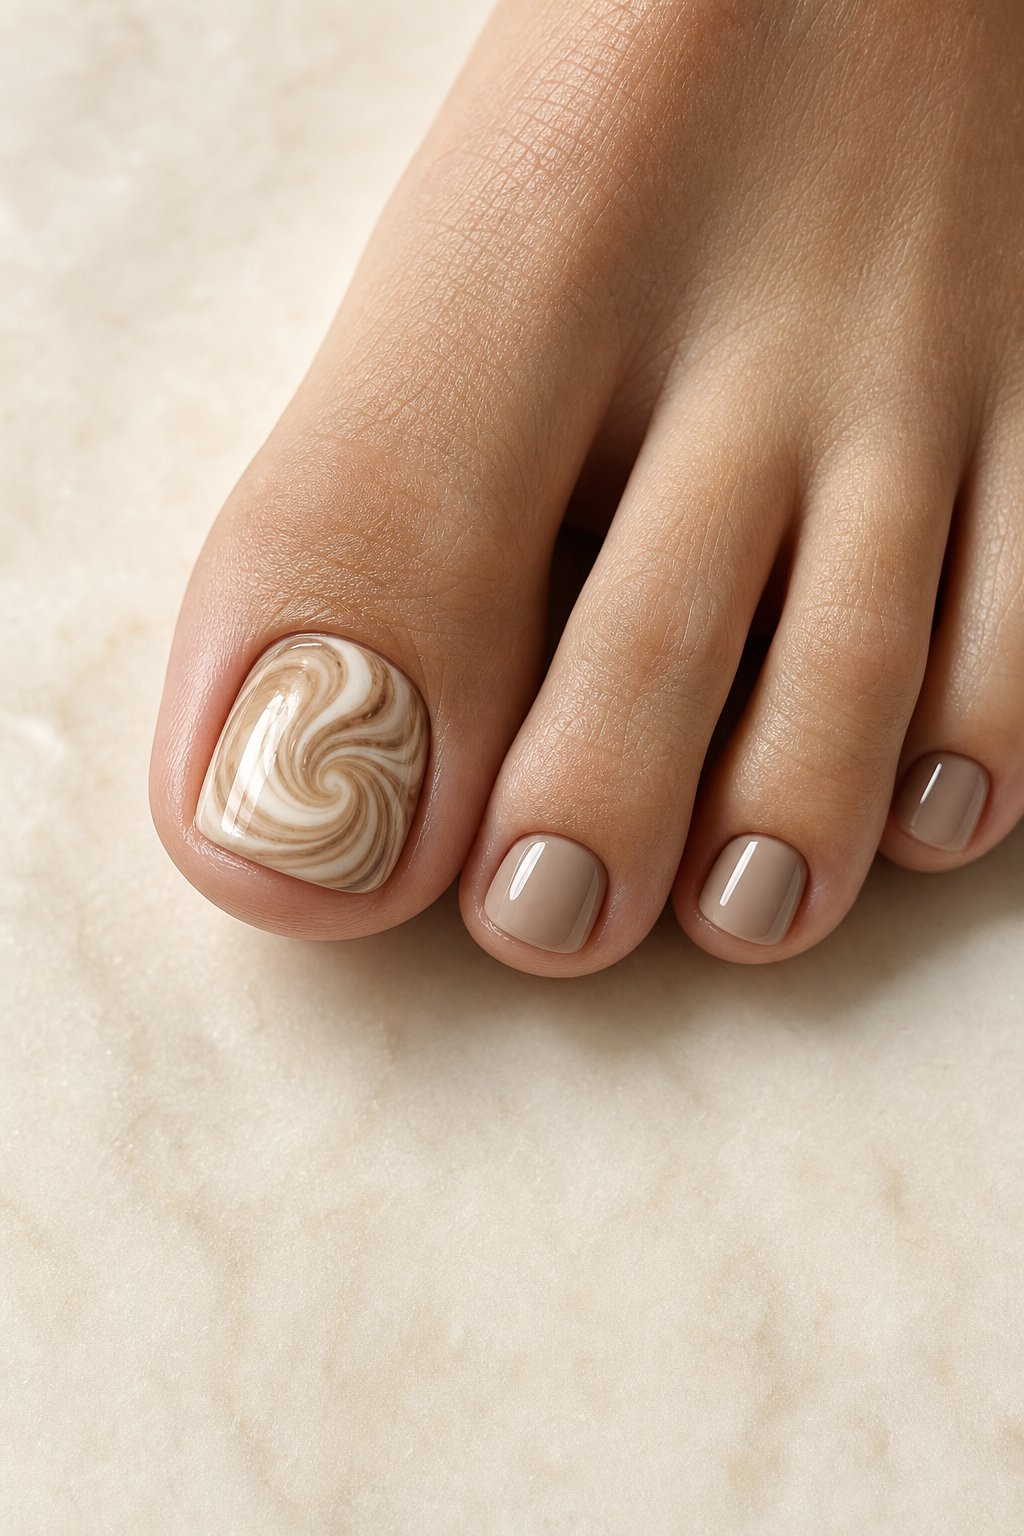
Latte swirl art gives your big toes a cozy café look through curved bands of cream, tan, and mocha. Keep the remaining nails in a sheer beige so the swirls have room to shine. Use a fine liner brush and pull each curve in one smooth motion.
Slightly different patterns on each big toe make the design feel hand-painted and relaxed.
A glossy topcoat blends the layers and makes the colors look creamy. This style suits short nails because the lines follow the natural width of the toe. Let each shade settle briefly before adding the next curve to prevent muddy edges.
Expert Tip from KidsCareIdeas: “Start with the lightest stripe and build toward the darkest brown. Clean your brush between colors to keep each swirl crisp.”
7. Plaid Flannel Accent Toe Design
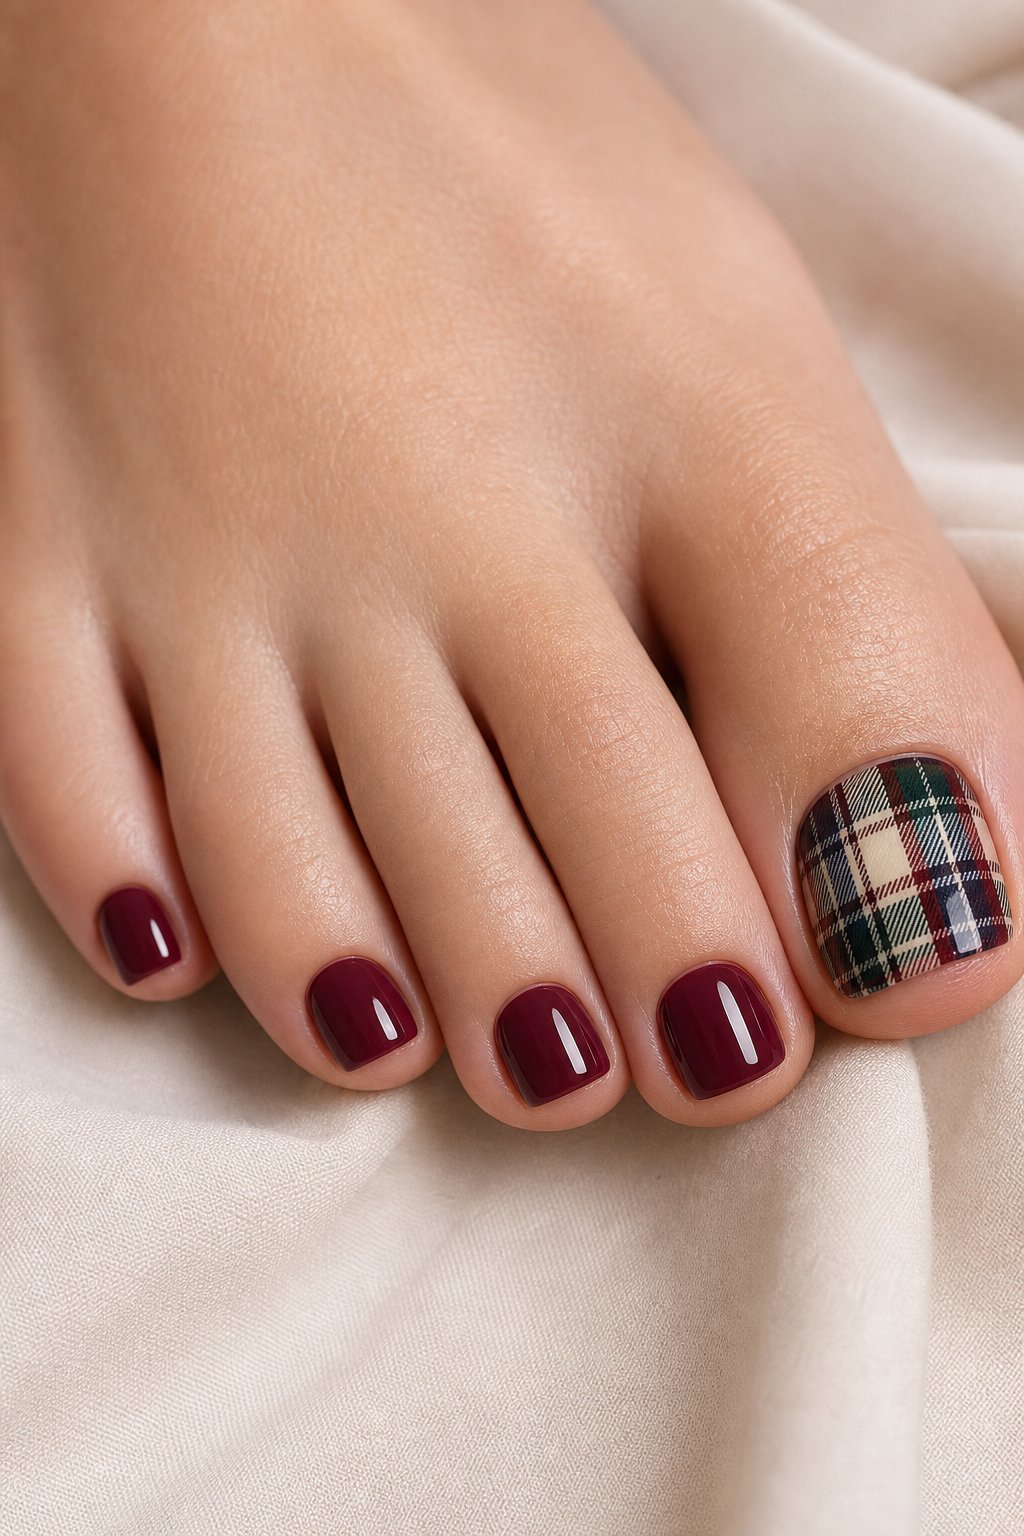
A plaid accent toe brings flannel-shirt charm to a simple neutral pedicure. Use a warm beige base on every nail, then paint thin rust, burgundy, and brown lines on one big toe. Vary the line width to mimic woven fabric and leave small spaces between the stripes.
A fine detail brush gives you more control than a standard polish brush. Keep the other big toe solid burgundy for a coordinated pair. Matte topcoat creates a soft fabric effect, while gloss makes the plaid look sharper. This design needs a steady hand, so use striping tape if you prefer clean geometry.
Expert Tip from KidsCareIdeas: “Paint the widest stripe first and let it dry before crossing it with thinner lines. A barely damp cleanup brush keeps the corners tidy.”
8. Pumpkin Spice Micro French Pedicure
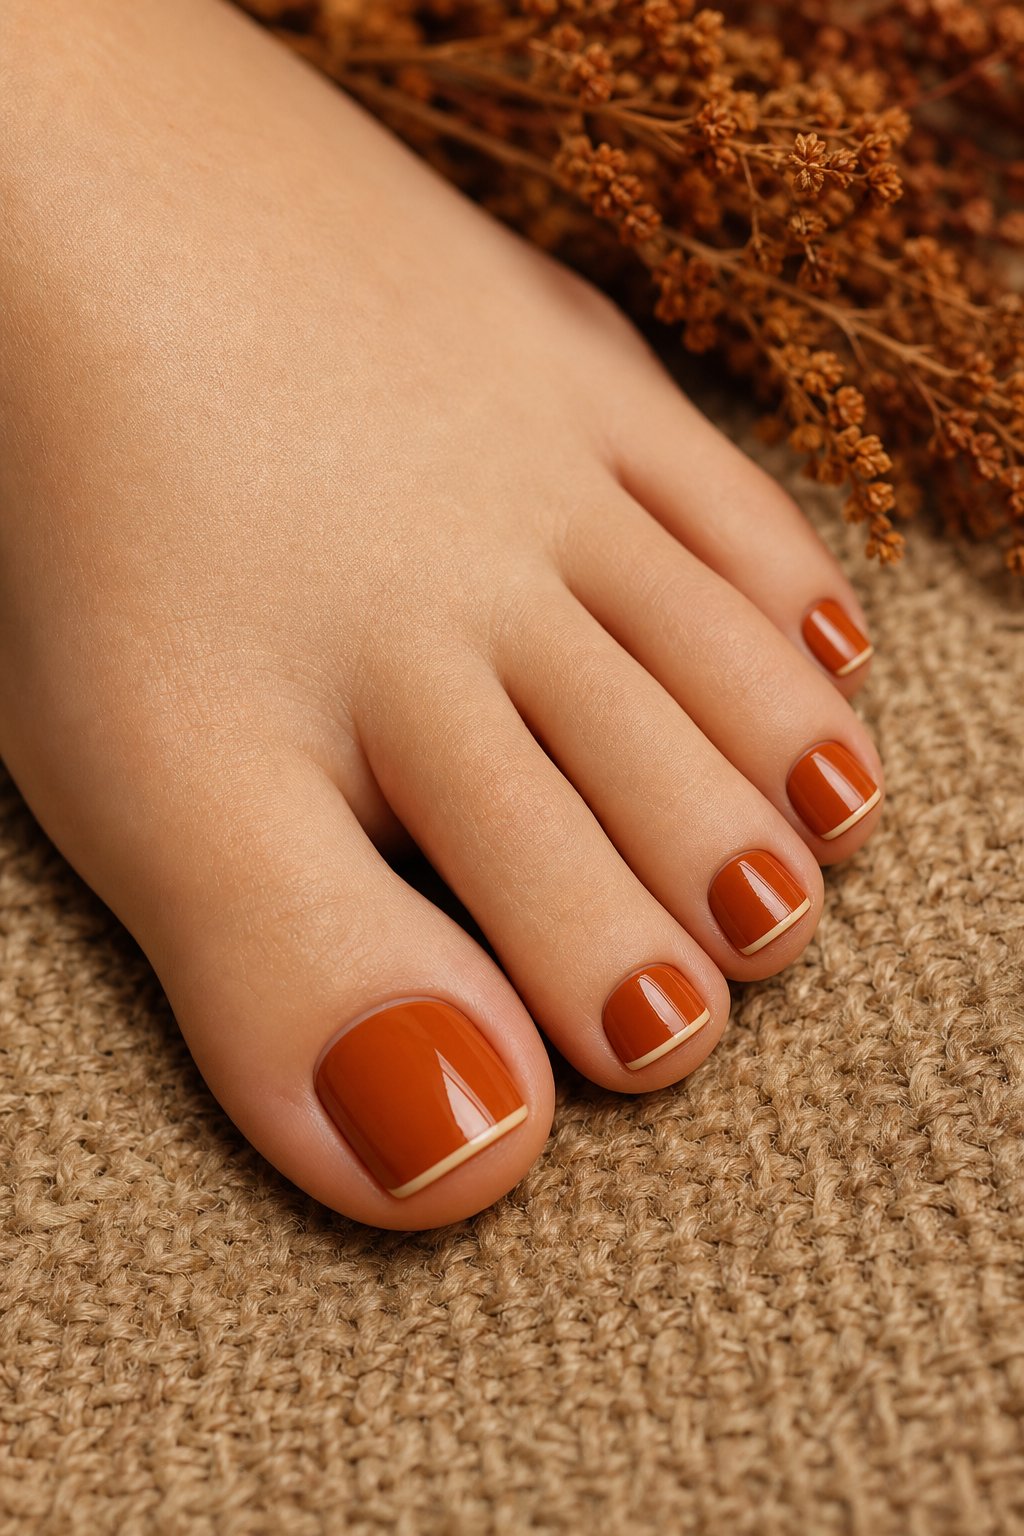
Pumpkin spice micro French tips add a small seasonal detail to a warm orange pedicure. Choose a muted pumpkin base and draw very thin cream lines along the tips. The narrow contrast keeps the look refined and prevents orange from feeling too loud. Paint the same design on each toe for a tidy, balanced result.
A glossy finish brings out the warmth of the orange and cream pairing. This combination looks playful with sneakers and polished with sandals. Use a liner brush for the tips because the regular brush may lay down too much product.
Expert Tip from KidsCareIdeas: “Rest your painting hand on a firm surface before drawing each tip. Short strokes create smoother lines than one long sweep.”
9. Cranberry Red Glitter Pedicure
Cranberry red glitter gives your November toes festive sparkle with a deep berry base. Choose fine shimmer for a smooth finish or chunky glitter for stronger light reflection. Two thin coats keep the color rich without creating a thick layer near the cuticles.
Apply glitter densely to the big toes and use one lighter coat on the smaller nails for a gentle fade. A thick gel-like topcoat smooths rough glitter particles and adds shine.
This shade works for Thanksgiving gatherings, holiday events, and everyday wear. Remove it with acetone wraps because glitter polish holds tightly to the nail surface.
Expert Tip from KidsCareIdeas: “Pat glitter polish onto the nail instead of brushing it back and forth. This builds even sparkle and reduces bald patches.”
10. Mocha Marble Toe Nails
Mocha marble creates a soft stone effect with layers of cream, caramel, and chocolate brown. Begin with a pale coffee base, then add thin wavy lines while the surface remains slightly tacky. Drag a detail brush through each line once to blur it without losing the veining.
Cover every nail for a full statement or place the marble on both big toes for a quieter design. High gloss makes the pattern look wet and polished. Keep the veins sparse because crowded lines quickly turn muddy on a small nail. This palette blends easily with beige, black, denim, and rust clothing.
Expert Tip from KidsCareIdeas: “Use a nearly dry brush for the marble veins so the colors soften without spreading across the whole nail. Finish with two thin layers of topcoat.”
11. November Birthstone Citrine Gem Accent Pedicure
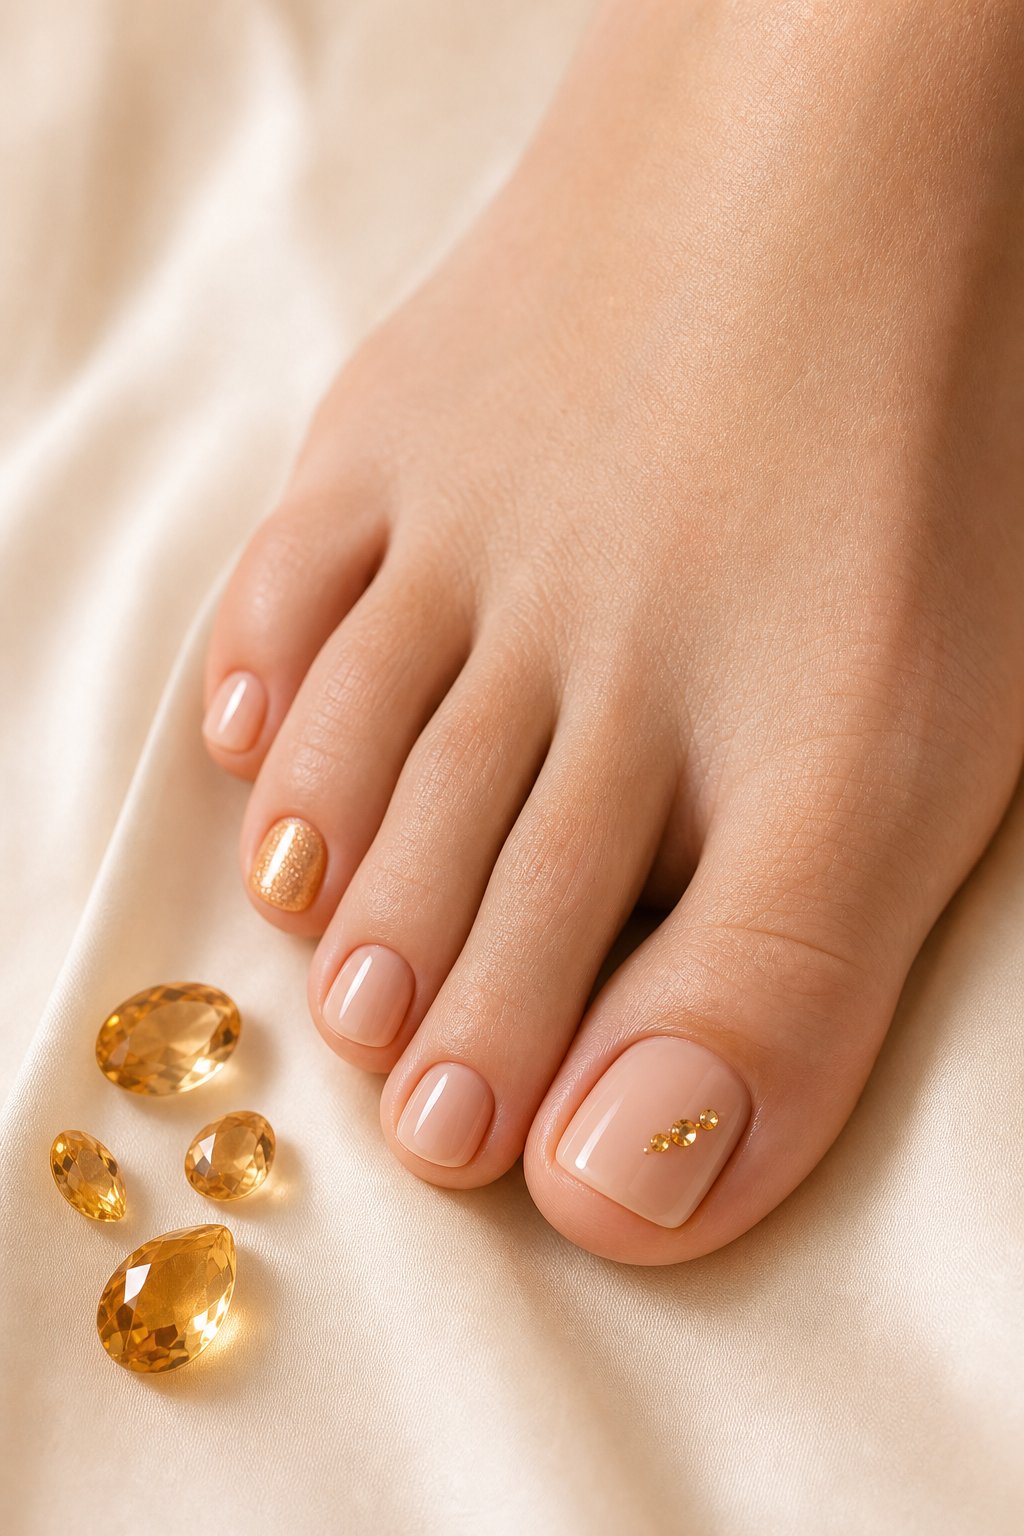
Citrine gem accents give a November pedicure a golden birthstone detail over a clean nude base. Paint every nail sheer beige, then place one small amber rhinestone on each big toe.
Add a tiny gold dot near the stone if you want more sparkle without extra pattern. Keep the rest of the nails plain so the gems look intentional. Nail glue holds decorations more securely than polish alone, especially on toes that rub against footwear.
A rounded square shape supports the jewel without making the nail look crowded. This design feels special for birthdays while remaining easy to wear through the month.
Expert Tip from KidsCareIdeas: “Place gems with wax pencil or angled tweezers after topcoat has set slightly. Seal around the edges with clear gel for a smoother finish.”
12. Matte Forest Green Pedicure With Gold Stripe
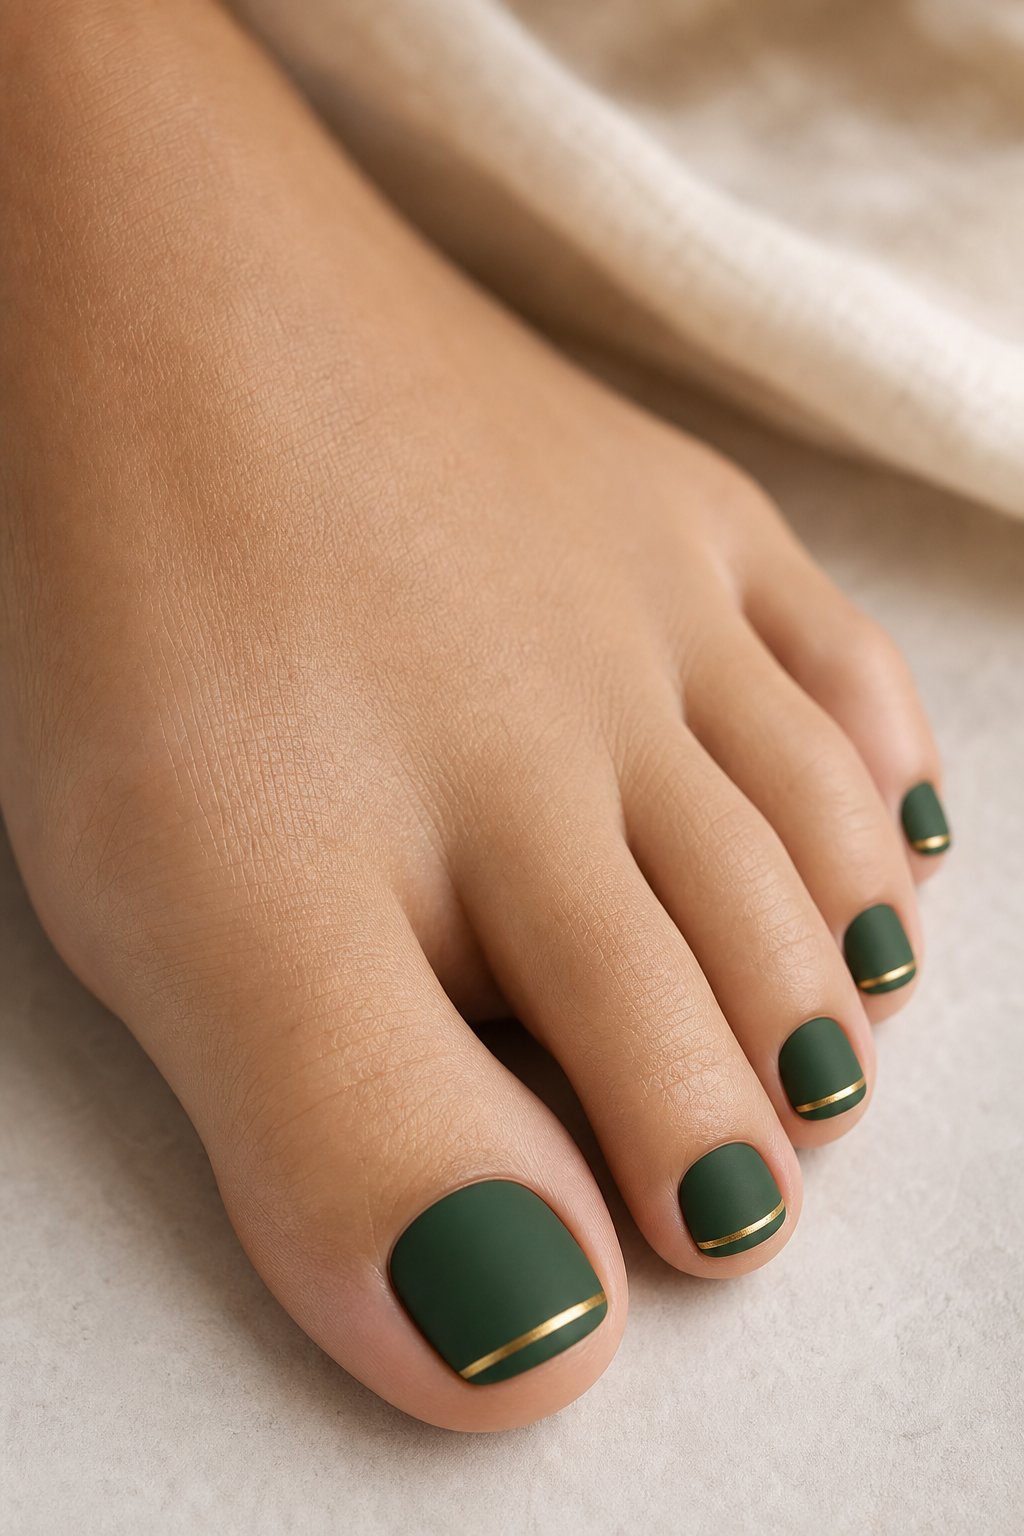
Matte forest green with a thin gold stripe gives your toes a clean, tailored fall look. Paint the green across every nail and let it dry fully before adding the metallic detail.
Place one vertical or diagonal stripe on each big toe for a simple graphic finish. Matte topcoat softens the green, while the gold remains bright against it.
Use striping tape for matching lines or a fine brush for a more relaxed hand-painted effect. The deep color looks rich with camel, cream, and charcoal clothing. Reapply matte topcoat when the surface begins to lose its soft texture.
Expert Tip from KidsCareIdeas: “Press tape edges down with a wooden stick before painting gold. Pull the tape away while the stripe is still wet for a clean border.”
13. Copper Foil Nude Pedicure
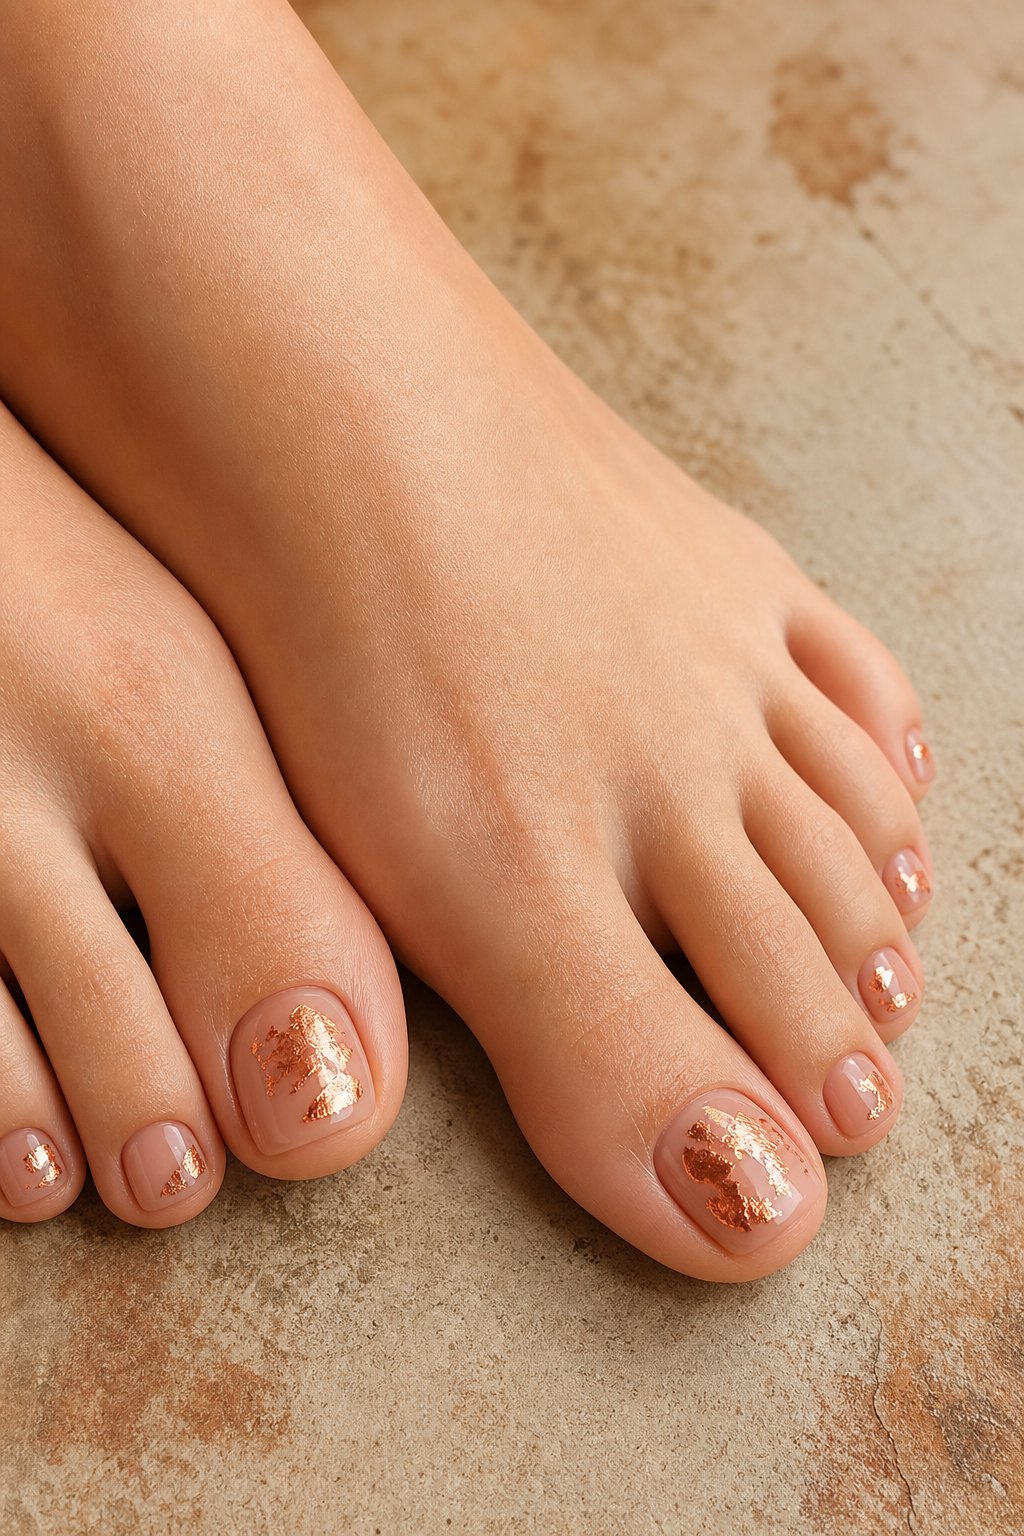
Copper foil over nude polish gives you a warm metallic accent that stays light and wearable. Choose a nude base close to your skin tone, then add small foil pieces along one side of each big toe.
Leave the smaller nails glossy and plain for visual breathing room. Copper pairs well with rust sweaters, brown boots, and gold-toned jewelry.
The foil catches light without covering the full nail, so the design remains neat as it grows. Seal the pieces with a smooth topcoat and check the sidewalls for lifted edges. A soft almond or rounded shape makes the placement look more natural.
Expert Tip from KidsCareIdeas: “Use fewer foil pieces near the cuticle because that area receives the most rubbing. Press down the corners before sealing.”
14. Thanksgiving Turkey Big Toe Nail Art
Thanksgiving turkey art turns your big toe into a cheerful holiday detail. Paint a warm cream base, then add a small brown turkey body near the center of the nail.
Use rust, orange, mustard, and red dots or short feathers around it. Keep the smaller nails in a matching pumpkin or cranberry shade so the character stays easy to see.
A detail brush helps with the beak, eyes, and feather lines. Finish with clear topcoat after the art dries to prevent color drag. This playful design suits family gatherings and casual holiday outfits.
Expert Tip from KidsCareIdeas: “Build the turkey from large shapes first, then add tiny facial details last. Let each color dry briefly so the feathers keep their edges.”
15. Autumn Leaf Silhouette Toe Nail Design
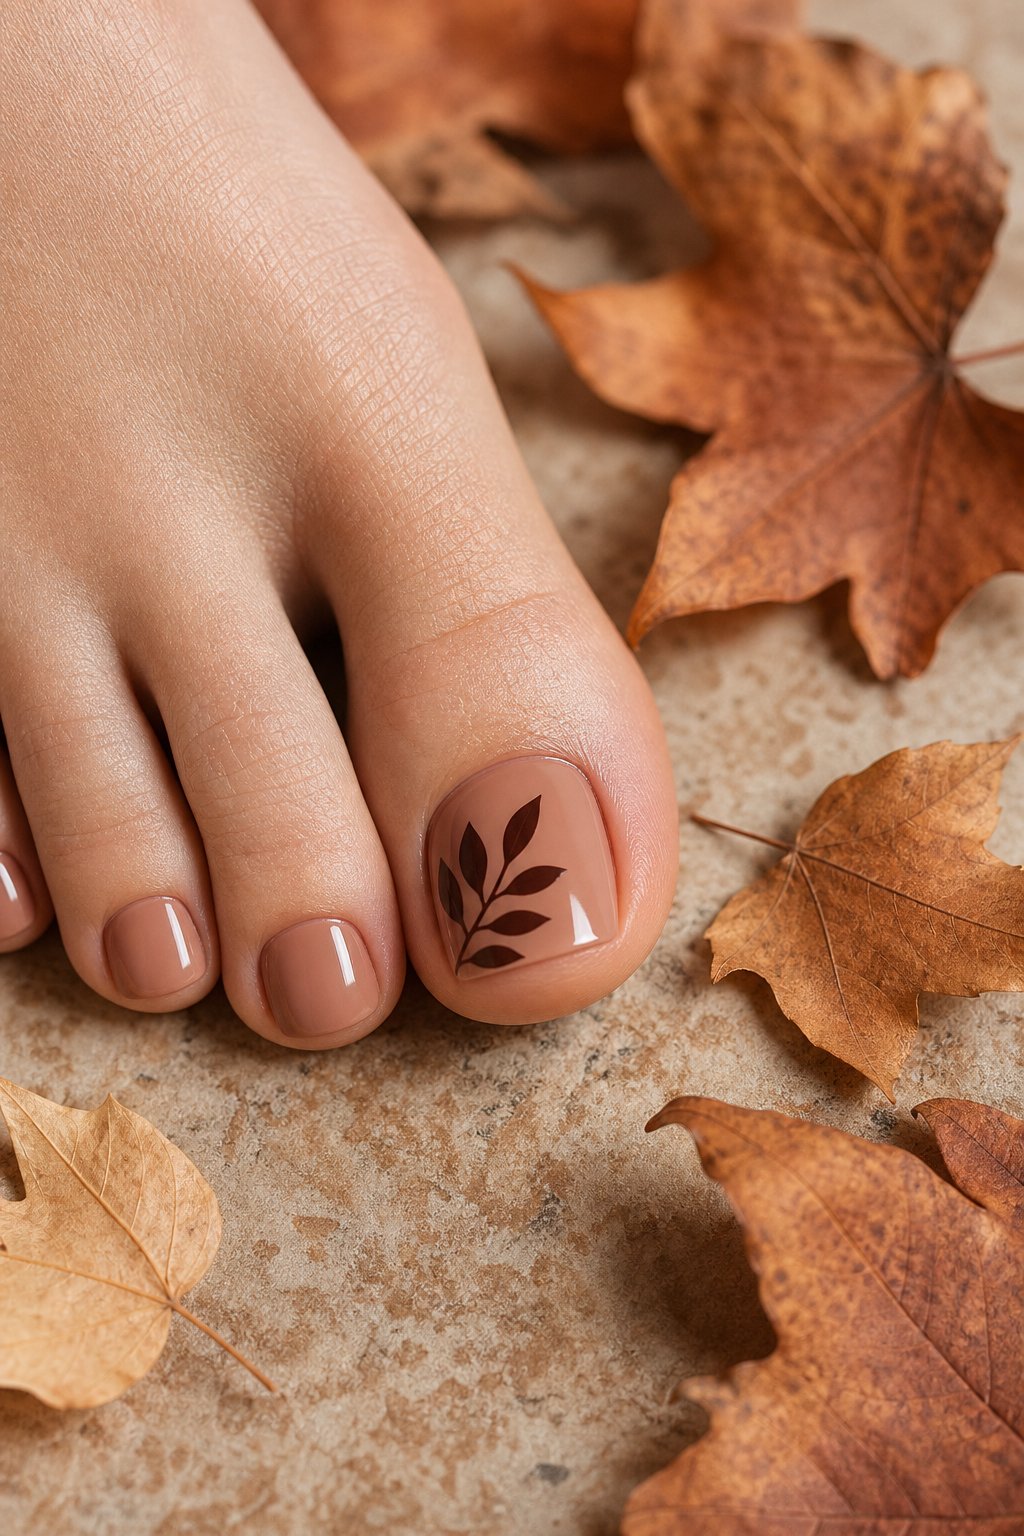
An autumn leaf silhouette gives your big toe a crisp seasonal focal point. Use a translucent beige or soft orange base, then paint one dark leaf in brown, burgundy, or forest green. A simple outline with a few inner veins reads clearly on a small nail.
Keep the remaining toes in a matching solid shade to frame the artwork. Add one gold dot at the leaf stem if you want a small glint.
Matte topcoat creates a paper-like finish, while gloss makes the silhouette look richer. This design works best with short, neatly shaped nails.
Expert Tip from KidsCareIdeas: “Sketch the leaf shape with a dotting tool before filling it in. Keep the veins short and centered so the design stays recognizable.”
16. Black Cherry French Pedicure
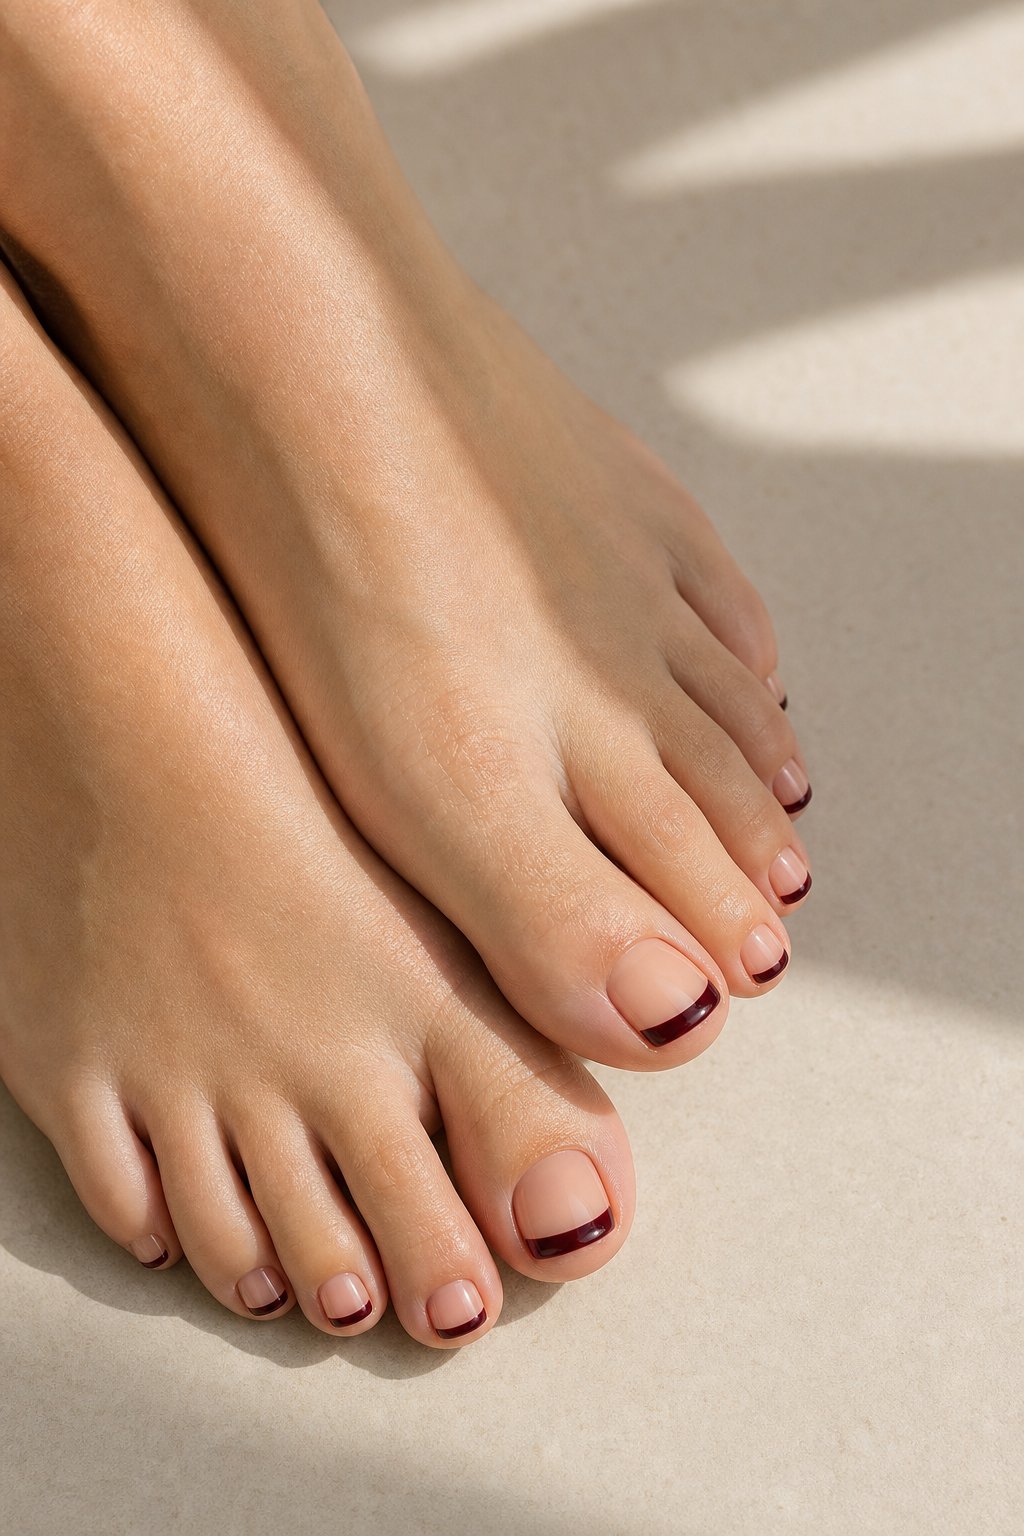
Black cherry French tips offer a moody November finish with a lighter base underneath.
Apply a sheer pink or beige base, then paint deep burgundy across the free edge. Keep the curve shallow on shorter nails so the tip does not cover too much of the base. A high-shine topcoat gives the dark color a polished, jewel-like look.
Repeat the design on every toe for a sleek result, or reserve the deepest tip for each big toe. This shade complements black, gray, cream, and berry clothing. Clean the sidewalls with a small brush dipped in remover for sharp edges.
Expert Tip from KidsCareIdeas: “Rest the polish brush near the center of the tip and roll the toe gently beneath it. This creates an even curve with less brush movement.”
How to Choose a November Toe Nail Design
Which November Colors Work Best With Your Skin Tone?
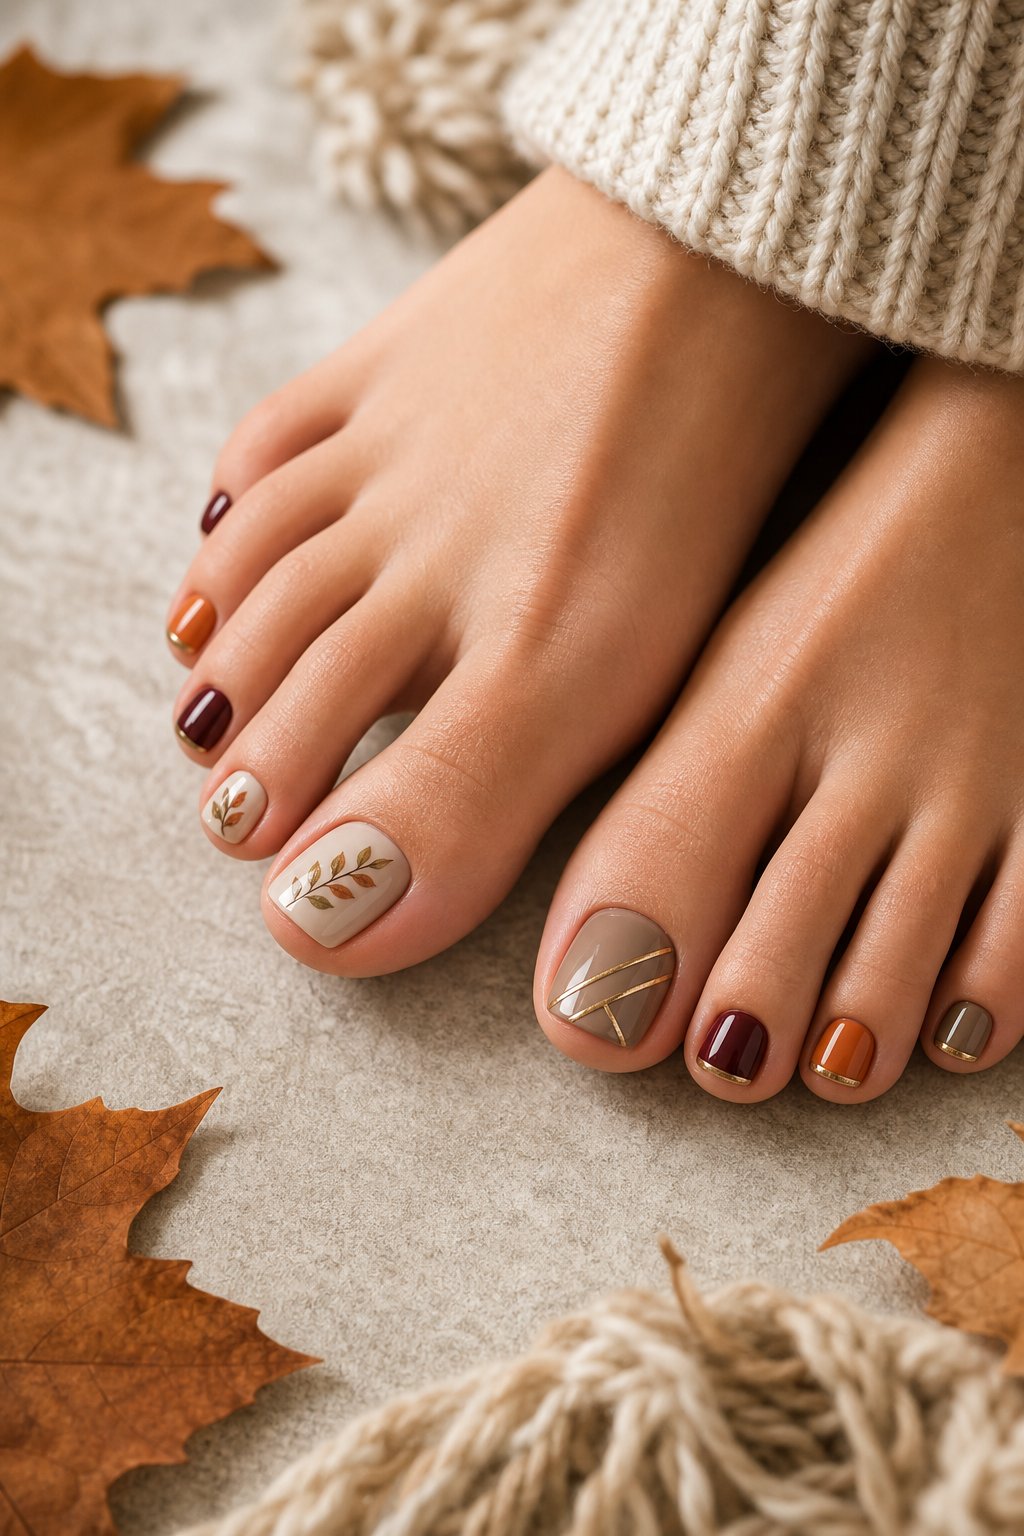
Warm skin tones pair well with copper, burnt orange, olive, caramel, and golden brown. Cool undertones suit cranberry, black cherry, burgundy, forest green, and blue-leaning red. Neutral undertones give you room to mix shades across both groups.
A sheer nude base helps every color feel balanced. Test one stripe against your skin in daylight before committing to a full pedicure, especially with orange or brown shades.
Should You Choose Gel, Regular Polish, or Press-On Toenails?
Gel gives you a hard, glossy finish and suits detailed art or long wear. Regular polish offers easy color changes and works well for solid shades, French tips, and simple accents. Press-on toenails provide a quick style for an event, though careful sizing and strong adhesive help prevent lifting.
| Design | Main color | Detail level | Finish | Best setting |
|---|---|---|---|---|
| Espresso Brown Gloss | Espresso | Low | Glossy | Everyday |
| Tortoiseshell Big Toe Accent | Caramel and brown | Medium | Glossy | Dressy casual |
| Burnt Orange French Tip | Burnt orange | Medium | Glossy | Everyday |
| Deep Burgundy Chrome | Burgundy | Medium | Metallic | Evening |
| Olive Green and Gold Leaf | Olive | Medium | Glossy | Seasonal |
| Latte Swirl Big Toe Art | Mocha | High | Glossy | Creative |
| Plaid Flannel Accent | Rust and burgundy | High | Matte or gloss | Casual |
| Pumpkin Spice Micro French | Orange | Medium | Glossy | Playful |
| Cranberry Red Glitter | Cranberry | Low | Sparkle | Festive |
| Mocha Marble | Mocha | High | Glossy | Dressy |
| Citrine Gem Accent | Nude and gold | Medium | Glossy | Birthday |
| Matte Forest Green Stripe | Forest green | Medium | Matte | Polished |
| Copper Foil Nude | Nude and copper | Medium | Glossy | Minimal |
| Thanksgiving Turkey Art | Multicolor | High | Glossy | Holiday |
| Autumn Leaf Silhouette | Brown or burgundy | Medium | Matte or gloss | Seasonal |
| Black Cherry French | Black cherry | Medium | Glossy | Evening |
How Detailed Should Toe Nail Art Be?
Choose one accent toe when you want easy upkeep and a shorter appointment. Full designs suit special events, though small details need more drying time and careful shoe choices. For home painting, prioritize clean color blocks, thin lines, and one clear focal point.
How to Make Your Fall Pedicure Last
How Do You Prevent Toe Nail Polish From Chipping in Boots?
Give polish at least two hours to set before wearing fitted socks or boots. Choose moisture-wicking socks with smooth seams, and leave enough room in the toe box so fabric does not scrape the nail tips. Apply a thin topcoat every few days, focusing on the free edge. Avoid using toenails to open packages or push against shoes.
What Prep Helps a Pedicure Stay Glossy Longer?
Wash away lotion and oil before polish, then dry the nail plate fully. Gently push back loose cuticle skin, file the edges, and wipe each nail with rubbing alcohol. Apply a thin base coat, two light color coats, and a topcoat that reaches the tip. Moisturize the surrounding skin after the polish has cured, keeping cream off the nail surface during application.