So, you want nails that match the vibe of 17 February? You’re in luck—here are some easy, stylish ideas you can whip up at home or show off at the salon.
You’ll see everything from classic reds and gentle pastels to wild chrome, playful prints, and sparkly bits. Seriously, there’s something for every mood.
You’ll find simple inspo for romantic heart tips, cozy browns, glittery gradients, and chic metallics—no endless scrolling needed.

Flip through these ideas and spot a style that fits your outfit, your plans, or just your general “I want cute nails” attitude.
1. Cupid’s Classic Red Heart Tips
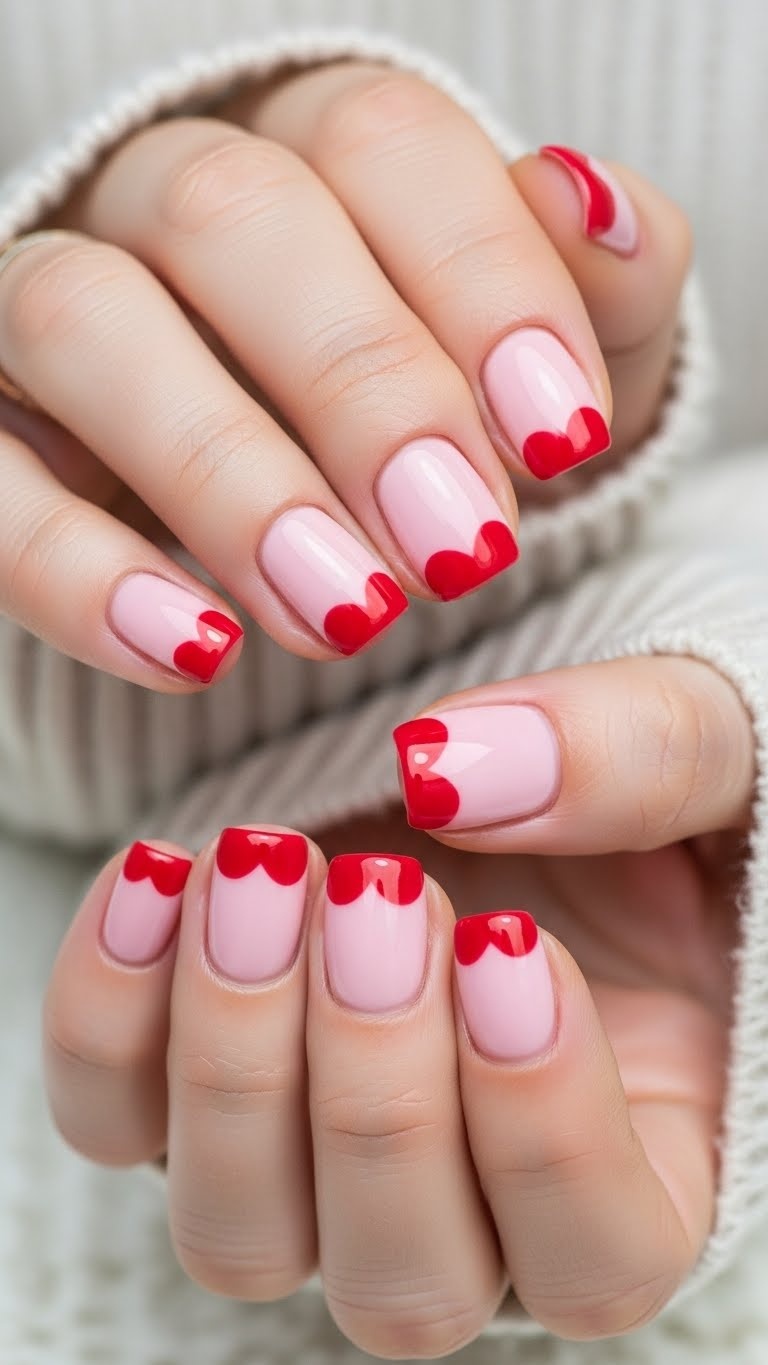
Grab your favorite red polish and paint the tips, then add tiny hearts near the cuticles. It’s a timeless Valentine look—simple, but it never gets old.
Use a thin brush for crisp edges, and a dotting tool to make those hearts even. If you’re feeling extra, leave one or two nails plain or add a little glitter for balance.
This works on both short and long nails, so don’t stress about length. Seal it all with a topcoat to keep chips away and that shine going.
Clean up the skin around your nails with a cotton swab dipped in remover for a pro finish.
Expert Tip from KidsCareIdeas: “Choose a fast-dry topcoat to lock in the hearts and cut down on drying time.”
2. Violet Velvet Matte Finish

Go for a deep violet matte if you want something soft but a little mysterious. The velvet matte look dials down the shine and just feels cozy.
Paint on two thin coats for even color, then finish with a matte topcoat to keep that plush vibe. If you’re feeling wild, add one glossy accent nail for a little surprise.
Tidy up your cuticles and use thin layers to dodge streaks or clumps.
Expert Tip from KidsCareIdeas: “Apply a barrier around your nails with tape or petroleum jelly to keep edges clean.” “If matte looks dull after a few days, gently buff the surface to renew the texture.”
3. Snowflake White Nail Art
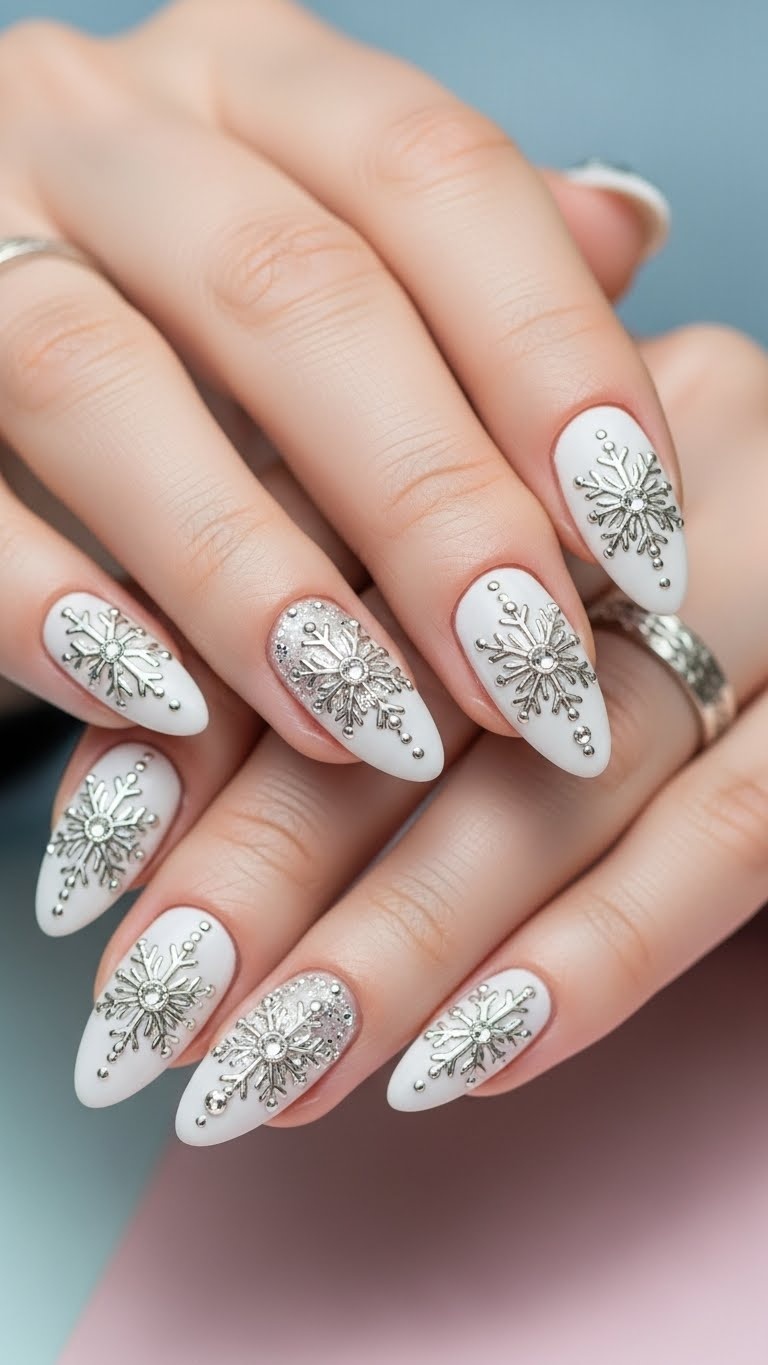
Create a wintery look with white snowflake designs over a pale blue or nude base. A thin brush or dotting tool helps you make those tiny lines and dots—just take your time.
Pop a bit of silver glitter in the center of each flake for some sparkle. Finish with a glossy topcoat to keep it all shiny and safe from chips.
Try out the pattern on a nail wheel first if you’re nervous about shaky hands.
Expert Tip from KidsCareIdeas: “Draw the snowflake on tape first to practice, then transfer it to the nail for neater lines. Use fast-dry topcoat to prevent smudges.”
4. Chocolate Brown Glossy Shine
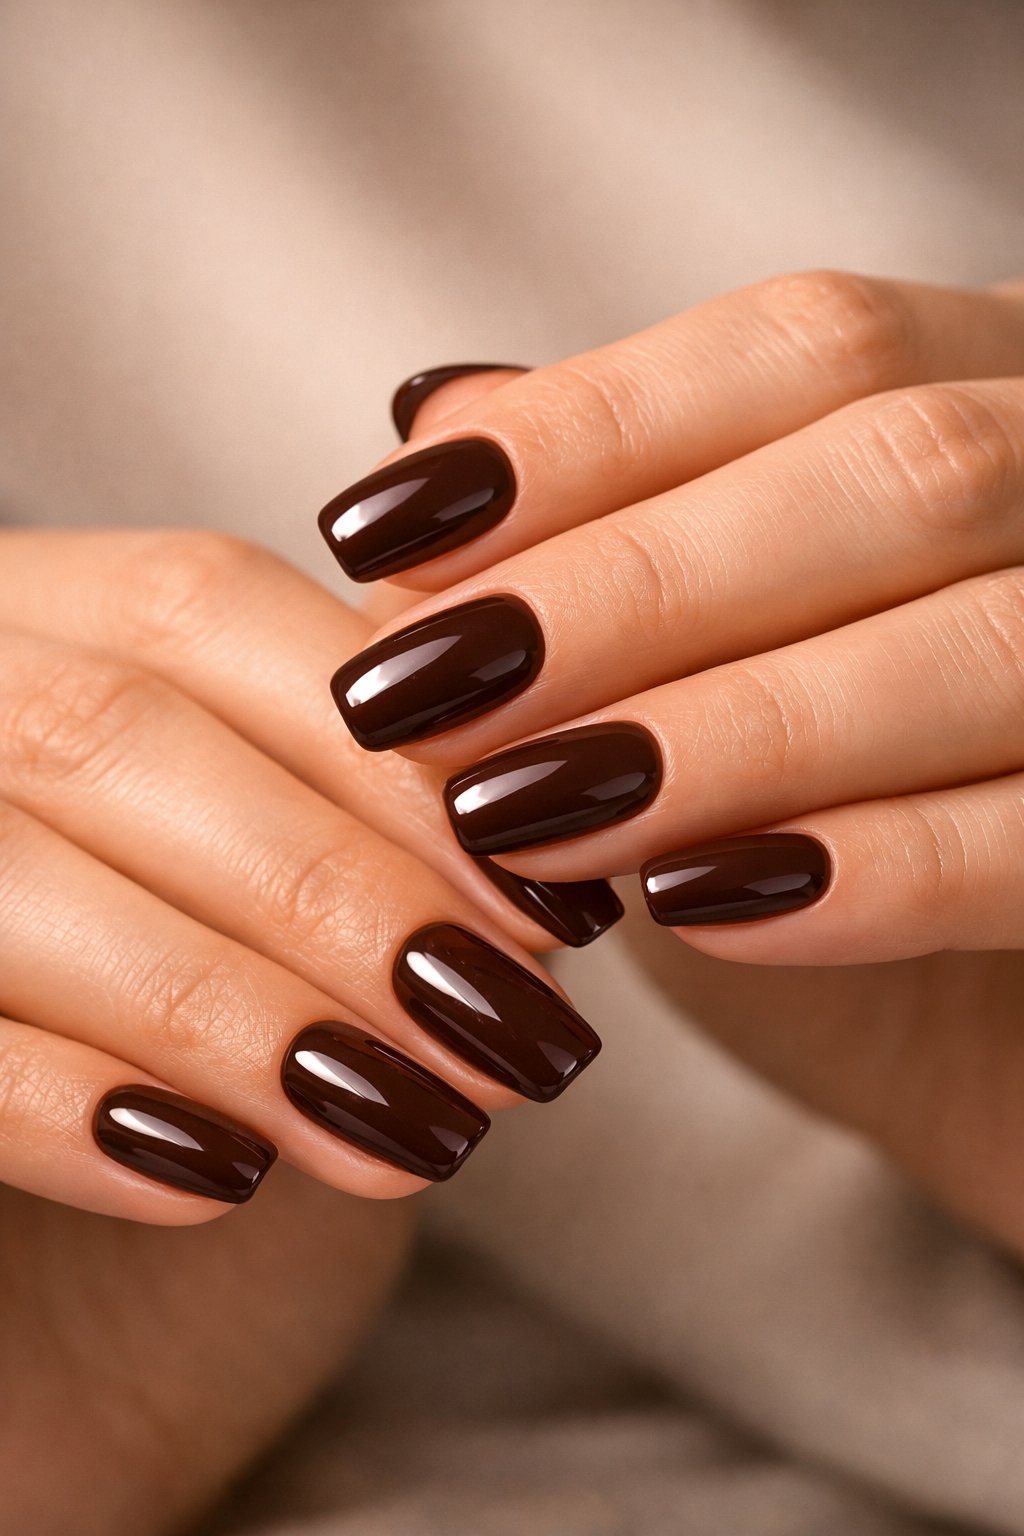
Chocolate brown polish gives your nails a warm, classic feel. It works on any nail length and matches both jeans and dressier looks.
Brush on two thin coats for full color. Top it off with a shiny topcoat for that extra gloss and to keep chips away.
If you want a little extra, add a tiny gold dot or a thin stripe on one nail. It’s simple, but people will notice.
Expert Tip from KidsCareIdeas: “Warm the polish bottle in your hands before use to help it glide on smoothly.”
5. Rose Gold Foil Accents
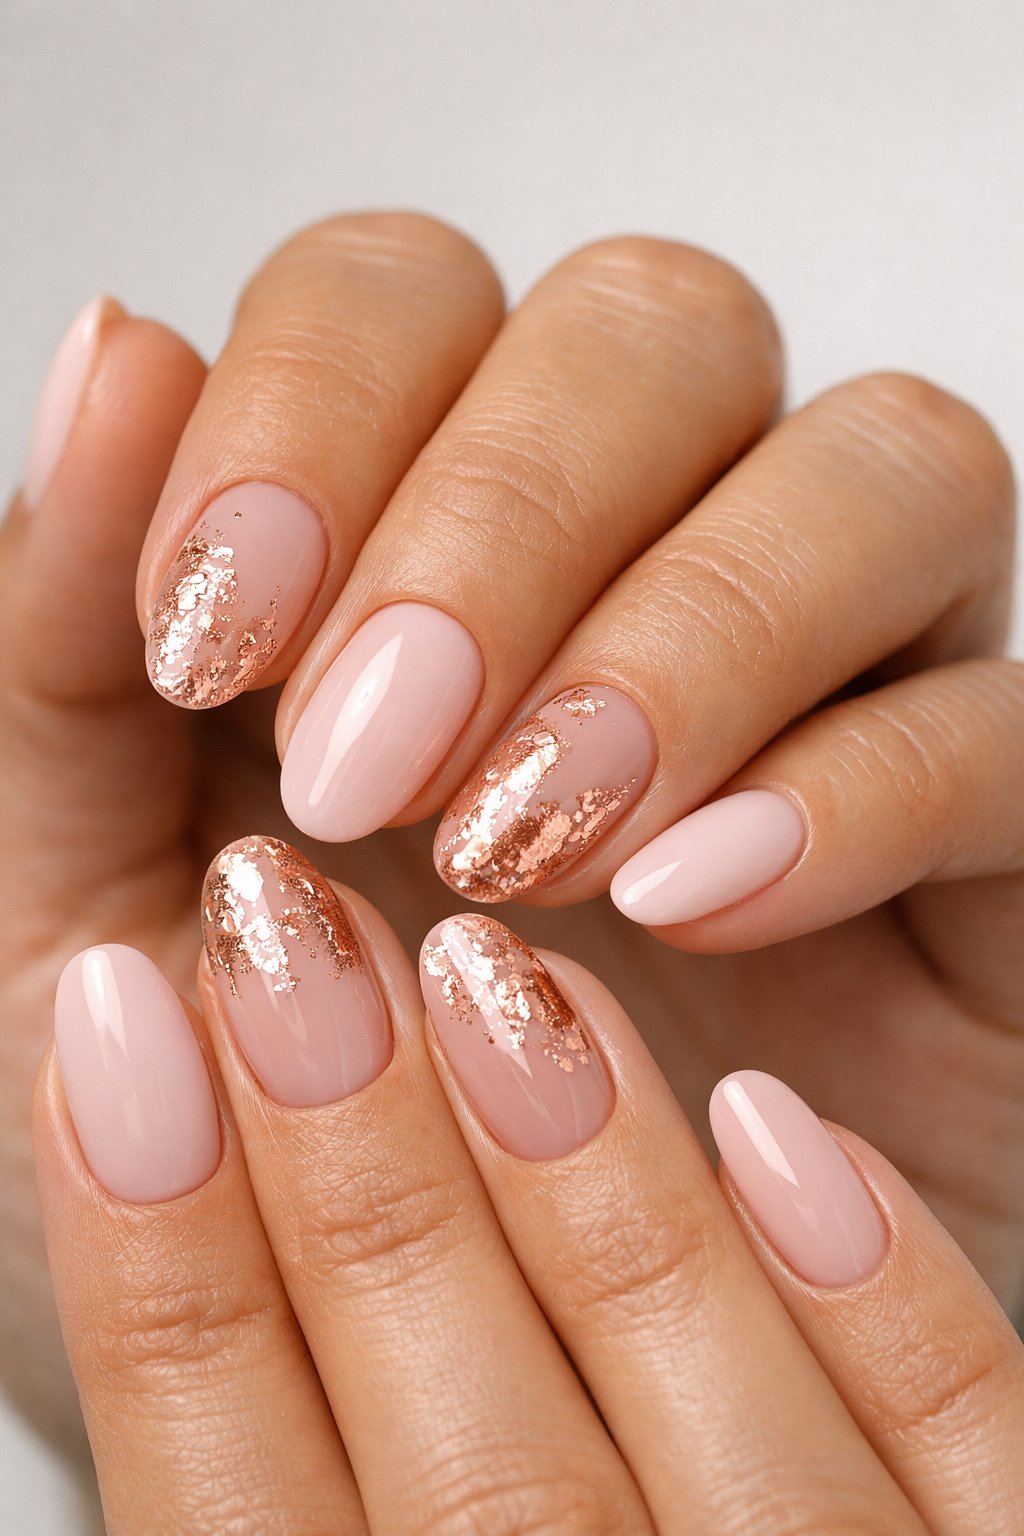
Rose gold foil adds just the right amount of shine without going overboard. Stick little foil pieces over nude or pale pink polish for a look that’s fancy but not fussy.
If you want to turn it up, make a foil gradient from the cuticle toward the tip. Top it off with a glossy topcoat so the foil stays put.
Mix in some tiny gems or thin stripes for extra texture. Don’t stress about making every nail match—sometimes the best designs are a little uneven.
Expert Tip from KidsCareIdeas: “Press foil gently with a silicone tool to avoid creases for a cleaner finish. Seal with two thin topcoats to protect the foil and extend wear.”
6. Marbled Pink and Grey Swirls
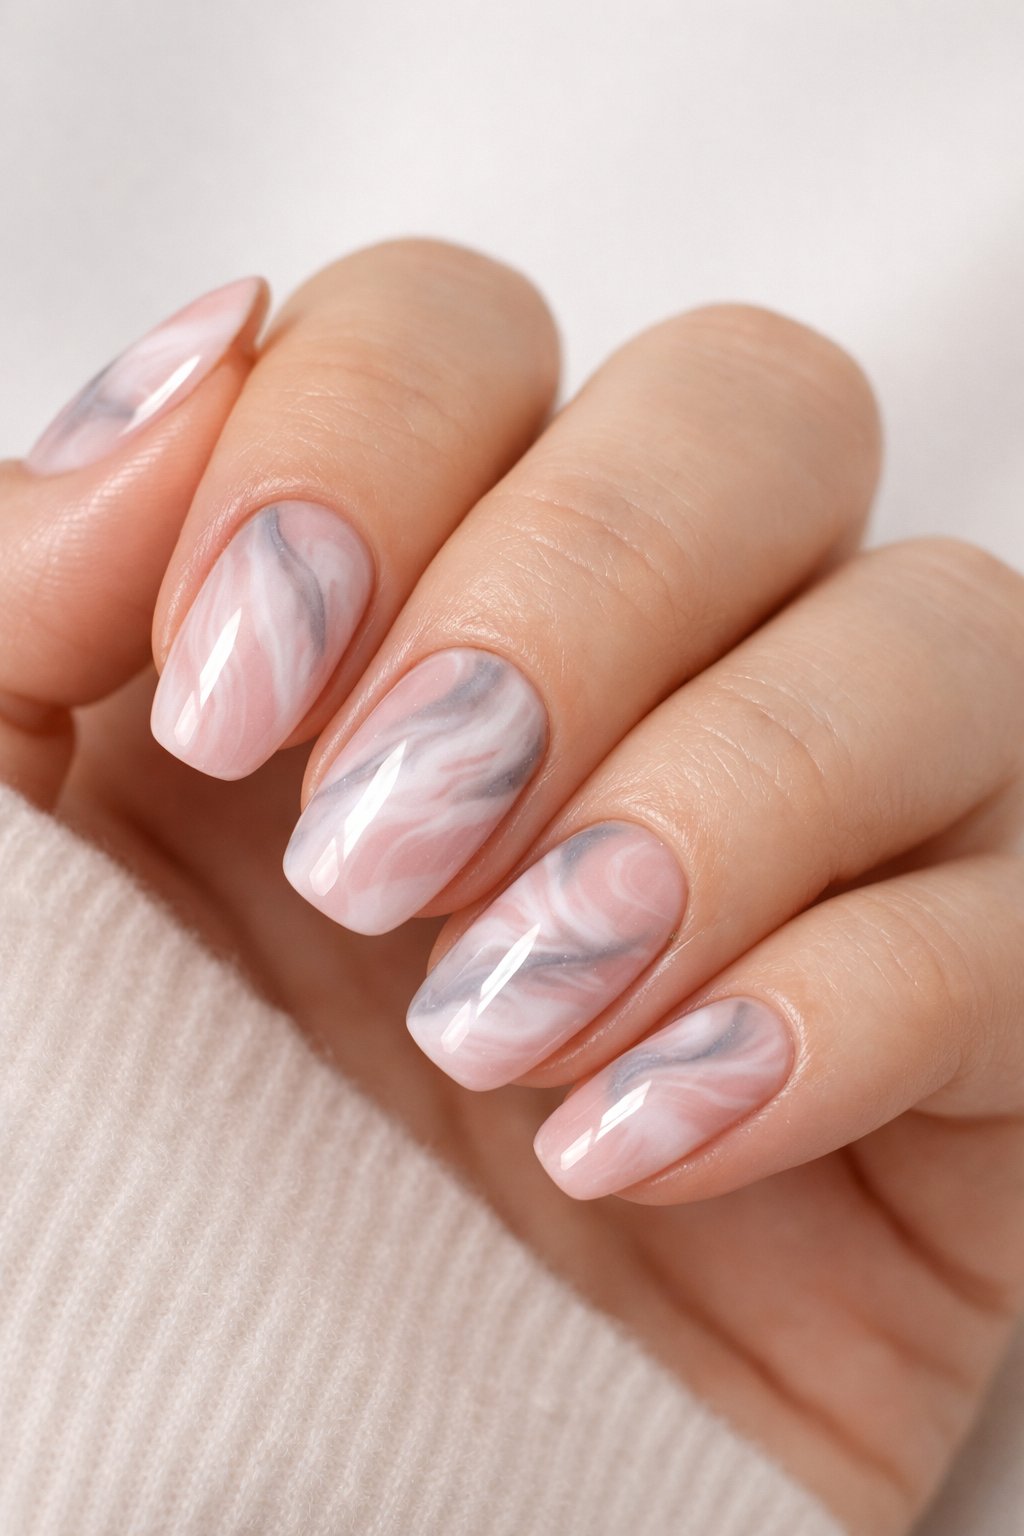
Swirl together pink and grey for a soft, artsy look. Start with a pale pink base, then drop on pink and grey polish and swirl with a thin brush or toothpick.
Seal with a glossy topcoat so your pattern stays fresh. This style hides little chips, so your nails look good longer.
It works on any length and feels just right for both casual days and moments when you want to look a bit fancy.
Expert Tip from KidsCareIdeas: “Work one nail at a time to control the marble. If the colors get too dark, dab a bit of remover on a brush to soften them.”
7. Champagne Glitter Gradient
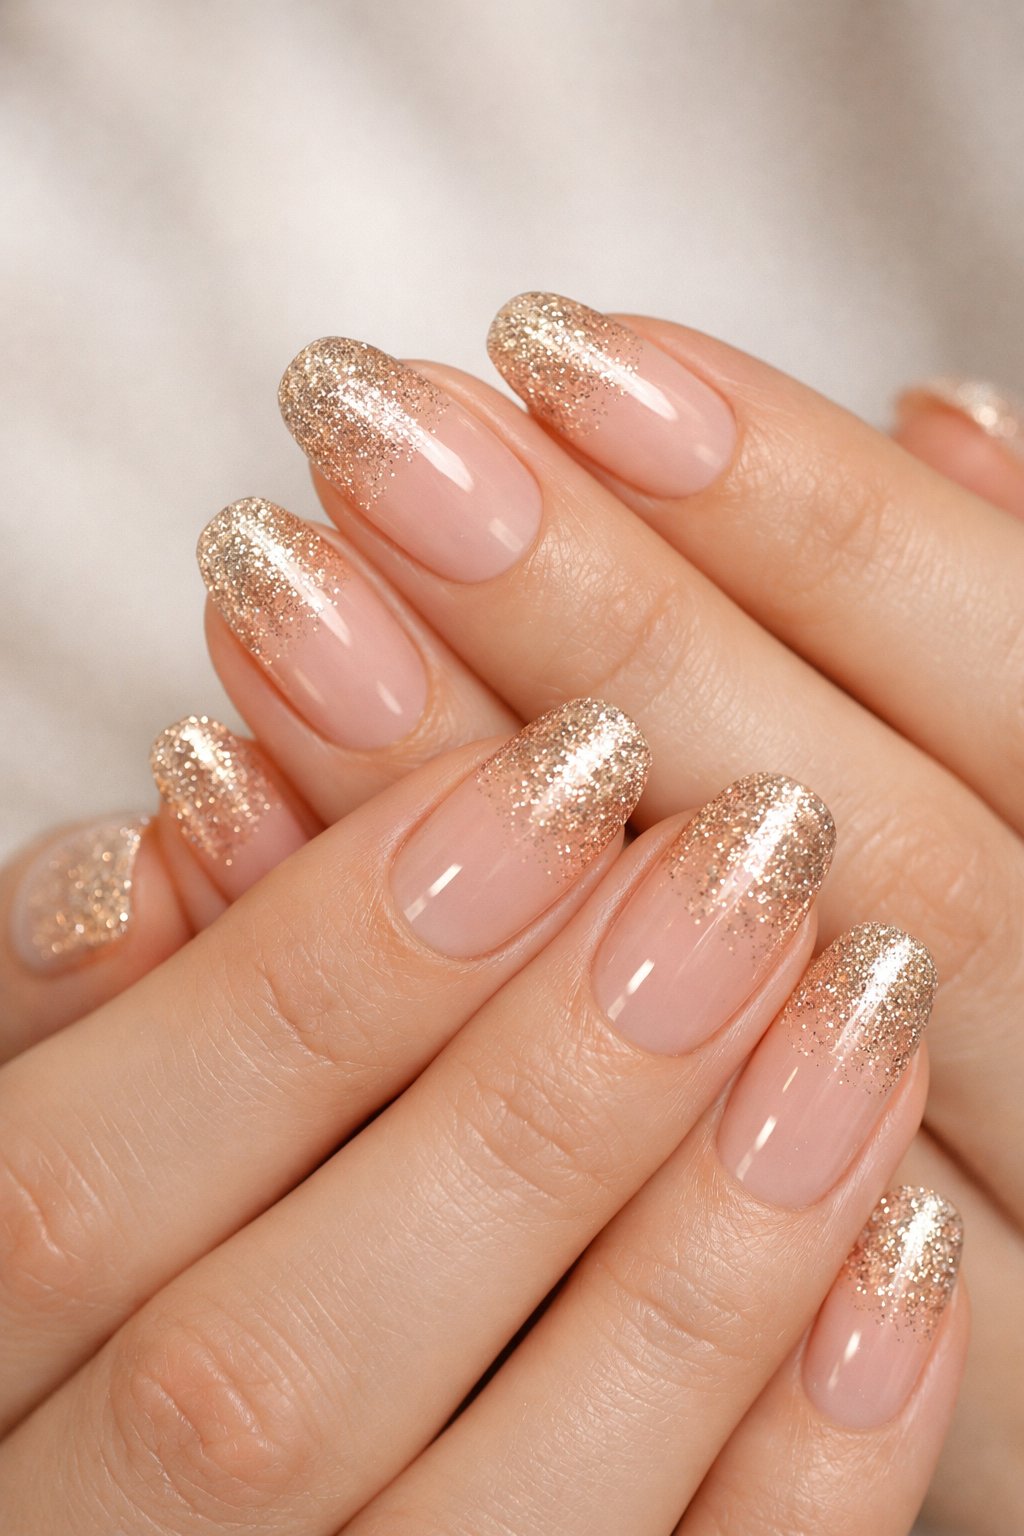
Pick a sheer champagne base for a soft, classy vibe. Paint two coats and let them dry—trust me, it makes the glitter go on smoother.
Dab gold glitter from the tip toward the middle with a little sponge to get that faded effect. Build up the glitter slowly so it doesn’t get chunky.
Finish with a glossy topcoat to lock in the sparkle and help your tips last. Plus, everything looks better with a little shine.
Expert Tip from KidsCareIdeas: “Apply glitter with a damp sponge for better blending and less fallout.”
8. Sassy Leopard Print in Burgundy
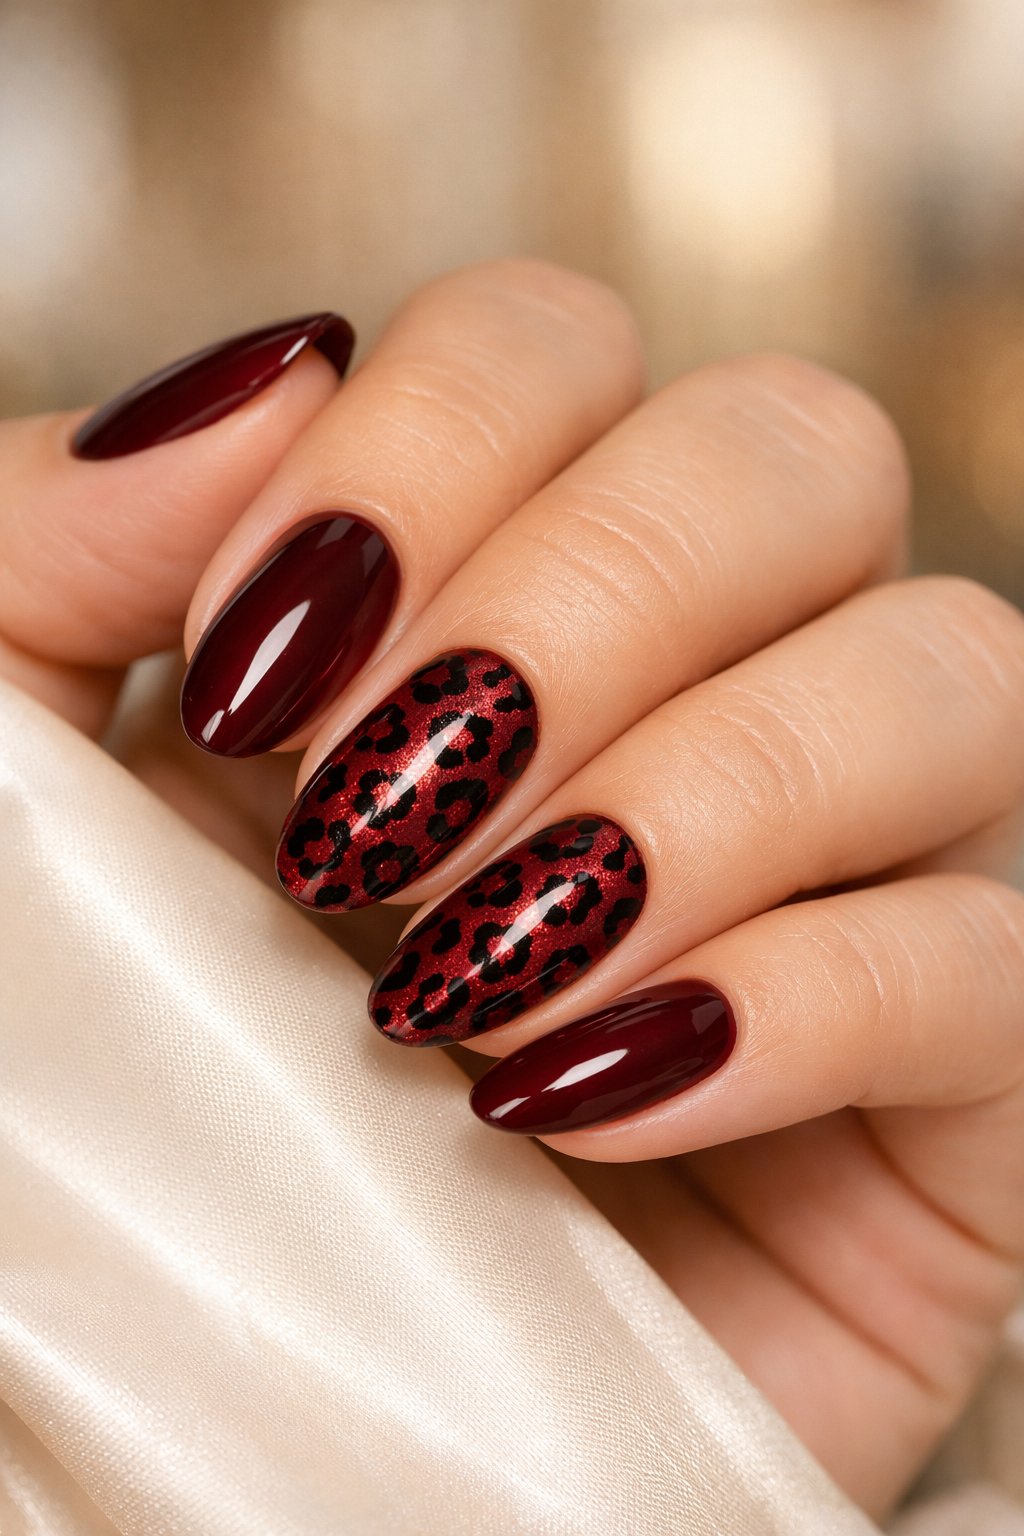
Go bold with a burgundy base and leopard spots. You can use glossy or matte topcoat, depending on your mood.
Paint on black rings and fill some in with brown or gold. Vary the size of the spots—real leopards don’t match, so you don’t have to either.
Add a thin gold stripe on one nail if you want a little extra. Finish with a quick-dry topcoat to keep your design safe.
Expert Tip from KidsCareIdeas: “Use a dotting tool or toothpick to keep spots tidy; practice on a nail wheel first.”
9. Soft Lilac with Silver Dots
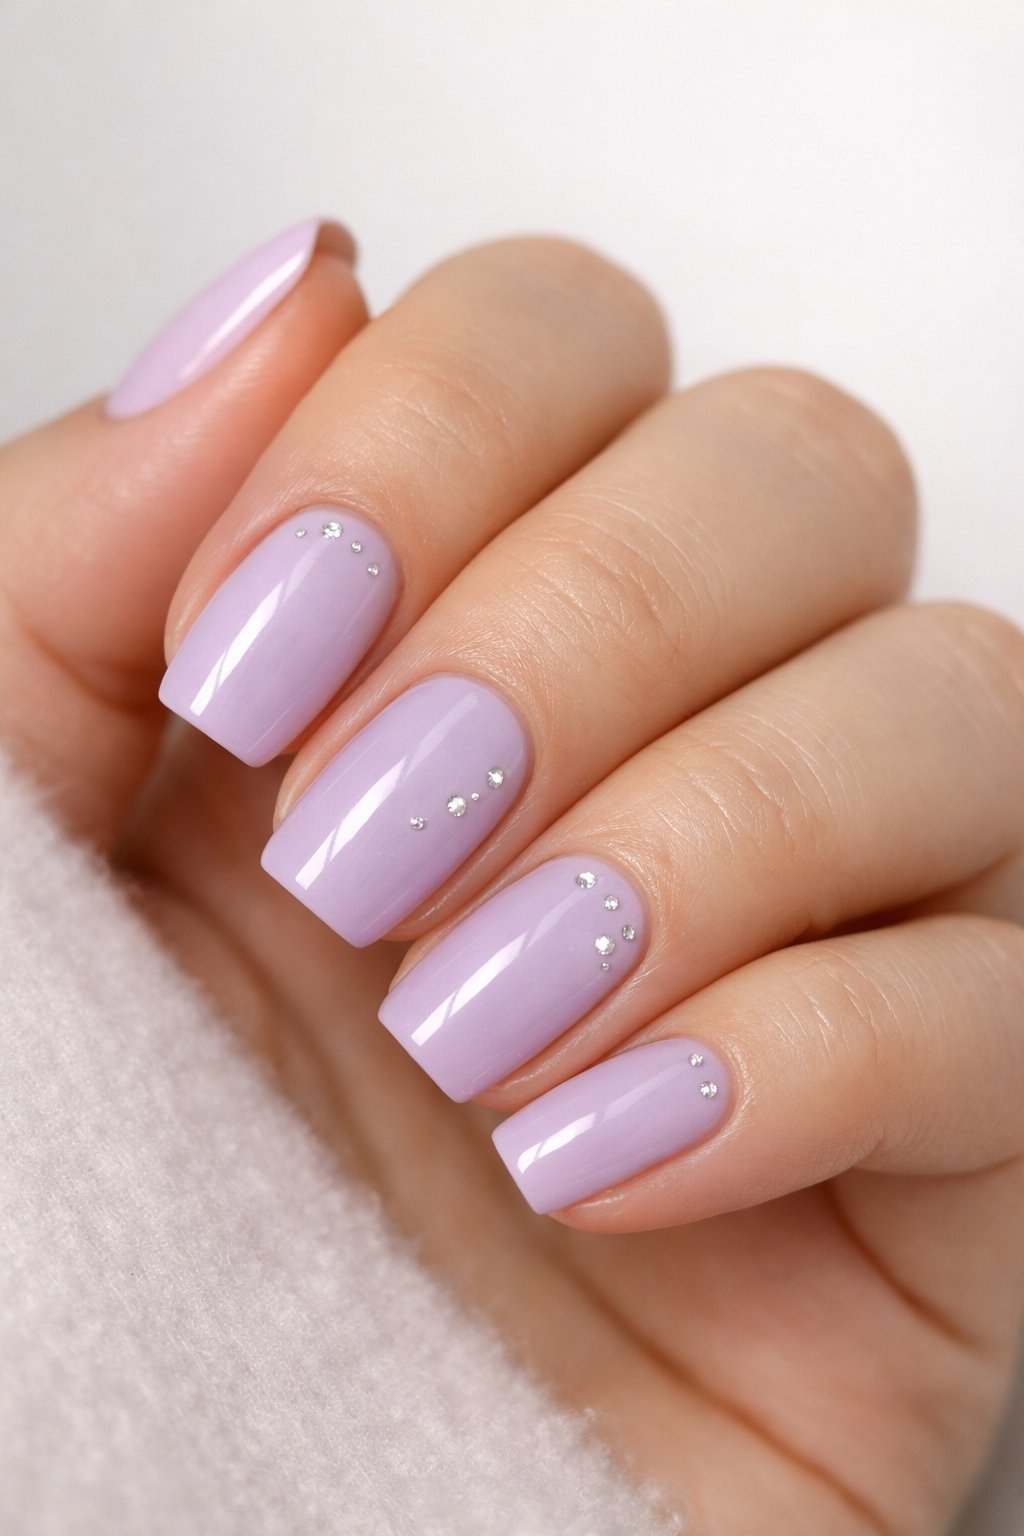
Start with a soft lilac base for a calm, pretty look. This shade flatters most skin tones and goes with just about any spring outfit.
Add tiny silver dots near the cuticle or along one side for a little sparkle. A dotting tool or the tip of a bobby pin does the trick.
Seal with a glossy topcoat so the dots stay put. This look works best on short or medium nails.
Expert Tip from KidsCareIdeas: “Apply a thin base coat first to prevent staining and help polish adhere.”
10. Bold Black and Red Stripes
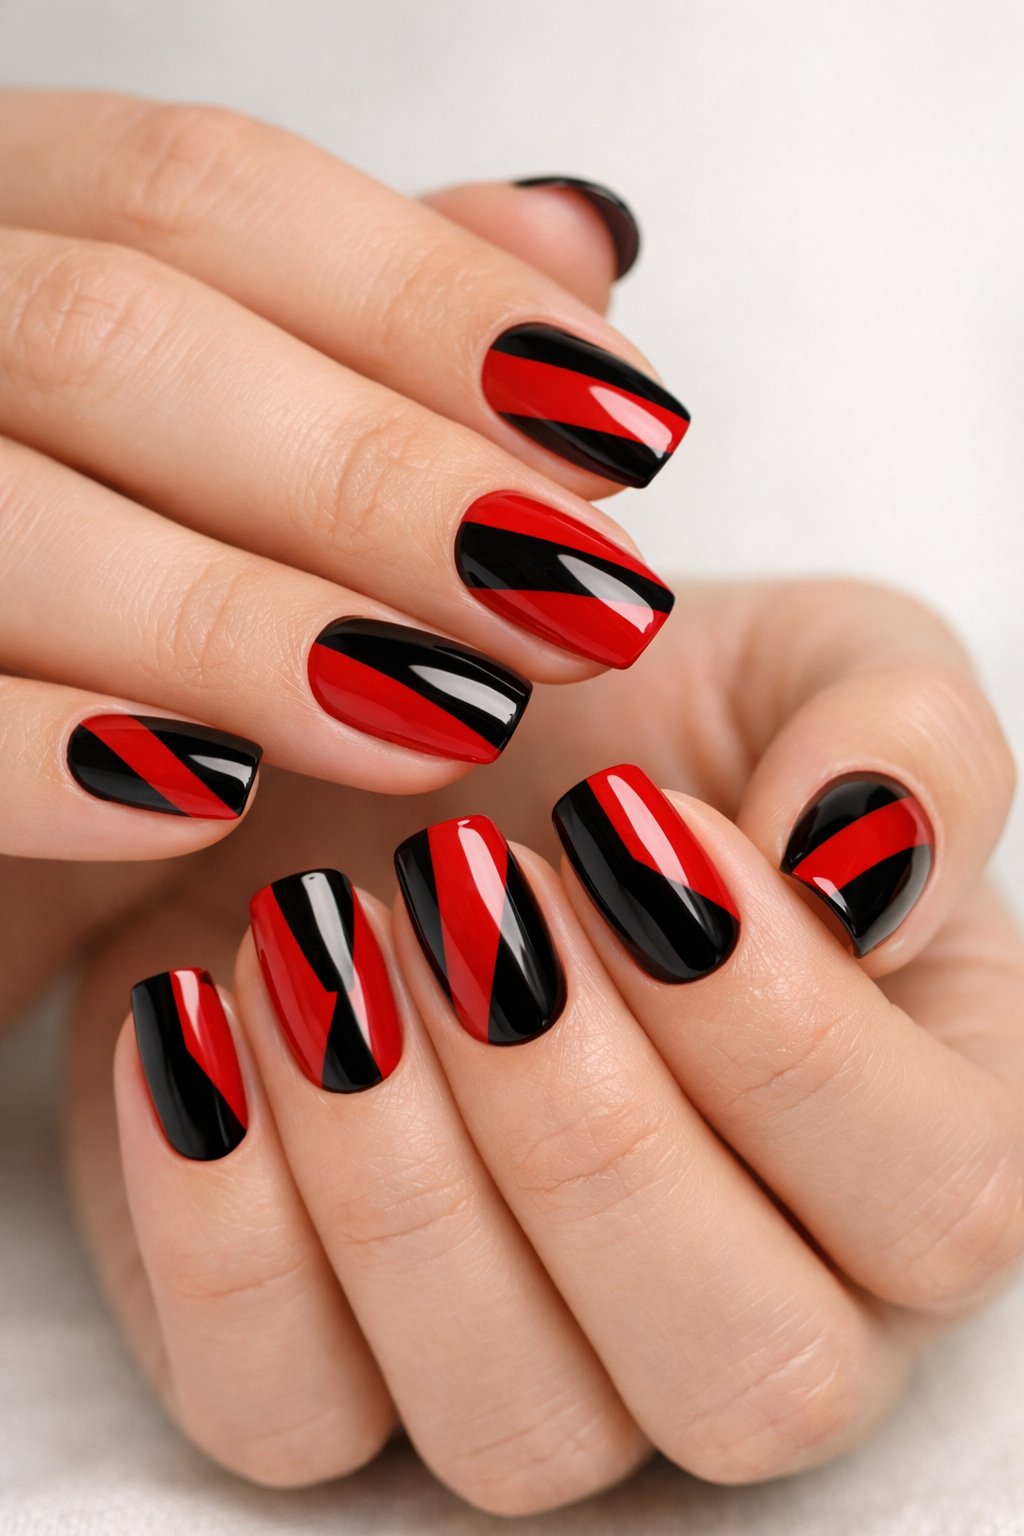
Go for a glossy black base and paint on red stripes for a punchy look. Striping tape or a steady hand with a thin brush helps keep lines sharp.
Vary the width of your stripes for some visual interest. If you want, keep one nail solid red for balance.
Top everything with a fast-dry topcoat to keep your lines crisp and shiny. This style works on any nail length and is pretty beginner-friendly.
Expert Tip from KidsCareIdeas: “Use a toothpick to pull tiny stray polish off the nail before top coat for crisp lines.”
11. Pastel Rainbow Ombre
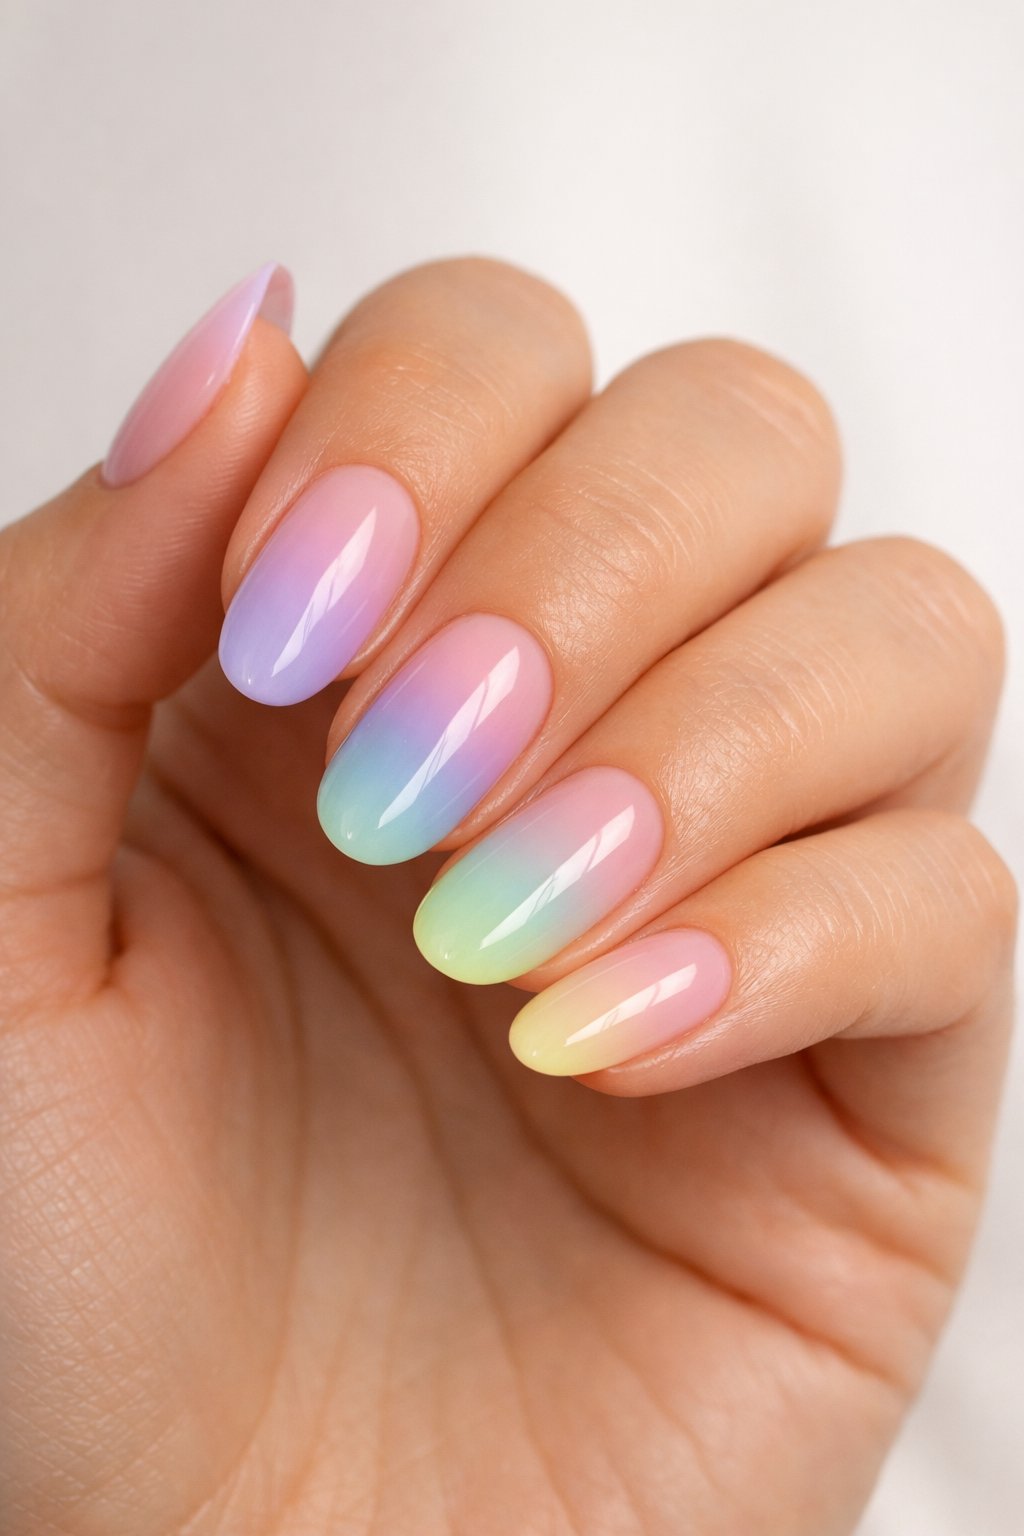
Blend light pastel shades for soft rainbow nails. Dab overlapping colors from base to tip with a little sponge—yep, it’s that easy.
Start with a white or pale base to make the colors pop. Do one nail at a time so the polish blends before it dries.
Seal with a clear glossy topcoat for shine and to keep the ombre looking smooth. Clean up around your nails with a small brush dipped in remover.
Expert Tip from KidsCareIdeas: “Work quickly when sponging to keep colors soft and smooth. Use a peel-off base around nails for easy cleanup.”
12. Metallic Blue Chrome
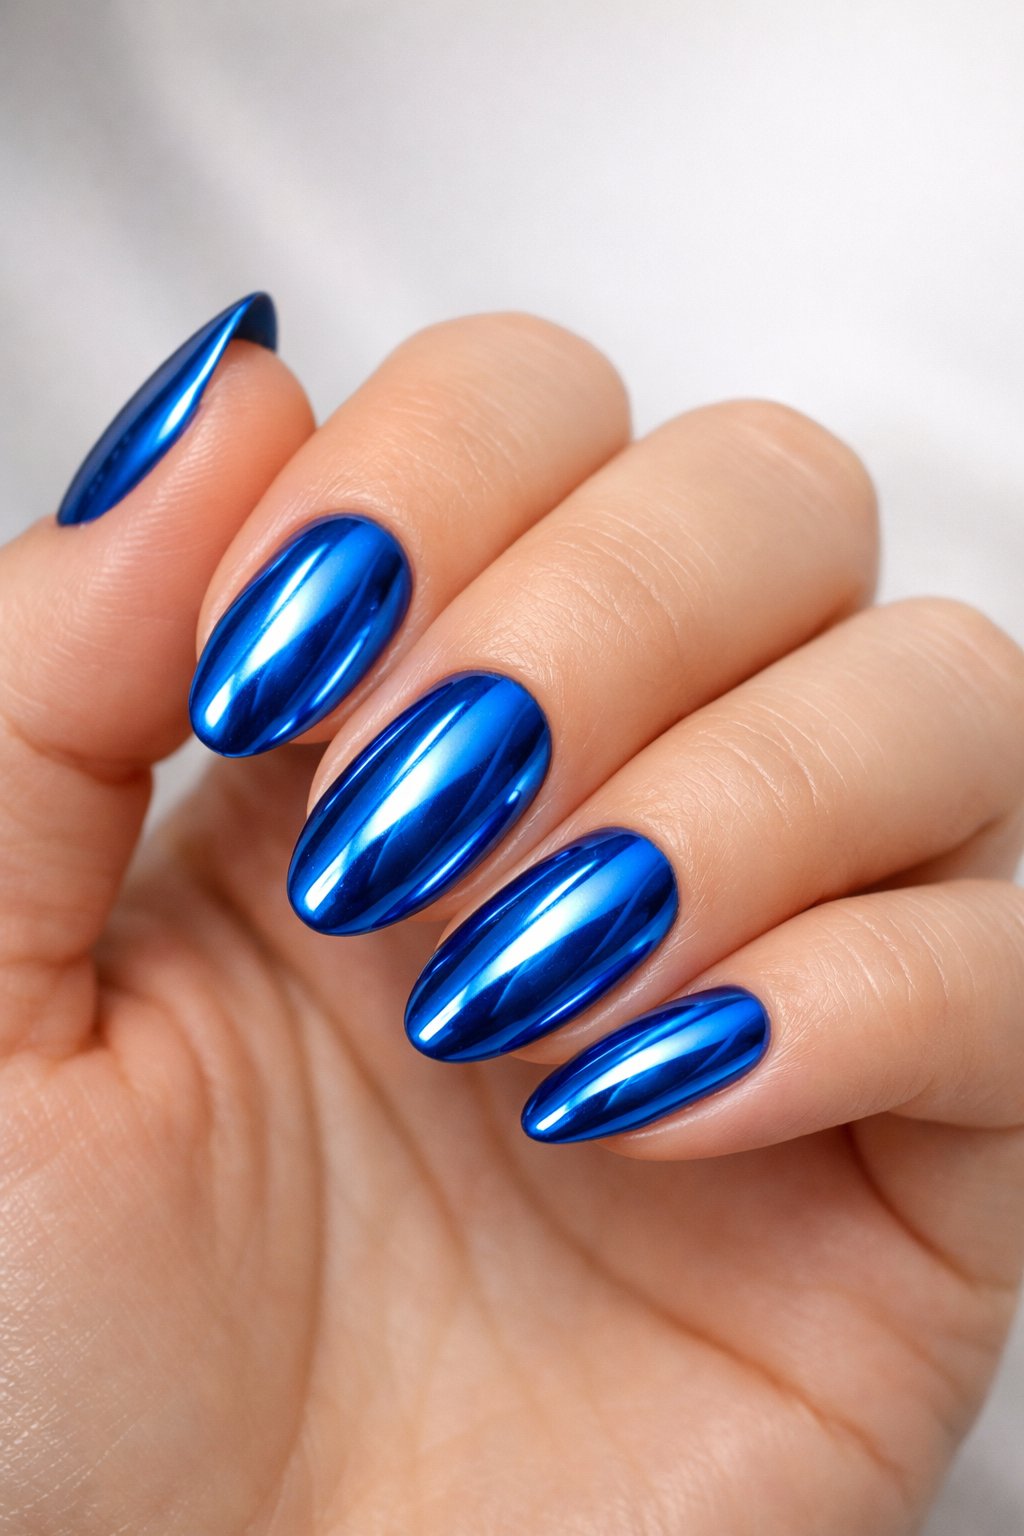
Try metallic blue chrome if you want your nails to stand out. The mirror finish reflects light and looks seriously cool.
Start with a dark blue base for depth. Rub on chrome powder with a sponge applicator to get that shiny, metallic effect.
Seal it with a glossy topcoat to keep the chrome from rubbing off. Toss on a couple of silver studs at the base if you want a tiny bit of bling.
Expert Tip from KidsCareIdeas: “Buff nails smoothly before applying chrome powder to avoid streaks. Use a gel top coat and cure it for the best long-lasting shine.”
13. Candy Heart Lettering Nails
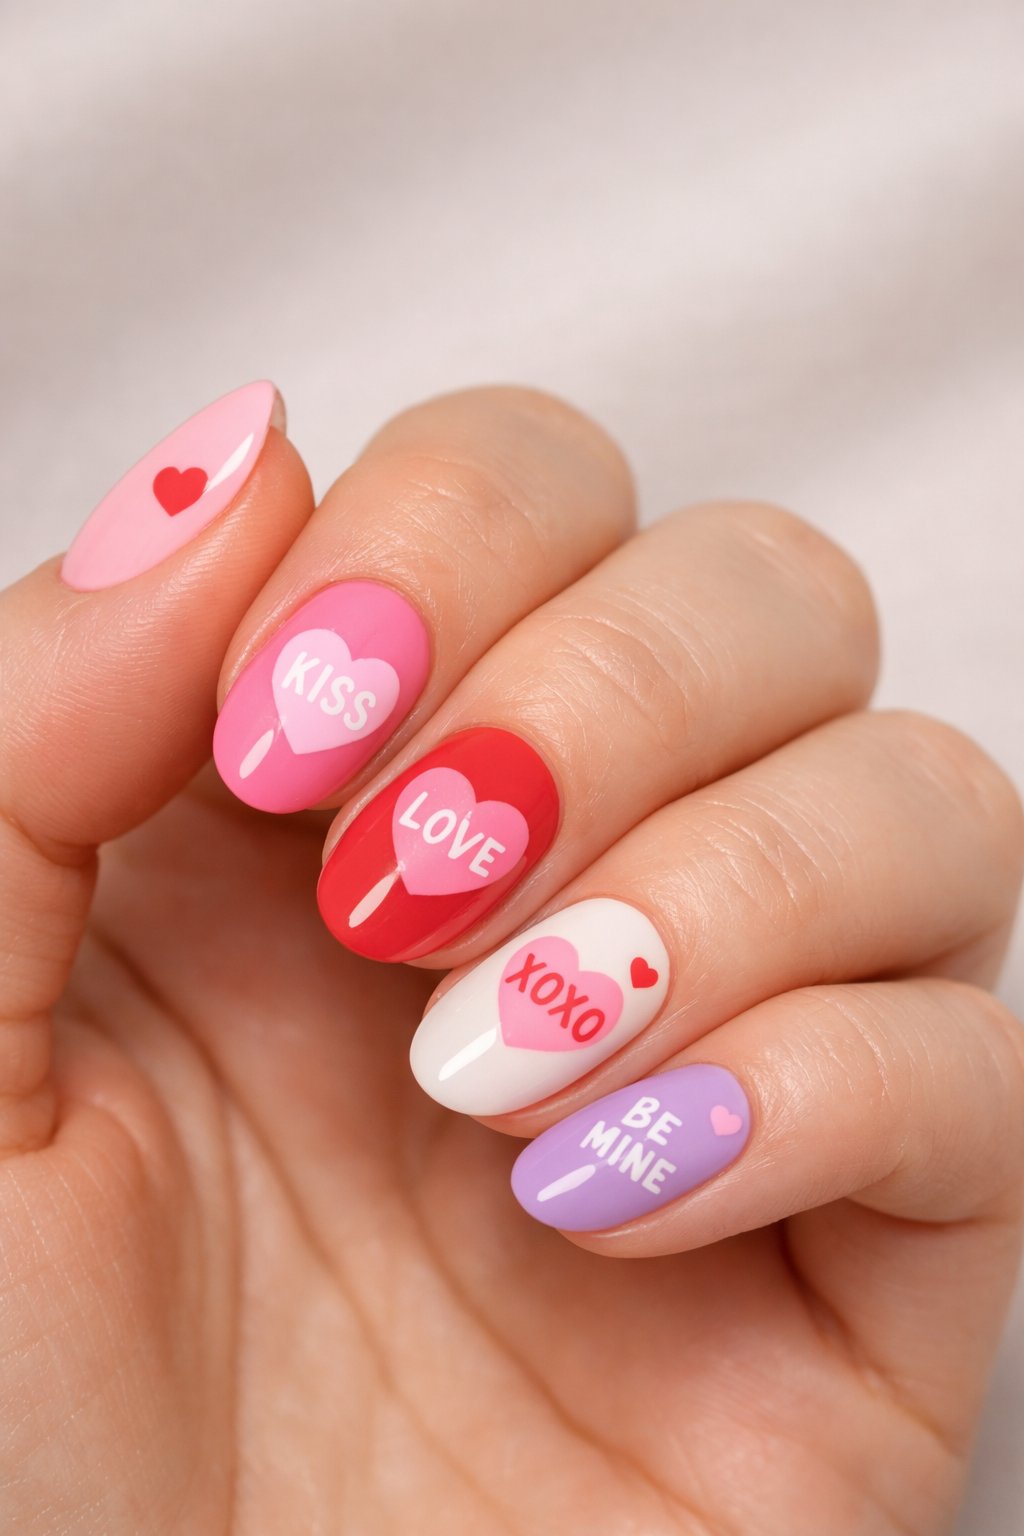
Paint your nails a soft pastel shade—pink, lavender, or mint all work. Use a thin brush or toothpick to write tiny words like “LOVE,” “XO,” or “BE MINE” in white or red.
Keep the letters simple and blocky so they’re easy to read. Add a clear topcoat to smooth everything out and protect your little messages.
If freehand letters stress you out, try tiny stickers or map out each letter with a dotting tool first.
Expert Tip from KidsCareIdeas: “Practice letters on a plastic sheet before painting on nails to build confidence. Seal with two thin topcoats for longer wear.”
14. Pink Satin French Manicure
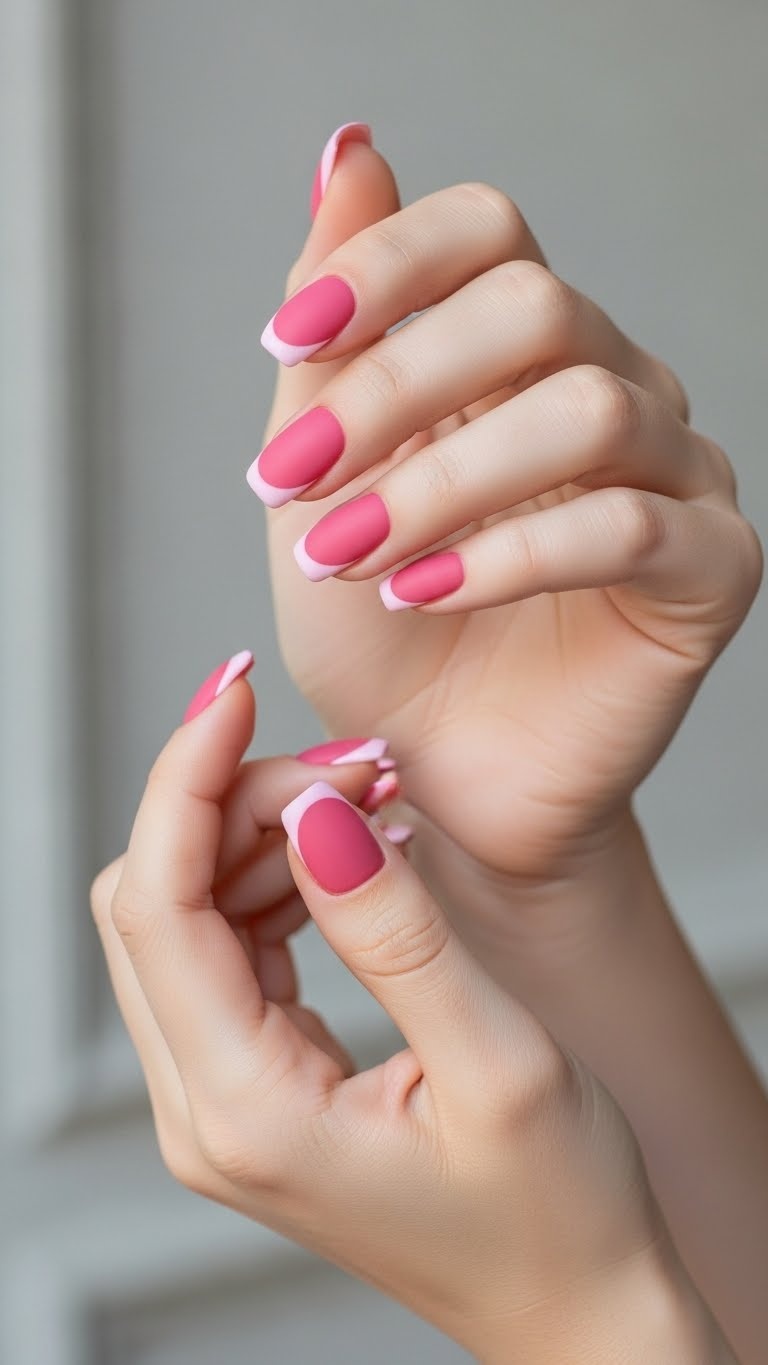
Get a fresh twist on the classic French tip with a satin finish. Use a sheer pink base and a thin white or pale pink tip for a soft, shiny look.
This style works on short or medium nails and hides chips better than you’d think. It looks polished for school, work, or just hanging out.
Finish with a matte-satin topcoat for that silky sheen. Keep brush strokes light to avoid streaks, and if you’re using gel, make sure to cure it all the way.
Expert Tip from KidsCareIdeas: “If you want longer wear, seal the tip edges with top coat. Use a thin brush to tidy the smile line for a crisp finish.”
15. Glossy Cherry Blossoms
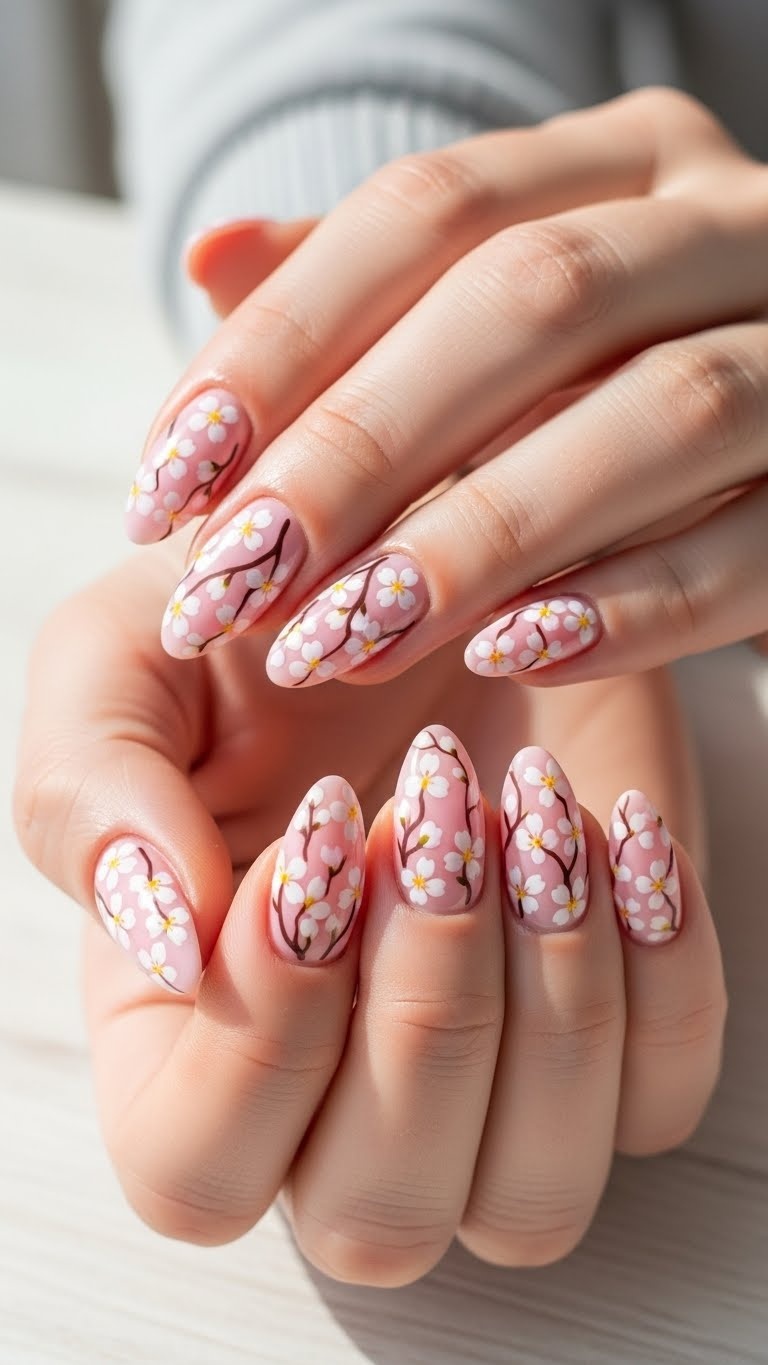
Grab a gentle pink polish for your base—trust me, it makes those cherry blossoms stand out like they’re waving hello. I like to paint tiny five-petal flowers using white or a paler pink, then dab a little gold or brown dot right in the middle.
Swipe on a glossy top coat and suddenly the flowers look like they’re fresh from the garden after a rain. If you want to keep things tidy, just add blossoms to one or two nails as accents.
I always stick with thin brushes for the petals and do one nail at a time. Otherwise, smudges sneak in when I’m not looking. If you’re like me and sometimes get impatient, quick-dry drops can save the day.
Expert Tip from KidsCareIdeas: “Use a toothpick for tiny dots and press lightly for even petals.”
16. Matte Navy with Gold Stars
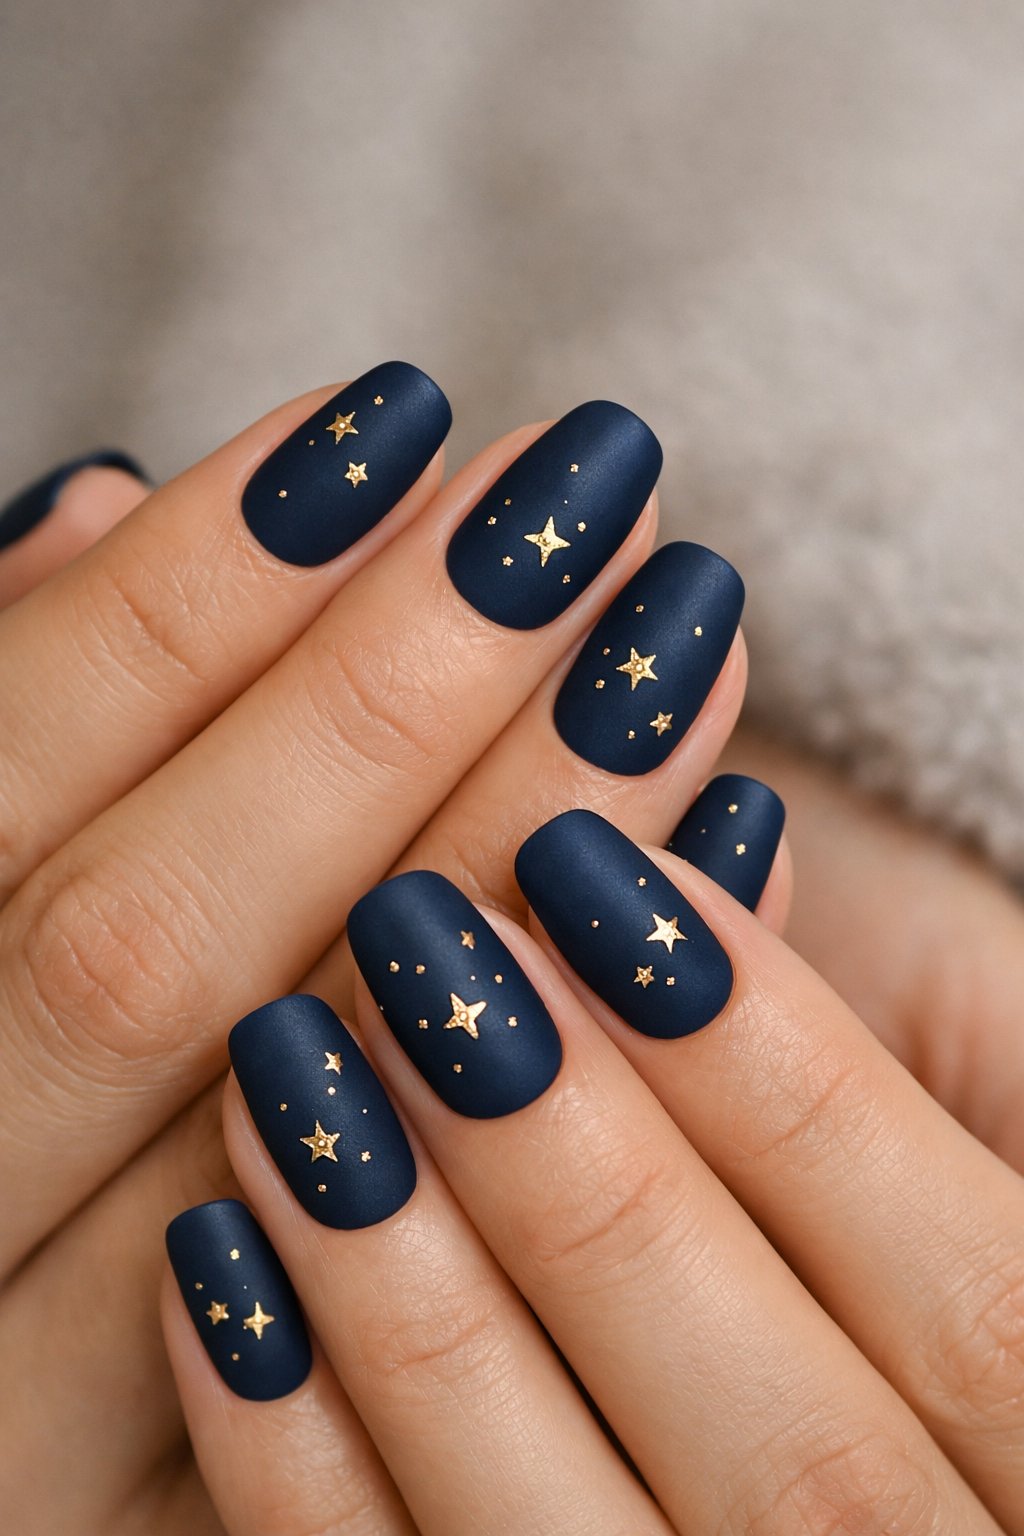
Pick a deep matte navy polish for your base. It’s got this calm, classic vibe that never gets old. Plus, the flat finish lets those gold stars really shine—without being over the top.
I use a toothpick or a little dotting tool to place the gold stars near the tip or close to the cuticle. Don’t worry about perfect spacing; a little unevenness just makes it look more handmade and honestly, a bit more fun.
Finish with a matte top coat. It keeps everything protected and keeps that soft look going strong. This combo looks great whether your nails are short or long.
Expert Tip from KidsCareIdeas: “Use a small brush dipped in metallic polish for crisp star points and wipe the brush often to avoid blobs. Apply thin layers and let each dry to prevent smudging.”
17. Pearl White with Rhinestones
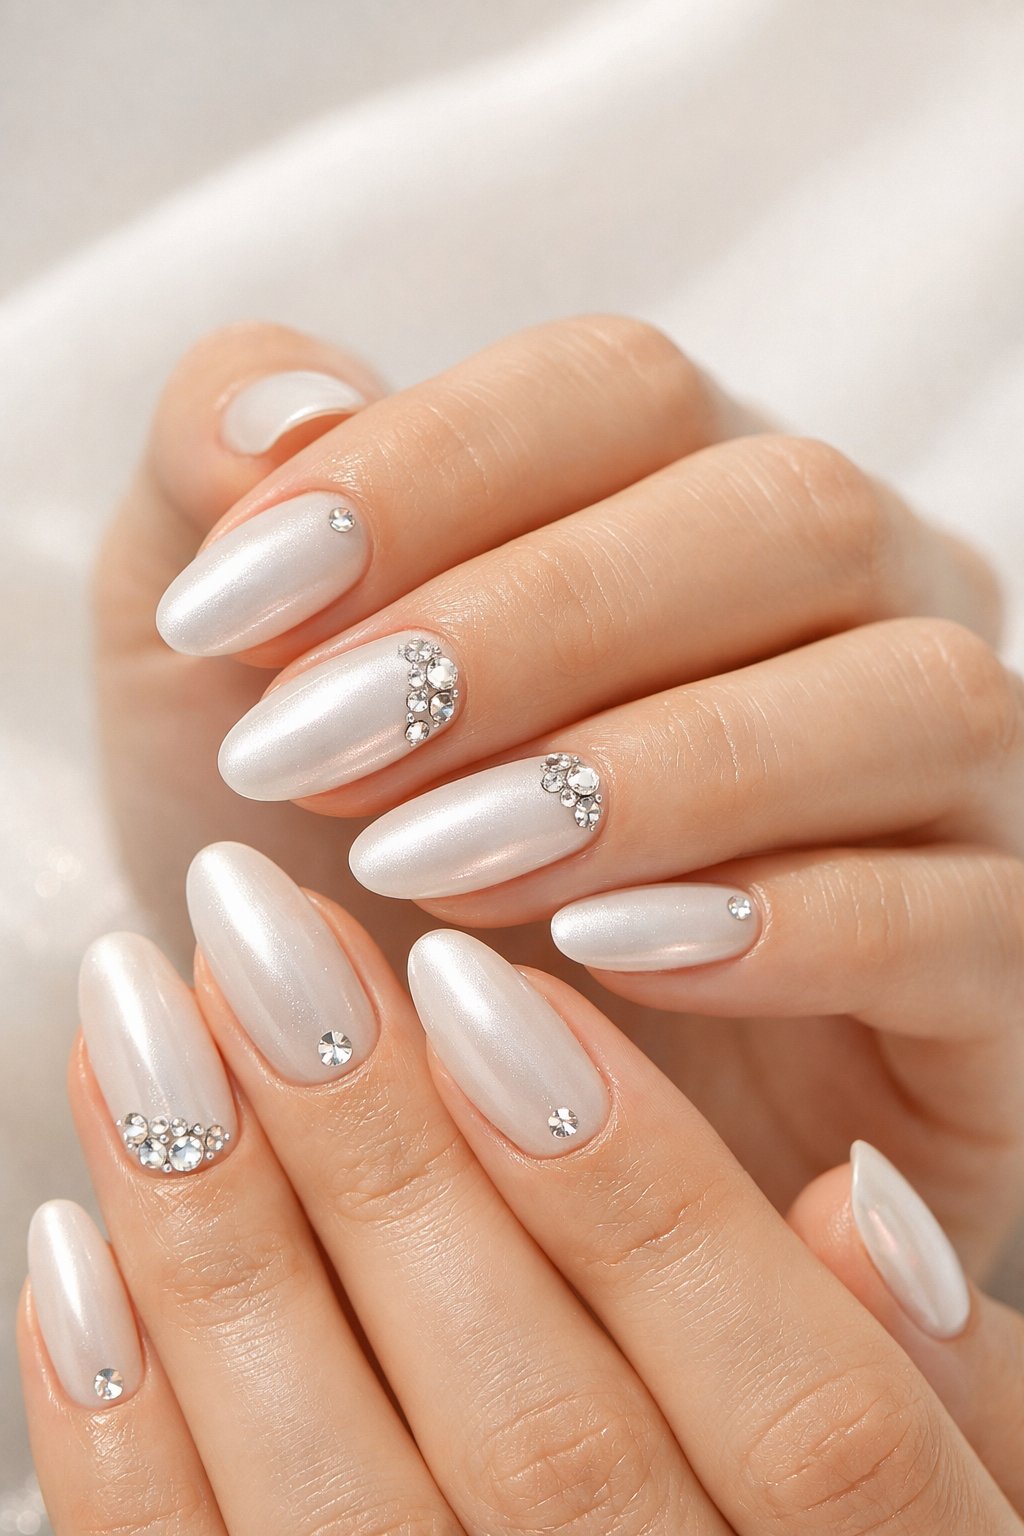
Grab a bottle of pearl white polish if you want that fresh, soft look that somehow flatters every skin tone. I mean, it’s just one of those shades that never lets you down.
You can paint all your nails pearl white, or maybe jazz things up with one accent nail covered in tiny rhinestones. A little sparkle goes a long way, right?
Stick the rhinestones near your cuticle or try placing them in a diagonal line if you’re feeling a little fancy. Just swipe on a clear topcoat to keep them stuck and stop them from catching on your sweater.
Honestly, this style looks good on short nails or long ones. It works whether you’re running errands or heading to a wedding.
Expert Tip from KidsCareIdeas: “Use a toothpick dipped in topcoat to pick up and place tiny rhinestones precisely. Press gently and finish with two thin topcoat layers to lock them in.”
