Inside: Easy 2-ingredient Moon Sand recipe. Quick and fun to make! Perfect for kids’ sensory play and creativity.
Looking for a fun, easy, and inexpensive activity for your kids? Moon sand is a fantastic option!
Soft, moldable, and perfect for creative play, it only requires two simple ingredients. Dive into the recipe and tips for the best moon sand experience.

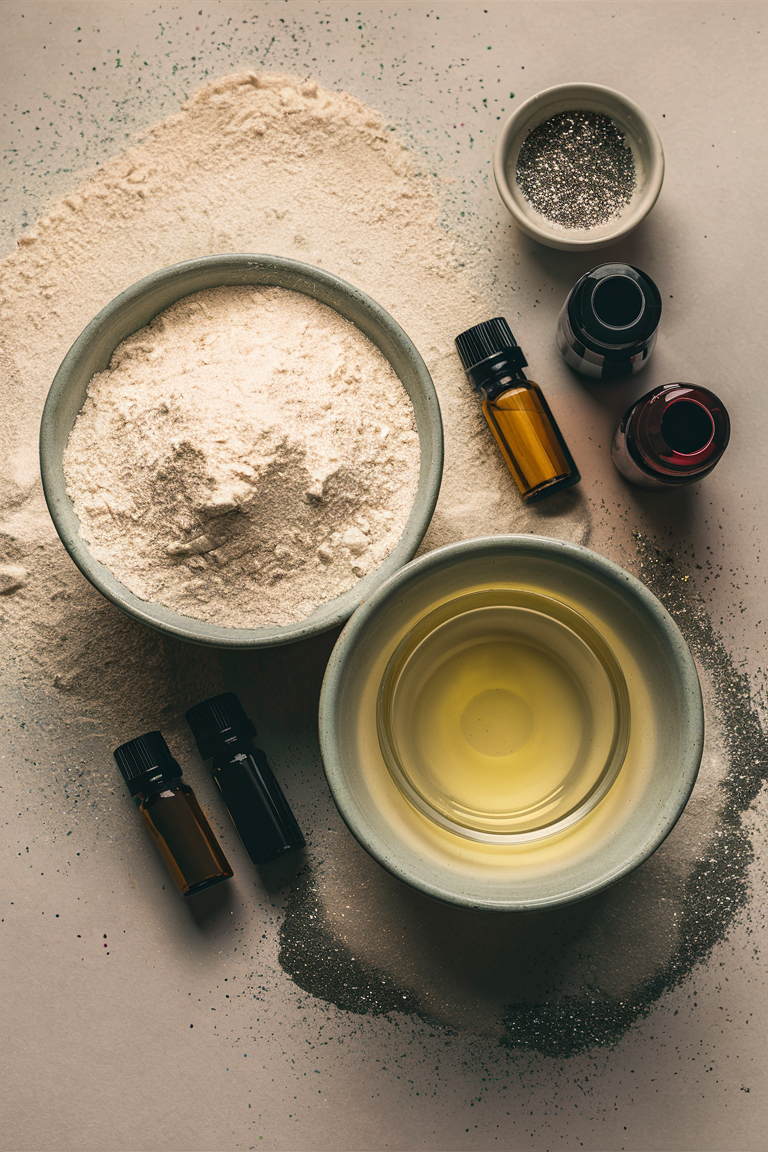
What You’ll Need
- Flour: The primary ingredient that gives moon sand its soft texture.
- Oil: You can use baby oil, vegetable oil, or even coconut oil depending on your preference.
Optional Add-Ins
- Food Coloring: If you want to add some color to your moon sand, you can mix in a few drops of food coloring with the oil before combining it with the flour. This helps distribute the color more evenly.
- Essential Oils: For a pleasant scent, consider adding a few drops of essential oils like lavender or peppermint to the oil before mixing.
- Glitter: For a sparkly effect, stir in some fine glitter to the flour before adding the oil.
DIY Moon Sand Recipe
Ingredients:
- 8 cups (1000g) of all-purpose flour
- 1 cup (240ml) of oil (baby oil or vegetable oil)
Optional ingredients:
- Food coloring (gel or liquid)
- Essential oils (for scent)
- Fine glitter (for sparkle)
Equipments:
- Large mixing bowl (preferably stainless steel or plastic)
- Measuring cups (for both dry and liquid ingredients)
- Kitchen scale (for precise measurements)
- Sturdy mixing spoon or silicone spatula
- Sifter or fine-mesh strainer
- Airtight container for storage
- Plastic tablecloth or newspapers (for easy cleanup)
Detailed Instructions to Make Moon Sand
Step 1: Prepare your workspace
Clear a large, flat surface in your kitchen or craft area. Cover the area with a plastic tablecloth or newspapers to catch spills.
Gather all ingredients and equipment before starting
Step 2: Sift the flour
Place the sifter or fine-mesh strainer over your large mixing bowl. Gradually add the 8 cups (1000g) of flour to the sifter.
Gently tap or shake the sifter to remove any lumps and aerate the flour. This step ensures a smoother texture in your final product.
Step 3: Create a well in the flour
Using the back of your mixing spoon, create a deep well in the center of the sifted flour.
The well should be about 3-4 inches in diameter and reach almost to the bottom of the bowl.
Step 4: Prepare the oil
If using baby oil, measure out 1 cup (240ml) directly.
If using vegetable oil, warm it slightly in the microwave (about 10-15 seconds) to thin it out.
Step 5: Add the oil gradually
Pour about 2 tablespoons of oil into the well you created.
Using your mixing spoon or clean hands, start incorporating the oil into the surrounding flour.
Work in a circular motion, gradually pulling in flour from the sides of the well.
Step 6: Continue adding and mixing
Repeat step 5, adding 2 tablespoons of oil at a time and mixing thoroughly.
As you progress, you may find it easier to use your hands.
Step 7: Knead the mixture
Once all the oil is incorporated, begin kneading the dough-like mixture.
Press the heel of your hand into the mixture, fold it over, give it a quarter turn, and repeat.
Continue this process for about 5-7 minutes, or until the texture is consistent throughout.
Step 8: Check the consistency
The moon sand should hold its shape when squeezed, but crumble easily when pressure is released.
If it’s too dry, add oil 1 teaspoon at a time, mixing well after each addition.
If it’s too wet, add flour 1 tablespoon at a time, mixing thoroughly.
Step 9: Optional: Add color and fragrance
Create a small well in the center of your moon sand. Add 3-5 drops of food coloring and/or 2-3 drops of fragrance oil.
Knead the mixture again until the color/scent is evenly distributed.
For more vibrant color, add more food coloring gradually.
Step 10: Optional: Add glitter
If desired, sprinkle 1-2 teaspoons of fine glitter over the mixture.
Knead again until the glitter is evenly distributed.
Step 11: Final texture test
Take a handful of the moon sand and squeeze it tightly. Open your hand. It should hold its shape initially, then slowly crumble.
If it passes this test, your moon sand is ready.
Step 12: Storage and maintenance
Transfer the moon sand to an airtight container. Label the container with the date of creation.
Store in a cool, dry place away from direct sunlight.
Before each use, knead the moon sand for a minute to refresh its texture. If it dries out over time, add a few drops of oil and knead to revitalize it
Tips for Making Moon Sand
Benefits of Playing with Moon Sand
Fun Activities to Try with Moon Sand
1. Building Castles:
Use small sandcastle molds or kitchen utensils to create intricate sandcastles.
This can be a great way to introduce concepts of architecture and building.
2. Hidden Treasures:
Bury small toys or objects in the moon sand and have your child dig them out. This can turn into a fun treasure hunt game.
3. Imprint Shapes:
Use cookie cutters or stamps to make different shapes and patterns in the moon sand. This can help with shape recognition and fine motor skills.
4. Moon Sand Bakery:
Pretend to bake cookies or cakes with moon sand using play kitchen tools. This can spark imaginative play and role-playing scenarios.
Cleaning Up Moon Sand
While moon sand is less messy than traditional sand, it can still get scattered around.
Here are a few tips to make clean-up easier:
1. Containment: Keep the moon sand in a large, shallow container to minimize spills.
2. Vacuum: Use a vacuum cleaner to pick up any stray grains of moon sand from the floor.
3. Wipe Down: For surfaces, a damp cloth can help clean up any remaining bits of moon sand.
Troubleshooting Common Issues
1. Too Oily:
If your moon sand feels too greasy, add a bit more flour to balance it out.
2. Too Dry:
If the moon sand is crumbling and not holding its shape, add a little more oil, a teaspoon at a time, until you achieve the desired consistency.
3. Coloring Issues:
If the color isn’t distributing evenly, mix the food coloring with the oil thoroughly before adding it to the flour.
Conclusion
Making moon sand at home is a simple, cost-effective way to provide hours of sensory and creative play for children.
With just two basic ingredients, you can whip up a batch of this versatile and fun material in no time.
Whether you’re looking for an activity to keep the kids entertained on a rainy day, or you want to introduce some sensory play into their routine, moon sand is a fantastic choice.
Plus, with the ability to customize it with colors, scents, and sparkles, each batch can be a unique creation.
